
Today we are going to see how to solve the problem of missing fonts in the Windows Terminal under Windows 11.
The latest version of Microsoft’s operating system has brought numerous improvements and changes to the user interface.
However, as is often the case with software updates, it has also caused some issues, one of which affects the display of fonts in Windows Terminal.
Specifically, we will see how to solve a problem that I have encountered when working with fonts in Windows Terminal. After configuring it correctly, we close the terminal, reopen it, and … ¡POM! 💥
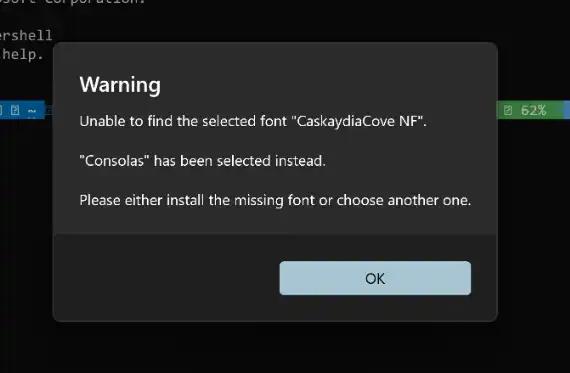
Message saying that the font cannot be found. You can configure it as many times as you want, but when you reopen Windows Terminal, the font will be lost.
What’s going on?
It seems that the main problem lies in the location of the fonts in Windows 11. In previous versions of Windows, fonts were saved at the system level in the C:\Windows\Fonts folder.
However, in Windows 11, Microsoft has moved the fonts to a different location, specifically to the user folder %LOCALAPPDATA%\Microsoft\Windows\Fonts.
In theory, this change is an improvement, because now each user can have their own fonts. But it has also brought a few problems and incompatibilities. For example, Windows Terminal itself seems unable to access them properly (pause for facepalm 🤦♀️).
Temporary Solution
This problem arises when users try to install new fonts in Windows 11. If we install them by double-clicking on a font file or dragging it to the fonts window, they are installed at the user level.
Then Windows Terminal does not recognize them, which translates to … that, to ¡POM! 💥
While we wait for Microsoft to provide an official update to fix this problem, there is a temporary solution so that we can recover our fonts in Windows Terminal.
1: Do Not Install Fonts by Double Clicking or Dragging ❌
The first part of the solution is to avoid installing fonts by double-clicking on the font file or dragging it to the fonts window in Windows 11.
These methods, which used to work in previous versions of Windows, are no longer effective due to the change in the location of the fonts.
2: Install Fonts as an Administrator ✔️
Instead, to effectively install fonts in Windows 11, we do the following:
- Right-click on the font file you want to install.
- From the contextual menu that appears, select “Install for all users”.
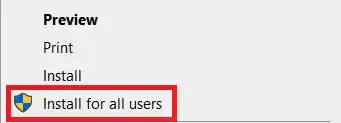
This action will ensure that the fonts are installed correctly and available for use in Windows Terminal and other applications.
Although we hope that Microsoft will resolve this issue in future updates to the operating system, users can use the temporary solution mentioned above to install fonts effectively.
References: