
We start with the fourth and final tutorial dedicated to web forms on the ESP8266 and ESP32 seeing how to turn on an RGB LED through a web page served to the client.
We will refer to the ESP8266, but the same code is compatible for the ESP32, adjusting the name of the libraries. At the end you have the code for both the ESP8266 and the ESP32.
In the previous entries we have seen how to receive text, how to turn on and off an LED, and how to vary the intensity of an LED using PWM, all through web forms.
As we have said in all these entries, there are many ways to communicate a client web page with the ESP8266 as a backend. Web forms are one of the first and simplest, but not necessarily the best for your project.
These tutorials are serving us to introduce concepts progressively and see how to organize the code so that it is not “spaghetti code”, and that we will need later when we see other ways like Ajax or Websockets.
In this last entry of the web forms we are going to see how to turn on an RGB LED, which is a bit of an excuse to, really, see how to work with colors between a web page and the ESP8266.
In fact, in the example we are only going to show the RGB received by serial port. Doing ‘something with them’ will depend on your project.
The reason is that it is very common to use the ESP8266 in lighting projects (with individual LEDs, or LED strips, WS2182b (Neopixel), matrices, panels, etc) and use a web page to change the color, intensity, or animation…
The other reason to dedicate an entry to this is that normally web pages work with colors in hexadecimal format encoded in a text string (for example, #DC30FF). And that “threatens to complicate our lives”
Fortunately we have the Arduino ColorConverter library that has a function, precisely, to deal with hexadecimal representations as those used on web pages.
So let’s get to work!
As usual, our main program remains the same as in the previous examples
#include <ESP8266WiFi.h>
#include <ESPAsyncWebServer.h>
#include <FS.h>

#include "ColorConverterLib.h"
#include "config.h"  // Replace with your network data
#include "Server.hpp"
#include "ESP8266_Utils.hpp"

void setup(void)
{
  Serial.begin(115200);
  SPIFFS.begin();

  ConnectWiFi_STA();

  InitServer();
}

void loop(void)
{
}Regarding the ‘Server.hpp’ file, we have defined an Endpoint for ‘/RGB’ under the POST method, associated with the callback function ‘handleFormLed(…)‘. In this function, we use the ‘HexToRgb(…)’ function from the ColorConverter library to transform the received color, encoded as a text string with a hexadecimal value, into three R, G, and B values of type uint8_t (0-256). Finally, we display the values by serial port.
AsyncWebServer server(80);

void handleFormLed(AsyncWebServerRequest *request)
{
  String rgb = request->arg("rgb");

  uint8_t red = 0;
  uint8_t green = 0;
  uint8_t blue = 0;

  ColorConverter::HexToRgb(rgb, red, green, blue);

  Serial.println(red);
  Serial.println(green);
  Serial.println(blue);

  request->redirect("/");
}

void InitServer()
{
  server.serveStatic("/", SPIFFS, "/").setDefaultFile("index.html");

  server.on("/RGB", HTTP_POST, handleFormLed);

  server.onNotFound([](AsyncWebServerRequest *request) {
    request->send(400, "text/plain", "Not found");
  });

  server.begin();
  Serial.println("HTTP server started");
}
Finally, the ‘index.html’ web page located in ‘data’ that we will upload to ‘SPIFFS’ is as follows,
<!DOCTYPE html>
<html class="no-js" lang="">
   <head>
      <meta charset="utf-8">
      <meta http-equiv="x-ua-compatible" content="ie=edge">
      <title>ESP8266 Forms</title>
      <meta name="description" content="">
      <meta name="viewport" content="width=device-width, initial-scale=1">
   </head>

   <body>
    <h1>Form example</h1>
    <form action="/RGB" method="post">
      Color:<br>
      <input type="color" id="colorSelector" name="rgb"></br>
      <button type="submit" value="submit">Send</button>
    </form>
    </body>
</html>
Where we see that we have defined an input of type ‘color’. And here comes another one of the funny parts of color selectors, which are not standardized, and the representation varies between the operating system and browser you are using. In addition, they can be modified with libraries and styles. But, in this example, we will leave the control “by default” of the browser.
When we press the ‘Send’ button, the selected RGB value will be sent as a hexadecimal value thanks to the association ‘name=“rgb”‘.
Result
Now, if we load our (oh yes! even uglier than before) web page, we see our color selector. As we said, the representation will be different depending on the browser and the operating system.
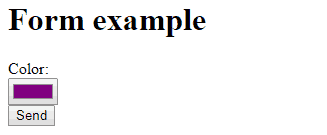
If we press the ‘Send’ button we see that the RGB values are displayed on the serial port, as three numbers from 0 to 256 independently. Now, of course, we would need to send each value to a PWM, or to a LED strip controller, or whatever you use in your project (this part should be trivial).

Easier than it seemed, right? Well, the important part in which we convert the hexadecimal code into R, G, B values can be used in any type of project, whether through a web form or through any other form of communication that we see.
And now, we say goodbye to our old (literally, old) friends the web forms, because in the next entry we will see how to use Ajax and in the following how to use Websockets. It gets interesting! Until next time.
Download the code
All the code in this post is available for download on Github.

Version for ESP8266: https://github.com/luisllamasbinaburo/ESP8266-Examples
Version for ESP32: https://github.com/luisllamasbinaburo/ESP32-Examples