After many (many!) entries dedicated to learning Arduino, we can finally start with our projects. We start with a simple, cheap, yet very useful and interesting one. Assembling a platform with two-degree-of-freedom servos, or simply a servo turret.
This type of platform is simply a mechanism that has two servos to rotate in two perpendicular directions, allowing it to be oriented in any direction (well, almost any).
These types of mechanisms can be found labeled as 2-DOF (degree of freedom) platform, pan/tilt mechanism, gimbal/lock, although I usually call it a servo turret.
In this post, we will see types and budget. In the next one, we will see the assembly process, and in the third entry, some code examples. And in the future, it will surely appear in some other more complex project since, as we have said, it is a very useful device.
Budget
To assemble this type of servo turret we will need the mechanical parts of the pan/tilt mechanism and two servos. They can be bought together, although it is usually cheaper to buy them separately.
Of course, we will also need all the electronic parts, which will depend on the project you want to do. In general, we will need a processor to control the servos, which can be any Arduino, DigiSpark, STM32, ESP8266, Raspberry Pi, among many others.
Depending on the project and the assembly, we may optionally need cables, a breadboard, and finally, the rest of the electronic components you want to add such as controls (potentiometers, joystick, wii nunchuck, etc), or something on top of the turret (camera, laser, a tomahawk missile, etc.).
Plastic Servo Turret
The most common servo turret we will find is the following
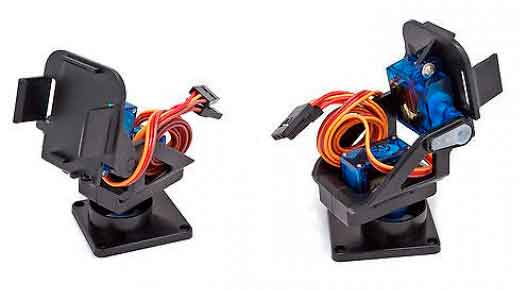
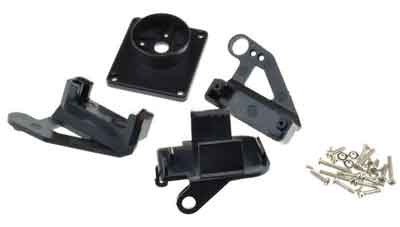
This mechanism is formed by plastic pieces that are sold together with the necessary screws for assembly. We can find it for 1.20€, from international sellers on eBay and AliExpress.
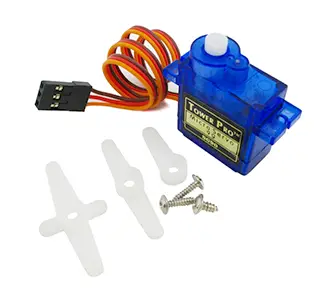
This type of servo turret mounts SG-90 9g servos, which we can find for 1.30€, or MG-90S, which we can buy for about 2.10€.
So the total budget for assembling one of these turrets is about 3.6€, controller and “whatever you want to put on top of it” not included.
Metal Servo Turret
The next most common type of servo turret is the metal one.
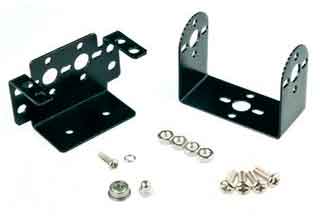
In this case, the mechanism is formed by standard servo brackets that we can find, together with the necessary screws to assemble it, for about 5€,
The servos are of the MG996R type, which we can find for about 3.8€.
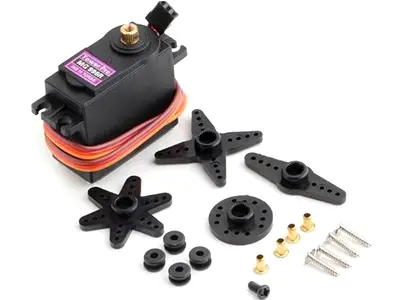
Therefore, the final price of a servo turret of this type rises to about 12-13€, once again electronics and “whatever you want to put on top” not included.
The metal type is larger and more robust, has much more powerful servos, so, logically, it is capable of moving heavier loads. However, with the type of cheap servos we are buying, keep in mind that the precision will not be top-notch either.
Personally, I like the first type of servo turret we have seen. Unless you really need to move a large load, in most cases, the first type will be sufficient.
What can we do with a servo turret?
Although it is a simple mechanism we can carry out a large number of projects with them. It will depend on the electronics and what we place on top of the servo turret. Here are some examples:
- Add a camera and create a “dome” type mechanism.
- Add an IMU and create a stabilized platform.
- Add a distance sensor and use it in a robot.
- Add a laser and aim at some coordinates.
- Add a missile launcher (toy, don’t be beasts XD).
- Add an infrared thermal sensor and make a thermal camera (search the Internet for “poor’s men thermal camera”).
- Add a TOF sensor and create a mini 3D scanner (“poor’s men LIDAR”).
- 20 thousand more things that you can think of…
- Any of the above, but inside a vehicle, robot, quadcopter, etc.
Similarly, we can use a wide variety of options to control our servo turret. From two simple potentiometers or encoders, or any of the controls we have already seen (PS2, Joystick, Nunchuck), to controlling it from a computer, tablet, or mobile phone using a serial port, or Bluetooth. A lot of options that will depend on our project.
It’s amazing how much fun something so simple can give us! And cheap, because we have seen that we can assemble it for less than 4€. In the next entry, we will see the assembly and the electrical diagram, and in the last entry, some code examples.
Download the code
All the code from this post is available for download on Github. 
