We continue with the series of posts dedicated to automatic control systems with a processor like Arduino, aimed at presenting control system theory intuitively and without formulas.
In the previous post we saw some generalities about what an automatic control system is. We saw what a plant, a controller, a closed loop are and their importance in the system’s behavior.
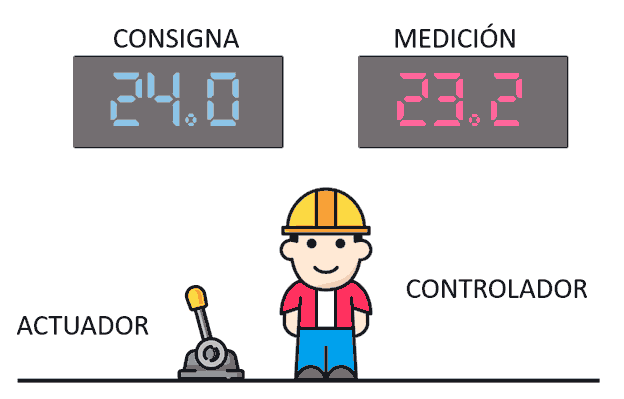
We finished with the example that you are going to act as the controller and you have woken up in a room. You know you are controlling a building’s climate system through a lever, and you have displays showing the measured temperature and the setpoint.
Apart from that, you know absolutely nothing about what your plant is like or what is happening. You also don’t know what effect pressing the lever in front of you has, you only know that it increases or reduces the power you apply to the building’s heating.
How do you control the system? That is, what strategy do you follow to move the lever based on the indicators you see?
In this post we are going to see the simplest and probably most widespread form of control of a system, the on-off controller and its variant with hysteresis.
What is On-Off Control?
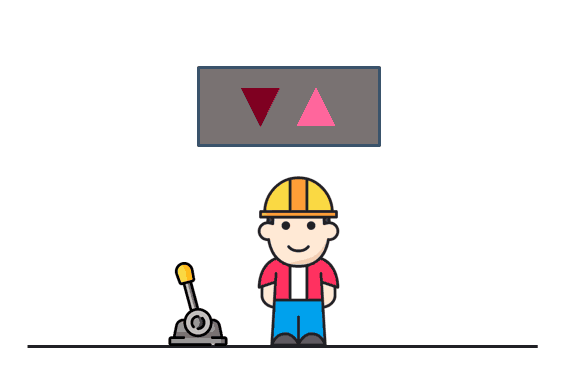
As its name suggests, on-off control consists of applying all possible action when the measurement is below the setpoint, and taking no action at all when it is above (or vice versa, depending on the actuator’s effect on the measurement).
In our example, if the setpoint is 24º, it would consist of raising the lever to the maximum if the temperature drops below 24º, and lowering it completely if we are above.
It certainly couldn’t be simpler. But logically, this simplicity has its consequences. Thus, on-off control has significant limitations that translate into a rather poor response, as we will see below.
Output of On-Off Control
Let’s imagine that, with a setpoint of 24º, when you wake up you are at 18º and, as per the rules, you turn the heating on full blast. You go to 20º, 22ºC, 24ºC… and you stop abruptly.
If your system’s response were instantaneous, the moment you stop, the temperature will drop. The moment it is 23.999…ºC you are going to turn it on full blast. You will go up to 24.00…01 ºC and stop again.
Repeatedly like this, you will have infinite switch-ons the moment you reach the setpoint for the first time. Since it’s impossible for you to hit the little lever infinite times per second, the universe will fix it by breaking something (usually the actuator).
Fortunately for you (and for your wrist) many systems have some inertia so you won’t have infinite switch-ons. When you reach 24ºC for the first time, you have the heating on full blast - you’re going all out! And even if you stop, you have applied so much power that the temperature will continue to rise for a while, even though you have removed the action.
Well, you haven’t broken your wrist, but now you have an overshoot of the setpoint that you cannot control, because your only form of control is to turn on full blast or stop completely.
Despite the system’s inertia, you will still have to turn your system on many times to keep the temperature constant. Furthermore, possible measurement noise and disturbances (for example, small internal air currents in the building) will contribute to these frequent switch-ons.
All this translates into poor performance and a shortened lifespan of your system. Something we can improve with control with hysteresis, which we will see next.
On-Off Control Simulation
Let’s illustrate the above with a small simulation. Below, we have the response of an on-off control, applied to a plant with some inertia. The setpoint is fixed at 1.0, then changes to 0.5, and finally back to 1.0.
The only parameter we can vary, K, is the action executed by our controller. In on-off control it is not a controller parameter but is fixed by the system, but here we can vary it to see its influence on the system.
K
As we can see, the moment we reach the setpoint we have multiple short-duration switch-ons, and a “sawtooth” appears in the controlled variable. If the actuator power (K) increases relative to the system’s inertia, we have a lower number of switch-ons at the cost of a greater deviation from the setpoint.
On-Off Control with Hysteresis
We have established that on-off control has the problem of causing many actuator switch-ons. The solution is simple: we define a range of acceptable values or hysteresis.
In our example, we decide to turn on the heating if we drop below 22ºC, and turn it off if we reach 26ºC. This way, we give the system more time and reduce the number of switch-ons.
Logically, this also has negative consequences, the main one being that we are no longer actually trying to reach the setpoint value but we settle for being “more or less close” to it.
The wider the range we accept (for example, turn on at 20Cº and turn off at 28ºC) the fewer switch-ons we will have, but we are increasing the system’s oscillation range (in this example, 8º temperature difference is a big difference for a climate control system!)
In general, when we talk about on-off control we refer to on-off control with hysteresis. However, consider that the case without hysteresis is a particular case of this, with the value range of +-0.
On-Off Control with Hysteresis Simulation
Now we will see the response of on-off control with hysteresis applied to the same system and setpoint evolution as before. This time we have two more parameters, the upper threshold and lower threshold.
K
Sup
Inf
We can verify that as we increase the controller’s threshold range we reduce the time between switch-ons, and these are longer. In return, logically, the oscillation around the setpoint increases.
When to Use On-Off Control?
If the system’s behavior is so “just barely acceptable”, then why is it used so much? For example, the thermostat you have in your house is an on-off control. Well, in many cases it is used because it is simple to implement and, although its behavior is not the best, it generally always works.
Furthermore, it is the only option when you have a digital sensor, even if you have an analog actuator. For example, imagine you have a light bulb that turns on if you are above 24º, and turns off if you are below.
You have no choice but to apply an on-off control, because when the light turns off you don’t know if you are 1º above, or 20º above. And if you know nothing about the plant or the environment, any other strategy is very risky.
Similarly, if you have an analog sensor, it is also the only controller if you have a pure digital actuator. In our example, a button instead of a lever.
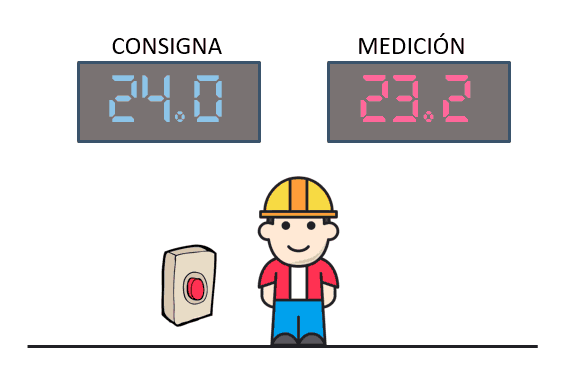
If the actuator allows it, we could play with making small presses on the button to regulate the action (i.e., applying PWM). This case we could consider analog, not digital. But not all digital actuators allow pulsed control.
In summary, if you have a digital sensor, or a pure digital actuator and you don’t know the plant or the environment, you can’t do much more than use an on-off control.
But, if you have an analog sensor and an analog (or pseudo-analog) actuator, using an on-off control is a bit lazy. Although well, it’s a simple option that works.
Implementing On-Off Control in Arduino
As we said, simplicity is one of the strong points of on-off control. Therefore, it is easy to implement on a microprocessor like Arduino.
In fact, we saw how to implement on-off control in this post. And you even have the Arduino Threshold library to make it even easier.
System Limitations
On-off control (or its evolution, on-off control with hysteresis) have significant limitations and, in general, a poor response.
The reason is that the system has little information compared to an analog system, which translates into a lack of ability to modulate the output in response to the input error. For example, on-off control applies the same action whether we are at 23.8º or at 12ºC.
To summarize, what are the limitations of an on-off controller with hysteresis.
First, we are going to have multiple switch-ons around the setpoint, which contributes to shortening the actuator’s useful life.
On the other hand, due to its very operation, we will never be able to smoothly reach the setpoint value, and we will have to settle for being within “an acceptable range” around it.
Furthermore, the behavior will always be oscillatory in nature (in general, similar to a sawtooth), a result of having to act at full blast, and then letting the system “fall”.
A good example is a line-following robot that only has two infrared sensors. You will see how they continuously oscillate around the line, because they have to make “sweeps” to see the line.
In general, it is not a comfortable system for the user, although, as always, it depends on the system’s characteristics. It may be tolerable for climate control, but it is not a controller you would want for your car’s speed control.
Imagine a car that accelerates full blast to reach cruise speed, then lets the speed drop, and accelerates full blast again, giving small jerks around the setpoint speed.
Fortunately, we have better analog controllers. In the next post, we will see the undisputed king, the PID controller.
