Let’s start a new Arduino project dedicated to building a chain-driven robot. As usual, in this first post in the series we will look at alternatives and budget, and in the next ones we will see the assembly, electrical diagram, and programming.
Building a chain-driven robot designed by ourselves is a very attractive and creative project. In reality, the operation and programming are very similar to the project of building a wheel robot. But it must be recognized that the chains give it a certain charm.
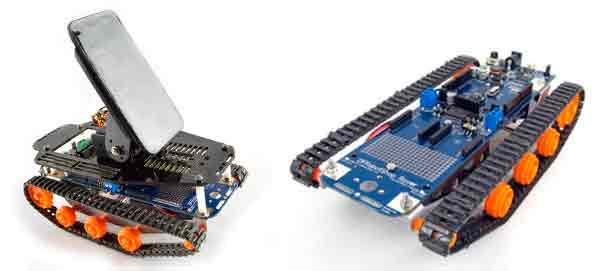
In particular, I present to you the multipurpose chain robot that we are going to see in this project.
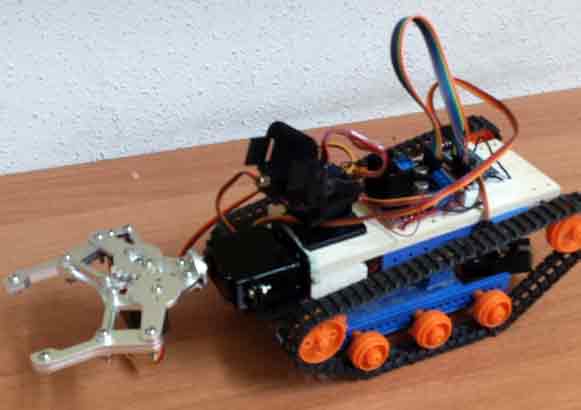 As you can see, I have added a front clamp with a servo, a servo turret with a laser, and Bluetooth. I was thinking of putting a small “crane” with an electromagnet behind it, but it was already carrying too much weight, and had a tendency to pull the chain when turning.
But the grace and the interesting thing about the project is that you experiment with your own configuration, with absurd combinations, with inclined chains, with double chains. Use your imagination! Try your own design and make the result fun.
Of course, do not be surprised if your design is not as stable as it could be. For example, in mine, with the center of gravity so high and so much weight on top, it is not as agile as it could be, especially if I mount the front clamp.
If you want a truly all-terrain chain robot, I recommend that you wait for the next project in which we will build a tank robot, where we will use the chassis of a toy tank to build a robot. It is a cheaper and more stable option (for something tanks are designed as they are designed
Advantages and disadvantages of chains
Apart from being fun and looking great to build a chain robot, it is worth reflecting a little on the use and differences compared to a wheel robot. For that, we look at real vehicles with chains and we immediately think of a tank, or perhaps a snowplow.
Indeed, the main advantage of using chains is to allow the vehicle to advance over a greater variety of terrains, especially soft soils such as mud or snow where wheels would get stuck. This is because the weight of the vehicle is distributed over a much larger surface than in the case of wheels.
Since I doubt that you want to put your robot in the mud (don’t you want to?), other advantages of chains are having more traction, because we have the entire tread band as the contact surface with the ground.
In addition, it allows us to be able to pass over obstacles that would jam the wheels (sticks, small stones) and even overcome uneven terrain. This is because the angle of attack of the chain causes the vehicle to rise, and if we have enough traction, we can pass over.
As an example, here’s a video of the tests of the robot jumping over a box, before adding the front clamp and batteries.
However, having chains also has some disadvantages. First of all, in general, it is more expensive to make a robot with chains than with wheels. It’s not like it’s going to cost us 100€, but, as we will see when we see the budget, if we could build a wheel robot for 15-25€, with chains it will be between 30-50€.
On the other hand, assembly is more complicated because we have several axes, instead of one or two. This implies more pieces and inevitably a little more complexity. It’s not going to be much more complex, but it can be a problem if we want to assemble it with young children, for example.
More serious is the effect of the chains on turns. With wheels, the turn is made around the rolling points, so the turn is quite smooth. In a vehicle with chains, the contact point is the entire chain band, so when turning it must necessarily slide laterally.
This causes that when turning we have an indetermination regarding which point we are turning, which translates into inaccuracies and angular and positional errors that accumulate, so the trajectory is not as precise.
On the other hand, it is more difficult for us to put encoders. This is more a problem of the kits that we are going to be able to buy rather than the fact of mounting chains. But the truth is that most of these robots are not designed to easily install encoders. And by now we know that without encoders we do not have a real robot, as we do not have position control.
Finally, a constant problem will be maintaining the correct tension of the chain. If it is too loose, the vehicle will not jump over obstacles well. If it is too high, we will have a lot of resistance and a probability of it coming loose. And in both cases, we will have a huge tendency for the chain to come off in the turns. So it will be a critical point in any design.
Options for building a chain robot
Purchased Chassis
If you search on sellers like AliExpress or eBay, you will find a large number of metal chassis with a lot of configurations, some very original and attractive, to make a chain-driven robot.
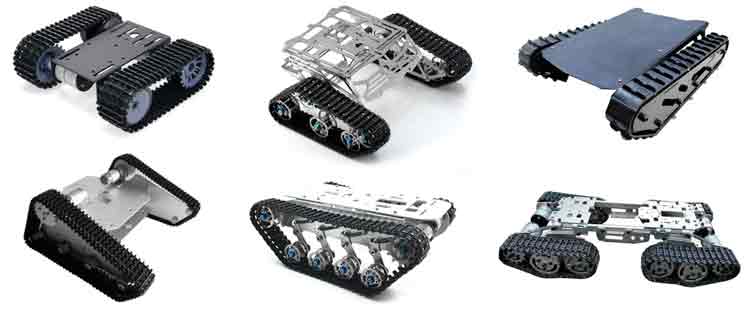
These chassis look really good, and we can put on top of them, for example, a robotic arm and build a homemade “bomb deactivator” robot, which is a very interesting and fun project.
However, they also have their disadvantages. The main one is the price, they cost between 50-150€, depending on the model and size. On the other hand, they are metallic, so they are quite heavy and also have a lot of “rattling” when they move. In addition, the configuration is fixed, and we have agreed that the grace of this project is that you make your own “crazy” design.
Even so, they are an interesting option and you can end up with a really striking chain robot.
Tamiya Chain Kit
Another very common alternative in the world of homemade robots, which is the one we are going to use in this project, is to use a chain kit from the Tamiya model manufacturer. They are very characteristic for their shape and their orange color, and allow us to make the configuration and design we want.
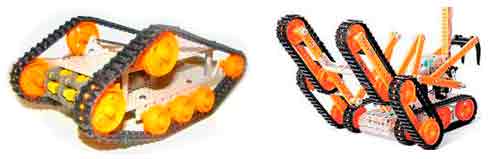
Here are some examples of “commercial” robots that mount (oh yes, surprise!) the characteristic orange wheels of the Tamiya Kit.
We can buy the chain kit in two versions. One that includes only the chains, the support wheels, and the metal axles, which we can buy for about 10€.
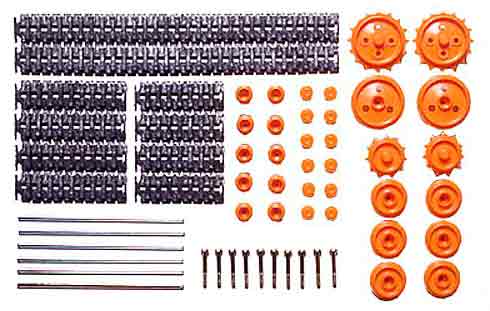
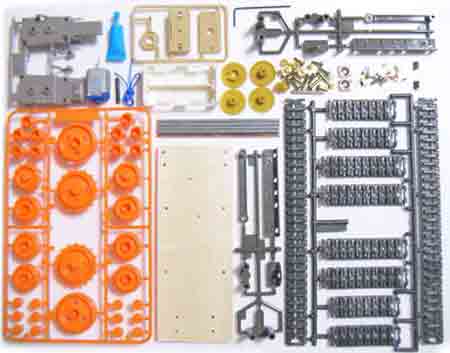
And a more complete basic chassis kit that we can buy for about 16€, which includes the previous one plus a wooden platform, support pieces for the axles, a battery holder (poor quality) and a motor.
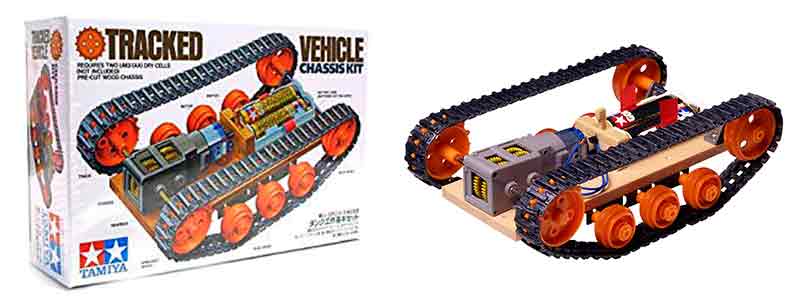
Unfortunately, the motor included in the Kit is a single motor, so we could only go forward and backward but not turn, so it is not useful for us.
To move our robot we must also acquire a Tamiya Double Gearbox Kit which costs about 10€. This kit includes a gearbox with two motors and whose axles fit perfectly with the motor wheels of the chain kit.
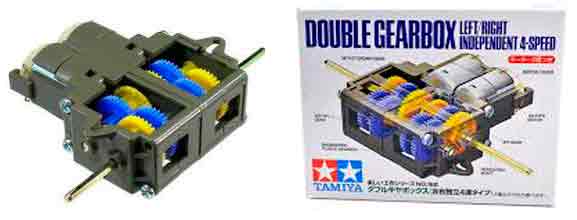
With this Kit we can move both chains in both directions which will allow us to move the robot forward and backward, but also turn on itself and take curves.
Budget
Recapping, how much will it cost us to make a chain robot? In the chassis part, if we want to get into the nitty-gritty and make the platform and supports ourselves (with wood, with plastic, with pieces you buy in a Chinese bazaar), we will need a chain kit for 10€ and the Double Gearbox Kit for 10€. In this case, we will have to look for the platform and the supports ourselves.
If we prefer less complications, we can buy the basic chassis Kit for 16€ plus the Double Gearbox for 10€. In any case, we should get some better base than the one that comes with the Kit, but almost any plastic part will be needed.
So, in summary, let’s say the chain robot chassis will cost us between 24-30€.
On the other hand, we will need the electronic components that we already saw in the 2WD robot. A controller like an Arduino Nano (2€), a motor controller like L298N or TB6612FNG (1.5€), a switch (0.5€), a battery holder (0.5€) and a mini breadboard (1€).
If we add it to the chassis, and the small material (cables, glue etc), in summary, we can assemble a chain robot for about 30-35€ approximately.
Then we can add on top, like a clamp with a servo (15€), a turret with a laser (2.5€), or electronic improvements like encoders (3€), Bluetooth (2€) or Wifi (2€), or an ultrasonic sensor (1€).
As always, it is an open project and will depend on what you want to do and how far you want to take it. But, as we had anticipated, it is more expensive than a wheel robot.
In particular, the configuration that we are going to see, which is the multipurpose robot in the image, will be around 45-50€. But remember that the fun part is that you can change it and invent your own configuration!
This is the end of this first post in the series. In the next one we will see the assembly and the electrical diagram, and later we will see the programming of our chain robot.
Download the code
All the code from this post is available for download on Github.

