What is an electromagnetic actuator?
An electromagnetic actuator is a device capable of generating linear movement directly, without the need to use mechanisms or gears.
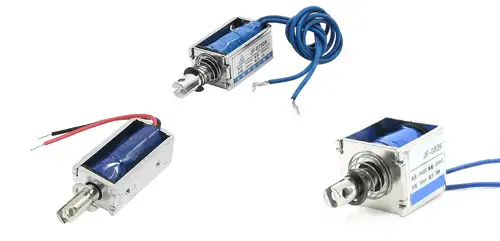
An electromagnetic actuator consists of a coil along with a plunger with a ferromagnetic core, both being independent elements.
When the current passes through the coil it generates a magnetic field that, similar to a solenoid, attracts the ferromagnetic core of the plunger causing its displacement.
Usually, there is a spring between the body of the coil and the plunger, so that it returns to its original position when the current ceases.
The supply voltage will depend on the size of the actuator, with common voltages being 5V, 12V, and 24V. The consumption varies from 100mA for the smallest actuators, up to 1-2A in larger models.
Electromagnetic actuators have the advantage of performing fast movements and being very easy to handle and maintain, as they lack moving parts (beyond the plunger itself).
On the contrary, the range is limited typically in the range of a few millimeters (4-60mm depending on the models). The force they can exert ranges from gram-forces to larger models capable of exerting a few kilograms-force.
The force exerted by the electromagnetic actuator is not linear, that is, the electromagnetic actuator exerts less force when the plunger is extended, than when the plunger is near its final position.
Another disadvantage is that, of course, there is no control over the speed or position of the plunger. We can simply pull or push a load.
Electromagnetic actuators are useful for generating linear movement in a compact and simple mechanism with hardly any moving parts. They are used in electronic locks, security doors, doorbells, and electronic valves.
We can use this type of actuators in projects and robots when we need a fast linear movement, but with a small displacement and small force.
Price
There are electromagnetic actuators in a wide range of sizes, characteristics, and therefore prices.
We can find small actuators of 20gf and 10mm extension for €1.80, medium-sized actuators of 100gf and 10mm for €2.80, up to the largest ones of 800-1500gf and 40mm for about €20, from international sellers on eBay or AliExpress.
Assembly diagram
The assembly diagram is simple, we are simply going to use a MOSFET such as IRF520N as a switch to control the activation of the electromagnetic actuator.
On one hand, we power the module with the nominal voltage of the actuator, through GND and Vin.
On the other hand, we connect the load using the connection terminal. An electromagnetic actuator is an inductive load. Therefore, we must add a flyback protection diode, as we saw in the MOSFET post.
Finally, we power the module’s electronics by connecting Vcc and GND to 5V and GND on Arduino, and we connect Pin SIG to any of the digital outputs of Arduino.
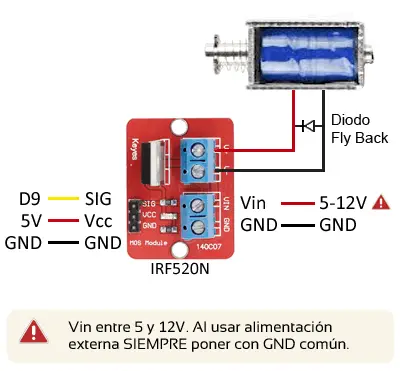
The connection, seen from Arduino, would be as follows.
Code Examples
The required code is simple, since to control the electromagnetic actuator we only need to use a digital output, as we saw in the digital outputs post.
For example, the following code would simply turn the electromagnetic actuator on and off every 10 seconds.
const int pin = 9;

void setup()
{
  pinMode(pin, OUTPUT);  //define pin as output
}

void loop()
{
  digitalWrite(pin, HIGH);   // set the Pin to HIGH
  delay(10000);               // wait 10 seconds
  digitalWrite(pin, LOW);    // set the Pin to LOW
  delay(10000);               // wait 10 seconds
}
Download the code
All the code in this post is available for download on Github. 
