What is a laser diode?
A laser diode is a device similar to a conventional LED, but instead of emitting conventional light, it emits a laser beam.
As we know, unlike a conventional light beam, a laser beam travels in a straight line. If the laser generator were perfect and the beam were in a vacuum, the light would continue its path until it encountered an obstacle.
However, as it advances in a gaseous medium (such as air) or liquid, the collision with its molecules causes the beam to scatter, causing it to weaken progressively.
In a vacuum, the beam is not visible. If we see it, it is precisely because it collides with the gas molecules, scattering part of the light. The effect is greater, for example, in smoke, which produces a spectacular effect by making the beam very visible.
On the other hand, no laser generator is perfect, and even less so the cheap diodes that we will use in our homemade projects, so in reality the beam becomes invisible after a few meters depending on the quality and power of the laser.
Laser diodes are widely used for the manufacture of pointers for presentations and for light effects in animations and shows. They are also fundamental components of laser printers, scanners, and CD, DVD, and Blu-Ray recorders/players, among others.
In our electronics and Arduino projects, we can use a laser as a signaling device, for example by placing it in a turret with a sensor, or in the arm of a biped robot.
Another interesting project to do with a linear beam diode is a 3D scanner. It is also common to use high-power lasers for engraving applications on various materials, such as wood or plastic.
And, in general, we can come up with ways to add a laser to almost any robot or invention that we can think of because, let’s face it… we all like lasers.
Price
We find laser diodes to add to our projects at a wide variety of prices, depending mainly on their power.
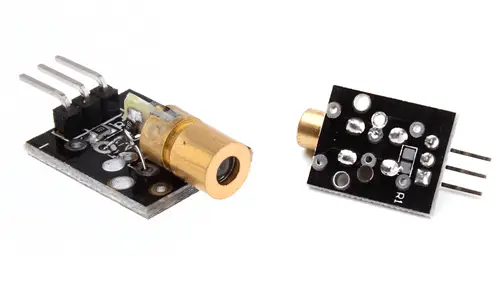
There are boards with a 1mW red laser diode, suitable for direct connection to Arduino. They are a good option for small and quick setups due to their ease of use. We can find this type of boards for 0.55€, from international sellers on eBay or AliExpress.
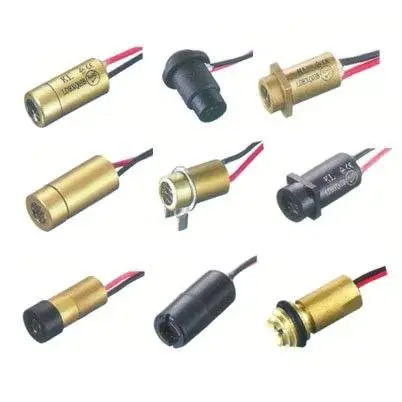
We can also buy the laser diode directly. As we said, there is a huge range of prices depending on the characteristics of the diode. The smallest diodes, of 1mW (similar to those on the previous board) cost around 0.15€. On the other hand, in general, medium-power laser diodes cost around 1€, and high-power ones range from 10€ onwards.
As advice, do not buy expensive lasers (say, over 10€) from unknown manufacturers without being very clear about the quality of the diode. It is normal for you to end up wasting your money.
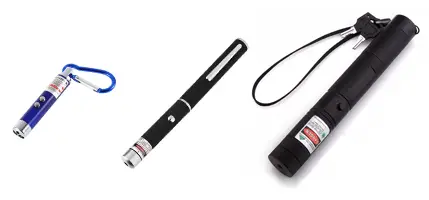
Another very popular option and sometimes cheaper is to buy/recycle a laser pointer directly and take advantage of the electronics, the head, and the casing, which integrated into a project look very good. We can find pointers of all colors for 1.5€ and really powerful and interesting green pointers for 5-7€.
The downside of using a pointer is that to connect it we will have to disassemble it and solder leads to its electronics, which can be somewhat more complicated and laborious, and require some skill.
Finally, we emphasize that you should not rely on the power specifications included in the ads by Chinese sellers because, frequently, they have nothing to do with reality.
How does a laser diode work?
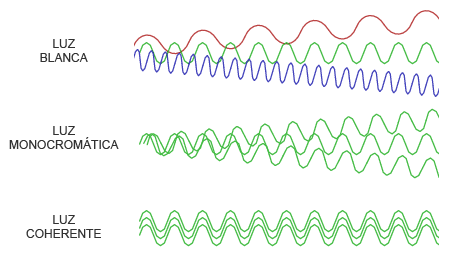
In short, a laser uses induced emission to generate a spatially and temporally coherent light beam. Spatial coherence corresponds to the ability of light to travel with little divergence, while temporal coherence indicates emission in a narrow spectral range.
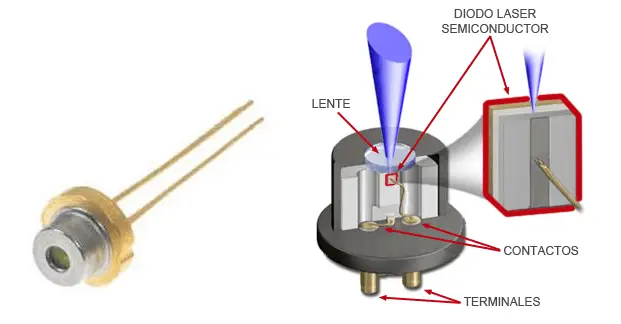
To achieve laser emission, a diode has a large PN junction that favors stimulated emission. One face of the semiconductor crystal is almost totally reflective, while the other partially allows light to pass through. This constitutes a waveguide that amplifies the light, which comes out through the partially reflective face.
Additionally, laser diodes have a lens, or collimator, that rectifies the divergence of the light. Coupled with the fact that light has a high degree of spatial coherence, the beam is capable of traveling long distances while maintaining a small beam.
There are laser diodes of all power types, from the smallest 1mW ones used in pointers, to 1W ones used, for example, to engrave wood or plastic.
High-power diodes require a heat sink to prevent them from breaking during operation. Even with a heat sink, they usually cannot be continuously on, and they need to be turned on and off in cycles of a few seconds.
Be careful with high-power diodes. With powers greater than 50mW, the use of protective glasses is mandatory. Simply reflecting on any surface that causes contact with the retina can cause permanent vision loss.
Laser diodes have a high degree of monochromaticity, with diodes emitting light in various colors, red, green, blue, and violet.
In short, red lasers are most suitable for generating heat and burning. It is common to find projects where they light matches, burst black balloons, or engraving machines.
Green ones are the most visible, since the human eye is very sensitive to green light. In green diodes, it is common to see the light beam along its trajectory.
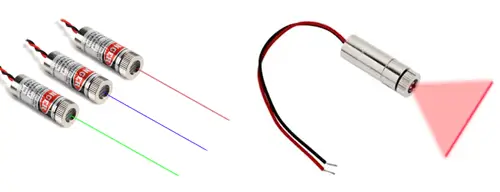
We also find laser diodes with different beam shapes depending on the optics they integrate. The most common is a pointer-type beam, but we can also find linear or multiple simultaneous point beams.
Assembly diagram
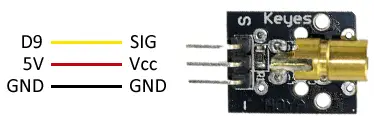
In the case of using a commercial board with a low-power integrated laser, the connection diagram is very simple. We simply power the module by connecting Vcc and GND to 5V and GND on Arduino. On the other hand, we connect the module’s signal pin to any digital output of Arduino.
On the contrary, in the case of using a higher power diode, the outputs of Arduino will not be able to provide enough intensity to turn on the diode, since the maximum intensity they can provide is 40mA, and it is recommended not to exceed 20mA.
In this case, we will need an amplification stage, for which we can use a BJT transistor or a MOSFET transistor. In this example, we will use a commercial board with IRF520N MOSFET, as we saw in this post, to control the load.
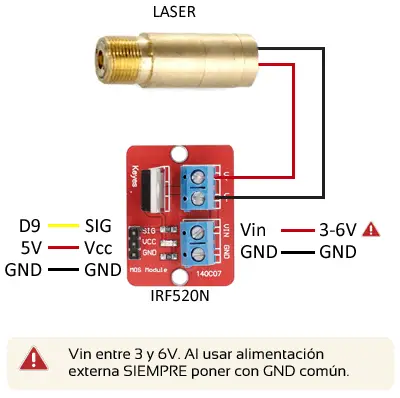
In both cases, the connection seen from Arduino is the same. We simply use a digital output to turn on the assembly, either the diode directly or through an amplification stage.
If the diode incorporates some type of controller (driver), or when reusing a pointer, we will keep all the electronics associated with the laser and simply use the MOSFET stage as a switch to turn the diode on and off.
Assembly code example
The necessary code is simple, as to control the diode, we only need to use a digital output, as we saw in the post digital outputs.
For example, the following code would simply turn the laser diode on and off for 5 seconds, letting it rest for 20 seconds.
const int pin = 9;

void setup() {
  pinMode(pin, OUTPUT);  //define pin as output
}

void loop(){
  digitalWrite(pin, HIGH);   // set the Pin to HIGH
  delay(5000);               // wait 5 seconds
  digitalWrite(pin, LOW);    // set the Pin to LOW
  delay(20000);              // wait 20 seconds
}
Download the code
All the code from this post is available for download on Github. 
