What is an I2C LCD controller?
The I2C LCD controller is a device that allows us to control a display through the I2C bus, using only two wires.
In this post we learned how to handle a Hitachi LCD display with HD44780 controller, a family of cheap and easy to use screens.
But using this screen directly from Arduino required using a large number of Arduino pins, which is a huge waste of resources that should be used for much more important things than turning on a simple display.
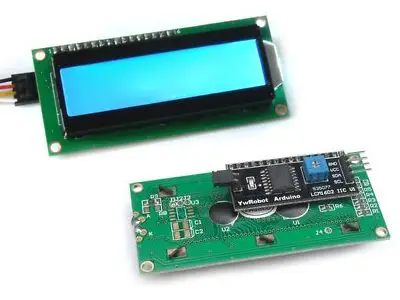
A recommended alternative is to use a controller that allows access to the LCD through the I2C bus. This I2C LCD controller can be connected to any HD44780 Hitachi LCD and reduces the number of necessary cables to two.
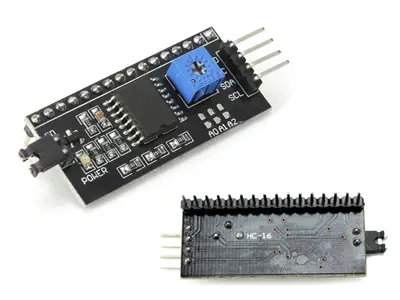
Internally, the I2C LCD controller is a variation of the PCF8574 digital input and output expander, specially adapted for HD44780 Hitachi LCDs. They even incorporate a potentiometer to regulate the LCD backlight.
The I2C LCD controller is usually delivered separately, in which case we will have to solder it to the LCD display.
Price
The I2C controller for a Hitachi LCD is a cheap component. We can find it for €0.60, from international sellers on AliExpress or eBay.
It is also possible to buy it together with the LCD. There is no significant savings in buying them together, so the price is the sum of the LCD + controller.
Therefore, the final price of an I2C LCD with 16 characters and two lines, 16×2 (LCD1602) is around €1.70, and that of 20×4 (LCD2004) with 20 characters and 4 lines is about €4.20.
Mounting scheme
The connection is simple, we simply power the module from Arduino using GND and 5V and connect the SDA and SCL pins of Arduino to the corresponding pins of the I2C LCD controller.
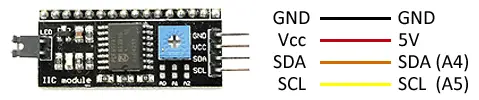
While the connection seen from the Arduino side would be like this.
On Arduino Uno, Nano, and Mini Pro, SDA is pin A4 and SCK is pin A5. For other Arduino models, refer to the corresponding pinout diagram.
Code examples
To use an I2C LCD screen, we will use the LiquidCrystal_I2C library, available at this link.
The usage is similar to the conventional LiquidCrystal library. The following sketch shows the use of the library’s functions to display the texts “Line 1” and “Line 2” on a 16×02 screen.
#include <Wire.h>
#include <LiquidCrystal_I2C.h>

LiquidCrystal_I2C lcd(0x27, 16, 2);  // Initializes the LCD at address 0x27, with 16 characters and 2 lines

void setup()
{
  lcd.begin();
  lcd.backlight();
  lcd.setCursor(0, 0);
  lcd.print("Line 1");
  lcd.setCursor(0, 1);
  lcd.print("Line 2");
  delay(2500);
  lcd.clear();
}

void loop()
{
}Download the code
All the code in this post is available for download on Github.

