What is an SD or micro SD reader?
An SD reader is a device that allows you to use an SD card as storage, which can be incorporated into our electronics and Arduino projects.
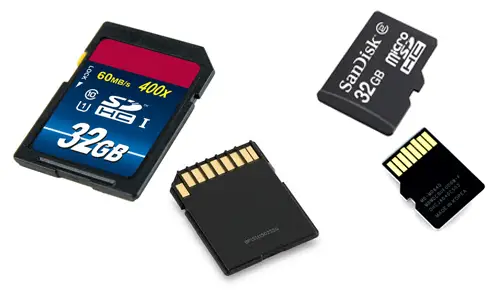
SD and micro SD cards have become a standard, displacing other data storage media due to their large capacity and small size. For this reason, they have been integrated into a large number of devices, currently being common components in computers, tablets, and smartphones, among others.
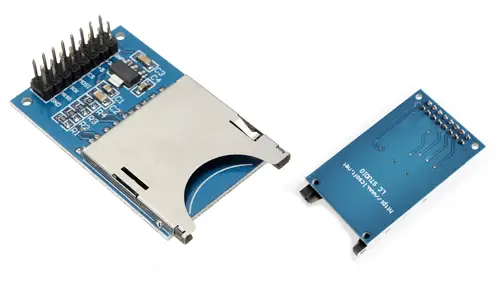
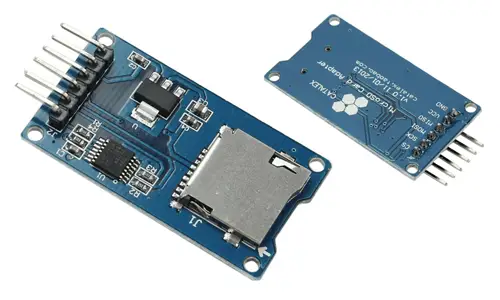
Within the world of Arduino, it is possible to find low-cost readers for both SD and micro SD cards. The first to appear were SD readers and later micro SD readers. Therefore, in general, micro SD modules are more modern models than SD modules.
In both types of readers, reading can be done through the SPI bus. Although they may have other interfaces, such as I2C or UART, it is usually preferable to use SPI due to its high transfer rate.
Regarding the cards used, we can use SD or SDSC (Standard Capacity) or SDHC (High Capacity) cards, but not SDXC (Extended Capacity) cards. It must be formatted in FAT16 or FAT32 file system.
The supply voltage is 3.3V, but in most modules, the necessary electronics are incorporated to connect it easily to Arduino, which frequently includes a voltage regulator that allows direct power to be supplied at 5V.
Using an SD or micro SD card with Arduino has the advantage of providing almost unlimited memory for our projects. It is also non-volatile (meaning it withstands when the power is removed) and can be easily removed and connected to a computer.
The major disadvantage is that it represents a significant workload for Arduino. Only the program will occupy 40% of the Flash memory, and almost 50% of the dynamic memory. The use of the processor is also demanding.
In general, handling a micro SD or SD card can be considered at the limit of Arduino’s capacity as a processor. Although it is possible to use them in simple projects, in real projects we should consider using another option such as a Raspberry Pi.
In home projects, SD and micro SD cards are mainly used in datalogger type projects, that is, to keep a record of sensor measurements. They can also be used, for example, to keep precalculated movements or routes of robots, and load them on demand.
Price
Card readers are very cheap devices. We can find micro SD card readers for about €0.35, and SD card readers for about €0.65, by searching international sellers on eBay or AliExpress.
Since micro SD card readers are cheaper, more modern, and compact, we will usually prefer micro SD readers over SD readers. The only real reason to buy an SD reader instead of a micro SD reader is to take advantage of a card that we have available.
Regarding the card, it is known that they have had a significant drop in prices. Currently, a 1GB SD or micro SD card has a very low price, and it is more than enough capacity for most projects. It is even common for us to be able to recycle old cards that we have replaced with higher capacity ones.
Wiring Diagram
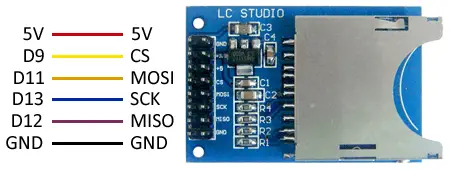
The connection is simple and similar for both SD and Micro SD readers. We simply power the module from Arduino using 5V and Gnd. On the other hand, we connect the SPI bus pins to the corresponding ones on Arduino.
The connection of the SD reader would be as follows,
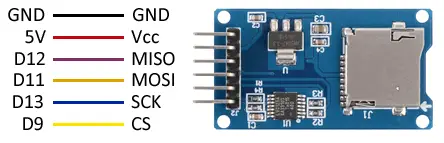
Similar to that of a micro SD reader, which would be the following.
In both cases, the connection, seen from the Arduino side, is the same, and would look like this.
The SPI pins indicated are valid for the Arduino Uno, Nano, and Mini Pro models. For other Arduino models, please refer to the pinout diagram.
Verify that your board is tolerant to a 5V bus before connecting it to Arduino. If not, you will have to use a level shifter.
Code Example
To perform the reading and writing on the SD card, we would use the SD.h library, included in the standard Arduino IDE.
This library includes functions for the management of files and directories, under the SD object.
// Initialize the SD
SD.begin(cspin);

// Check if a file exists (returns true if it exists, false otherwise)
SD.exists(filename);

// Delete a file
SD.remove(filename);

// Open a file
// Mode: FILE_READ for read-only
//       FILE_WRITE for read and write
SD.open(filepath, mode);

// Create a directory
SD.mkdir(directory);

// Remove a directory
SD.rmdir(dirname);
It also includes functions for reading and writing files, under the File object.
// Get the size of a file
file.size()

// Check if there are bytes left to read
file.available()

// Read a byte from the file
file.read()

// Write a byte to the file
file.write(data)

// Write a variable to a file (similar to Serial.Print)
file.print(data)

// Get the current read/write position
file.position()

// Move the current read/write position
// Pos: Must be between 0 and file.size()
file.seek(pos)

// Close the file
file.close()
The library provides code examples, which it is advisable to review. The following examples are modifications based on those available in the library.
File Reading
In this example, we read a file and display the content through the Serial port. The file “dataFile.txt” must exist on the card beforehand.
In a real-world scenario, the file could contain, for example, the angles that a robot’s servos should adopt to assume different positions, separated by commas.
In the reading of each line, the read information would be processed, and used to take the appropriate actions.
#include <SD.h>

File dataFile;

void setup()
{
  Serial.begin(9600);
  Serial.print(F("Initializing SD..."));
  if (!SD.begin(9))
  {
    Serial.println(F("Error initializing"));
    return;
  }
  Serial.println(F("Initialized correctly"));

  // Open file and display the result
  dataFile = SD.open("datalog.txt");
  if (dataFile)
  {
    String dataLine;
    while (dataFile.available())
    {
      dataLine = dataFile.read();
      Serial.write(dataLine);  // In a real case, the appropriate actions would be performed
    }
    dataFile.close();
  }
  else
  {
    Serial.println(F("Error opening the file"));
  }
}

void loop()
{
}
File Writing (Datalogger)
The following example shows the writing functions. The example simulates the function of a datalogger, a very common project that periodically records the reading of an event.
In this case, we use a readSensor function that simulates the process of reading a sensor. In the example, it simply always returns 0, but in a real case, this function would be replaced by a function that reads a sensor or an analog input.
Each measurement saves the time of data acquisition, and the simulated value of the sensor reading.
#include <SD.h>

File logFile;

void setup()
{
  Serial.begin(9600);
  Serial.print(F("Initializing SD..."));
  if (!SD.begin(9))
  {
    Serial.println(F("Error initializing"));
    return;
  }
  Serial.println(F("Initialized correctly"));
}

// Function that simulates reading a sensor
int readSensor()
{
   return 0;
}

void loop()
{
  // Open file and write value
  logFile = SD.open("datalog.txt", FILE_WRITE);

  if (logFile) {
        int value = readSensor();
        logFile.print("Time(ms)=");
        logFile.print(millis());
        logFile.print(", value=");
        logFile.println(value);

        logFile.close();

  }
  else {
    Serial.println("Error opening the file");
  }
  delay(500);
}
Download the Code
All the code from this post is available for download on Github. 
