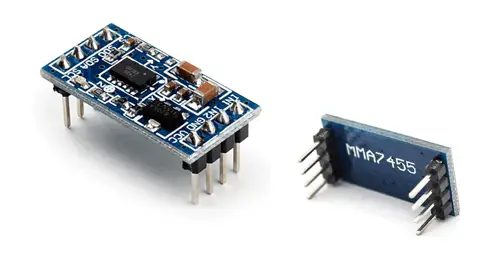
What is an MMA7455 accelerometer?
The MMA7455L is a micromachined capacitive 3-axis accelerometer (3 DOF) manufactured by Freescale Semiconductor, which can be easily connected to a controller or processor such as Arduino.
It is a capacitive micromachined sensor (MEMS) that detects acceleration in the X, Y, and Z axes. It is also possible to determine the sensor’s orientation, thanks to the force of gravity.
The MMA7455 accelerometer is widely used because it is a cost-effective option. The MMA7455 has low power consumption, from 0.5 to 3 mA when active and 26 µA in standby mode.
Communication can be done either via SPI bus or I2C bus, making it easy to obtain the measured data. The supply voltage is low voltage between 2.4 to 3.6V.
They are often integrated into modules that incorporate the necessary electronics to easily connect it to an Arduino. In most modules, this includes a voltage regulator that allows direct powering at 5V.
The MMA7455 has an analog-to-digital converter (ADC), a low pass filter, and temperature compensation. The measurement can be adjusted to a range of ±2g, ±4g, or ±8g in 8-bit measurements, and an additional 10-bit mode of ±8g. The sensitivity is 1/64 of the measurement range (an accuracy of 1.5%).
The MMA7455 has two interrupt pins that can be configured to respond to certain events. These events include detection of rapid movements, bumps, and vibrations, in one or two pulses, and detection of 0-g free fall conditions.
Accelerometers are widely used in all kinds of devices, from determining orientation in mobile phones or tablets, detecting free fall, measuring steps in pedometers, camera stabilization, alarms and vibration sensors, among many others.
If you want to learn more about accelerometers, gyroscopes, and IMUs in Arduino, check out the series of posts How to use an accelerometer with Arduino, How to use a gyroscope with Arduino, and Measuring inclination with IMU.
Price
The MMA7455 is a relatively expensive accelerometer. We can find it on mounting boards like the GY-291, which incorporates the necessary electronics to easily connect it to Arduino, for €1.80 from international sellers on eBay or AliExpress.
For a simple 3DOF accelerometer, it is a bit expensive. There are cheaper accelerometers like the ADXL345, and even IMUs with much superior features like the MPU6050.
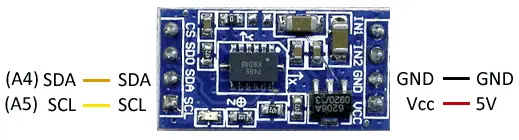
Wiring diagram
The connection is simple, we simply power the module from Arduino using GND and 5V and connect the SDA and SCL pins of Arduino to the corresponding pins on the sensor.
While the connection viewed from the Arduino side would look like this.
On Arduino Uno, Nano, and Mini Pro, SDA is pin A4 and SCK is pin A5. For other Arduino models, check the pinout diagram corresponding.
Verify that your board is 5V compatible before connecting it to Arduino. If not, you will have to use a logic level shifter.
Code examples
To read the MMA7455, we have several libraries available, such as the one developed by Alexandre Boni (eklex), available at this link. This library provides methods for communicating both via I2C and SPI, for configuring the ADXL345, and defining interrupts for activity, inactivity, normal, and double taps.
The library provides code examples, which it is advisable to review. The following example is a reduced version based on those available in the library, which shows the acceleration values on the three axes.
#include <Wire.h>
#include <MMA_7455.h>

MMA_7455 accel = MMA_7455(i2c_protocol);
float xg, yg, zg;

void setup()
{
  Serial.begin(9600);
  accel.begin();
  accel.setSensitivity(2);   //Define range, values 2, 4 or 8
  accel.setMode(measure);
  accel.setAxisOffset(0, 0, 0);
}

void loop()
{
  // Read the values and print them
  xg  = accel.readAxis10g('x');
  yg  = accel.readAxis10g('y');
  zg  = accel.readAxis10g('z');

  Serial.print("\tXg: "); Serial.print(xg, DEC);
  Serial.print("\tYg: "); Serial.print(yg, DEC);
  Serial.print("\tZg: "); Serial.print(zg, DEC);
  Serial.println();
  delay(500);
}
Download the code
All the code from this post is available for download on Github. 
