On the blog, we have already seen different alternatives to the standard IDE for programming development boards like Arduino. This time, we are going to look at another very popular option for programming Arduino using Visual Studio Code and its Arduino extension.
As we have mentioned several times, the standard IDE is very limited. It’s fine for getting started, but it quickly falls short when you ask for more and lacks features common in any modern IDE.
Update: This post is from 2014.
Currently, I recommend using Visual Studio Code + Platformio
Visual Studio Code (or VSCode) is an Open Source text editor developed by Microsoft that stands out for being lightweight, extensible, and customizable and is gaining great popularity among some developers.
Visual Studio Code is available for Windows, Linux, and Mac. It is an Open Source project and its code is available at https://github.com/Microsoft/vscode.
We could say that Visual Studio Code is part of a new trend of programs that are somewhere between a text editor and a lightweight IDE, a category that could also include the also very popular Atom.
To program Arduino with Visual Studio Code we will need an extension also developed by Microsoft and also Open Source, whose code is available at https://github.com/Microsoft/vscode-arduino.
The Arduino extension for Visual Studio Code has functions similar to the standard IDE, such as the library manager, example library, built-in serial monitor, and verify or upload Sketch functions.
But Visual Studio Code adds indispensable functions nowadays like autocompletion (intellisense), snippets, color highlighting in the code, creating an empty project from a template (scaffolding), or debug functions.
As you can see, many more functions than the standard IDE that are expected in a modern IDE and are very helpful when carrying out our projects. So let’s see how to program Arduino with Visual Studio Code.
Prerequisites
Logically, we must have Visual Studio Code installed. If you don’t have it yet, you can download and install the appropriate version for your operating system from https://code.visualstudio.com/.
On the other hand, we need to have the Arduino IDE installed version 1.6 or higher. We imagine that by now you already have it installed (right?) but, just in case, you have the process in this post.
Install the Arduino Extension
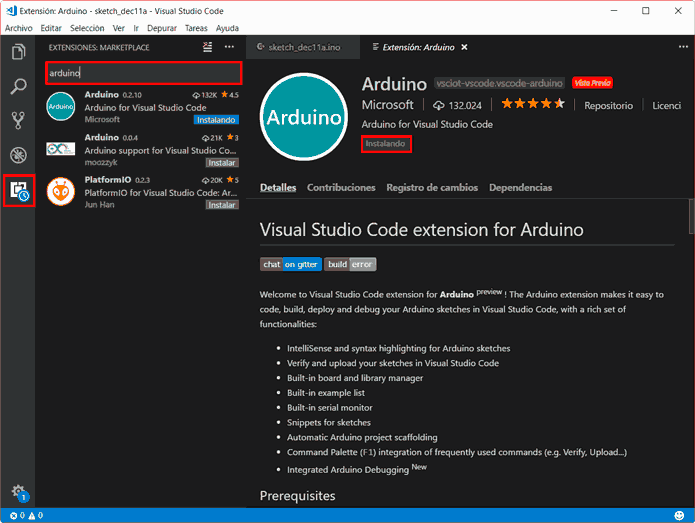
When we have the prerequisites installed, we need to install the Arduino extension for Visual Studio Code. To do this, click on the extension manager, search for ‘Arduino’, and click install.
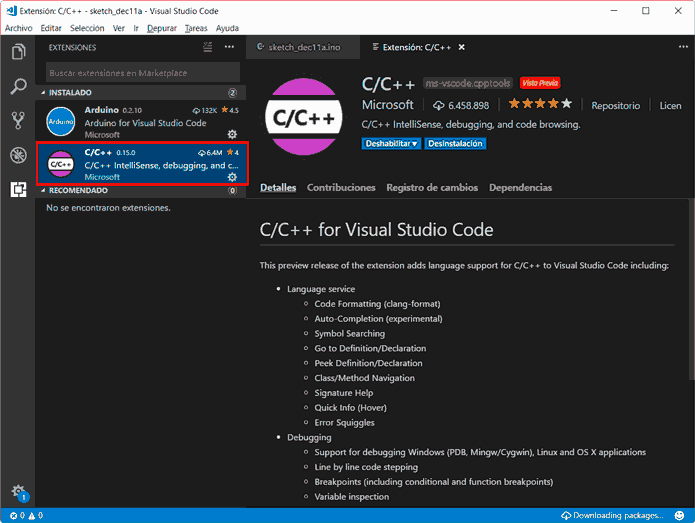
It will ask us if we want to install dependencies needed by the Arduino extension (like C++ for Visual Studio). We install those too.
We already have the Arduino extension installed! Now we can use Visual Studio Code to edit “.ino” files and enjoy new functionalities like intellisense or syntax highlighting.
VsCode Arduino Extension Commands
The Arduino extension adds various commands to Visual Studio Code to interact with Arduino files. These commands will be active when we are editing a Sketch (*.ino).
To access the commands, open the command palette by pressing the F1 or Ctrl+Shift+P keys and type the command you want (you don’t need to type it all, the first few letters are enough for it to appear and select it from the list).
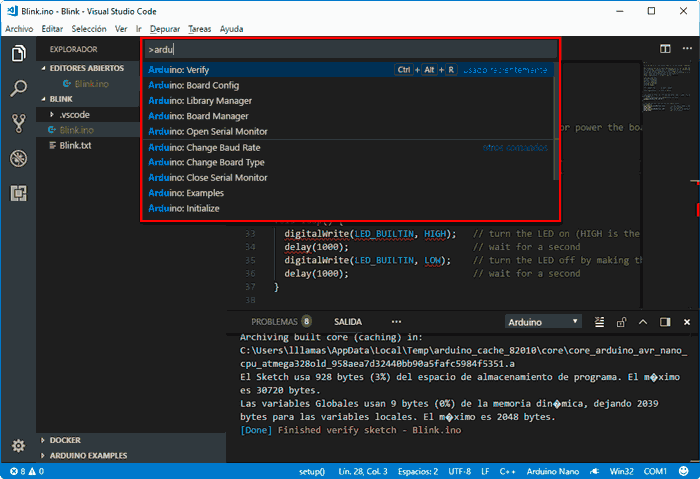
These commands of the Arduino extension for VsCode are:
- Arduino: Initialize: Creates a new Arduino project with a Sketch
- Arduino: Board Manager: Select the board for the current project
- Arduino: Upload: Compile and upload sketch (Control + Alt + U)
- Arduino: Verify: Compile sketch (Control + Alt + R)
- Arduino: Examples: Show list of examples
- Arduino: Library Manager: Explore and manage libraries
- Arduino: Open Serial Monitor: Open the serial port
- Arduino: Close Serial Monitor: Stop the serial port
- Arduino: Select Serial Port: Change the serial port
- Arduino: Change Baud Rate: Change the serial port Baud Rate
- Arduino: Change Board Type: Change the board type
- Arduino: Send Text to Serial Port: Send the selected line via serial port
Test VsCode with the Blink Example
Let’s test that we have everything correctly installed and configured. As it could not be otherwise, we are going to test with our old friend Blink, the equivalent of ‘Hello world’ in processors. Remember that this simple sketch only blinks the integrated LED on most development boards.
In the file explorer, there is a tab called “Arduino: Examples”. If it doesn’t appear, launch the command window (Control + Shift + P) and choose the command “Arduino: Examples”.
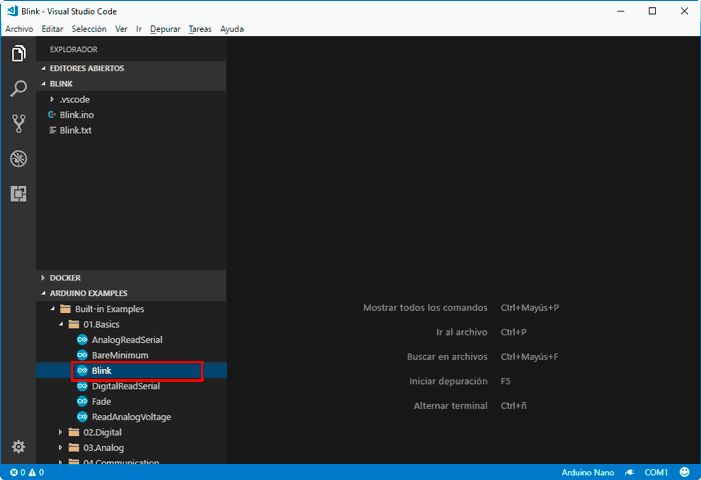
We search the library in “Built-in Examples/01 Basic/” and double-click on the Blink example. The Sketch will load in the text editor.
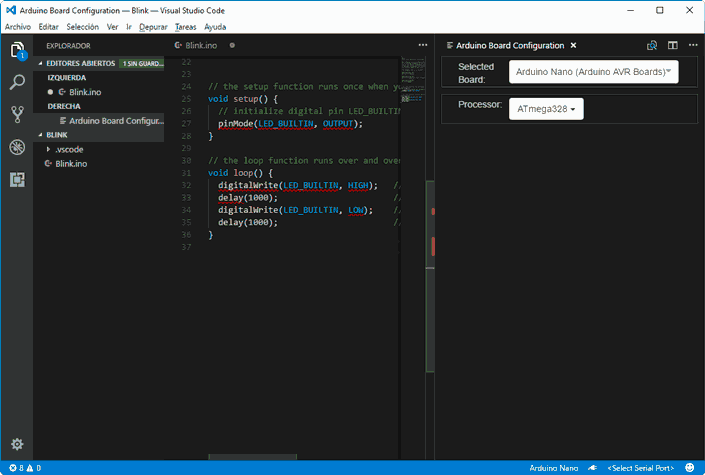
Now we must configure the board we are going to work with. To do this, open the command window again (Control + Shift + P) and choose “Arduino: Board manager”.
In the window that appears, select a board, for example the Arduino Nano (you can close the window after selecting the board).
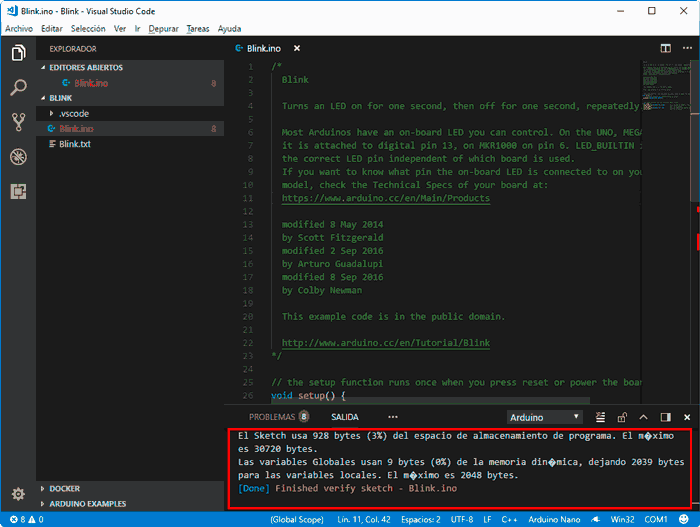
We verify the code with the command “Arduino: Verify” or by pressing the keys “Control + Alt + R”. We will see the output of the Arduino compiler and, if everything went correctly, the result of the compiled Sketch.
If we wanted to upload the code to the development board, we connect it as usual and in VsCode we would choose the command “Arduino: Upload” or by pressing the keys “Control + Alt + U”.
That easy! As you can see, the process is very similar to the standard Arduino IDE environment. In fact, it’s practically identical because, under the hood, VsCode uses the tools from the standard IDE.
Finally, note that in the bottom bar, the Visual Studio Code extension adds buttons to quickly perform the main actions we have seen, which are available when we are editing a sketch.

Open Existing Project
If we want to open one of our projects, simply go to the menu “File/Open Folder”, or press the keys ‘Ctrl+K Ctrl+O’ (both shortcuts, one after the other). We select the folder where we have our project and Visual Studio loads all the files from folders and subfolders.
Then we can verify or upload the code to the board, as we saw in the example with Blink, modify the files, add or delete files, etc.
Create a New Project
If we want to start a new project, we do the same as for loading an existing project, but we choose an empty folder (or create it in the same open window).
Now we can either create the files ourselves or use the command “Arduino: Initialize”, which is the recommended option to start the project.
Initialize performs the scaffolding (initializing a project to an “empty” but functional template) that contains a file called app.ino. Then it will ask us which board we want to use. And our project is ready!
Conclusions
Visual Studio Code and the Arduino Extension are a good combination for programming in Arduino. Although to each their own, I find it preferable to Atom+Platformio because the latter two feel very slow and heavy to me.
In any case, my favorite option is still Visual Studio + Visual Micro. Although I have both installed and for small-medium projects or modifications I don’t even bother opening Visual Studio, with Visual Studio Code it is sometimes enough.
In any case, it is a much better option than the standard IDE, by a long distance. So you have one more option for programming your Arduinos, highly recommended and that at the very least deserves a chance.
