If you use Arduino frequently, you will find the IDE more than limited, lacking most of the functions expected in a modern IDE.
Update: This post is from 2015, and Visual Micro has changed its licensing and pricing.
Currently, I do NOT recommend using Visual Micro, but rather Visual Studio Code + Platformio
In this previous post we saw how to set up Eclipse as a good alternative for developing in Arduino under a Linux environment.
However, the best option available for developing in Arduino is to use Windows and Visual Studio, its all-powerful flagship IDE. By a large margin, even if it’s hard to hear for Open Source lovers.
To be able to compile and upload programs to Arduino from Visual Studio it is necessary to add an extension called Visual Micro. This extension also allows working with a wide variety of development boards in addition to, of course, all Arduino models.
Before you have time to worry about its price, we have yet to mention the best part. Both programs, Visual Studio 2015 and Visual Micro, have free versions for non-professional use.
If you really want to get the most out of Arduino and become expert developers, it is advisable (and almost mandatory) to try the advantages of using Visual Studio and Visual Micro with Arduino. Let’s review some of these advantages.
Advantages of Visual Studio and Visual Micro
Formats and Colors
Colors for different types of objects, libraries, and variables. No more straining your eyes on the dull colors of the Arduino IDE. Distinguish the main parts of your code at a glance.
Automatic Tabbing
If you are purists of programming, misaligned lines and tabs with different spacing will make you nervous. Visual Studio takes care of fixing this for us, automatically indenting lines.
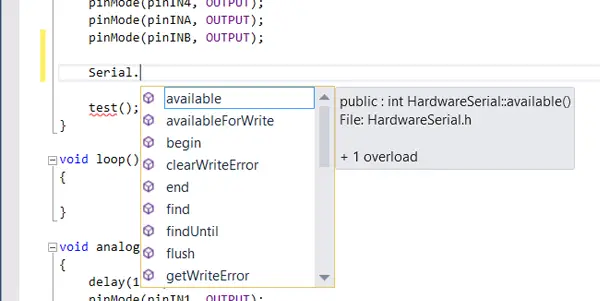
Intellisense
Intellisense, the assistance system for the programmer’s writing, is one of Microsoft’s greatest successes in Visual Studio. It allows us to complete variable names, get an object’s methods, use shortcuts to quickly write basic structures like loops and conditionals. Simply an essential function in any modern IDE.
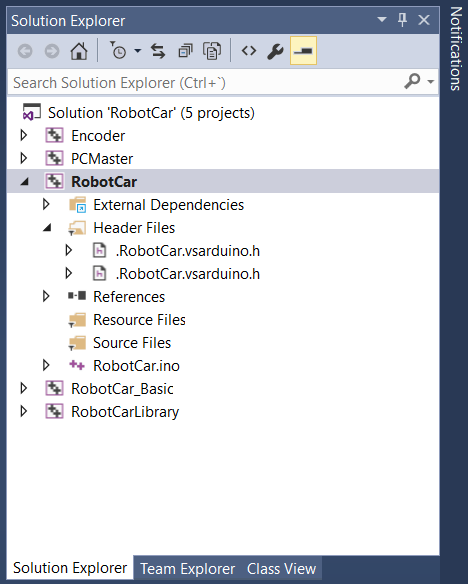
Multiple Projects in Solutions
Finally, some order in our Arduino projects. Thanks to Visual Studio we can create solutions consisting of more than one project, such as, for example, the code of a sketch and its associated libraries and classes.
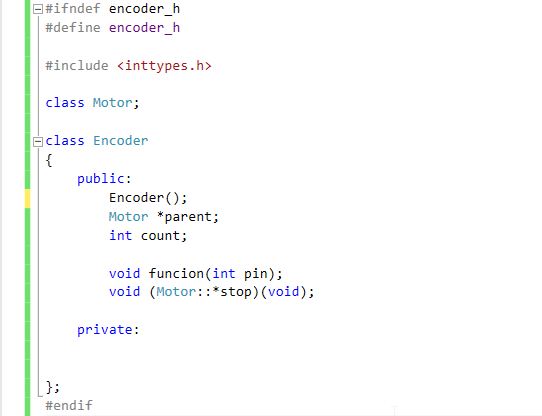
Code in Real C++
Another huge advantage, no more struggling with the IDE and its “interpretations” of C++. No more having to put most of the code in libraries to be able to use objects. With Visual Studio and Visual Micro you can use the full power of C++ to program your Arduino.
Ultra-Fast Compilation
Compilation from Visual Studio is really fast, about twice as fast as the standard Arduino IDE on Windows (which, by the way, is terribly slow). The generated code is exactly the same, and has the same optimizations, so it occupies the same memory in Arduino. Simply, Visual Studio is faster.
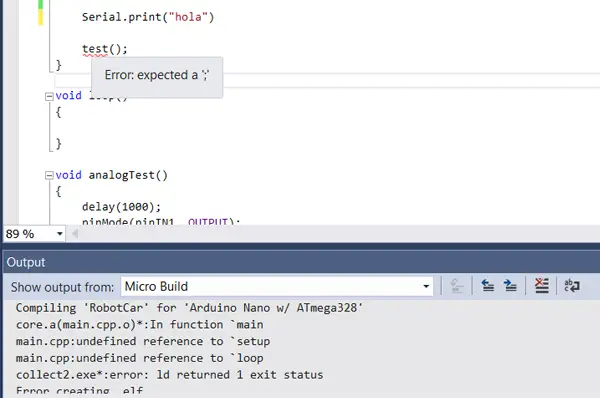
Error Control
The Standard IDE is quite sparing with words when indicating errors in our programs. Visual Studio will not only indicate the errors and the line where they occur after compilation, but it will also underline errors as we write them.
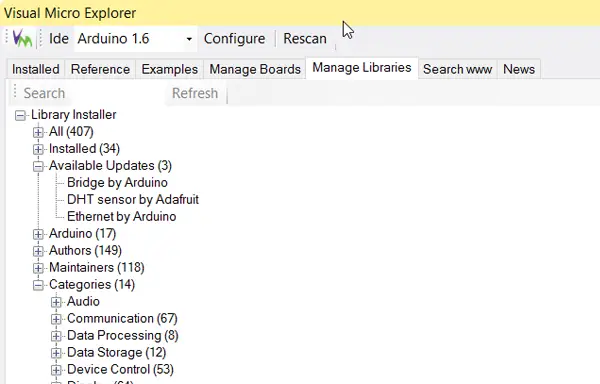
Library Manager
Visual Micro has an explorer that allows installing and managing libraries easily. It also allows managing the various available development boards and examples.
Debug (Pro Version Only)
Visual Micro has a paid Pro version that allows debugging Arduino from Visual Studio. A very powerful function, which is an invaluable aid for professionals.
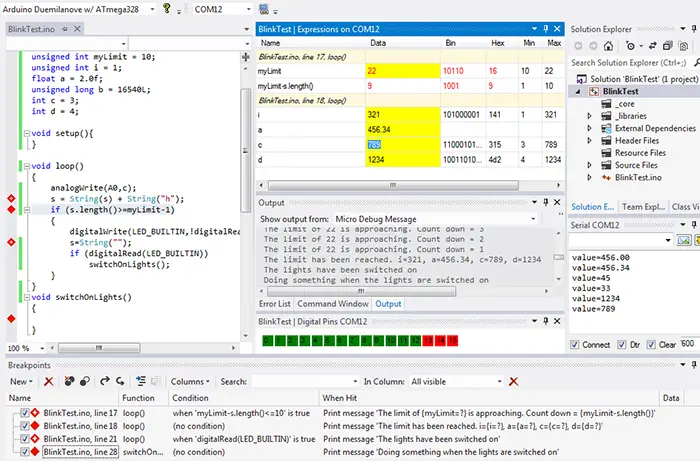
However, if you are hobbyists and do not wish to pay for the Pro version, don’t worry. The Debug function is very specific for professionals, and the free version is perfectly functional for the vast majority.
How to Install Visual Studio and Visual Micro
Installing Visual Studio is simple. We simply go to the download page.
We launch the installer and make sure to check the installation of the C++ language.
When the installation finishes (it’s a process that takes quite a while) we go to the Visual Micro download page and install the extension.
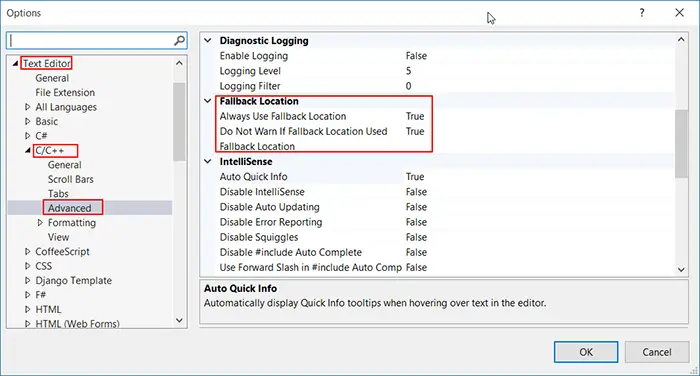
Finally, it is convenient to go to “Options/Text Editor/C++/Advanced” and activate the Fallback location, to avoid always creating an ‘ipch’ directory in each solution, a process that costs time and space and adds nothing.
Done, you can now use Visual Studio and Visual Micro to compile and upload your programs to Arduino, and many other development boards. It’s like going from using an old, rusty bicycle to a Ferrari!
