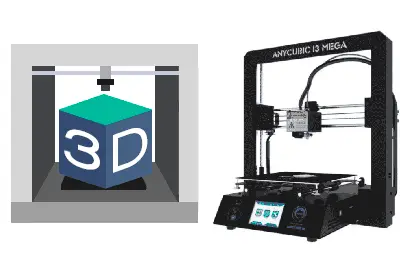
We continue with the first entries in the 3D printing section, dedicated to the assembly and setup of the Anycubic i3 Mega. In the first entry we saw the review of this great printer in the 200-300€ range, and in the previous entry we saw the assembly of the printer.
In this entry, we are going to see the calibration of the print bed, a process that usually haunts domestic 3D printer owners like a nightmare. But… wait a minute. Didn’t we say that the Anycubic i3 Mega didn’t need calibration? Well, in general, that’s ALMOST true, and it’s precisely one of its strong points.
However, logically, right after assembling it we will have to adjust the bed, because who knows how it ended up regulated. We will also have to repeat this process if we move it, or if we give it a bump or something like that.
Even so, we won’t be completely free from having to do the calibration periodically, because it will inevitably get out of adjustment from time to time due to temperature changes, vibrations, etc.
When we suspect there might be a misalignment, we should calibrate the machine. We will usually detect this by problems in the first layer of prints (lack of adhesion, parts peeling off or warping).
But on the Anycubic i3 Mega, it’s a process that needs to be done much less frequently than on other machines in a similar range; we can go months without having to calibrate it. Furthermore, the calibration process is really simple and quick, as we will see below.
Calibrating the Anycubic i3 Mega
To perform the calibration, we will have to touch the print bed with the extruder head at several points and adjust its height with the screws underneath it.
If we have already used the printer, first, we must make sure there are no plastic residues from previous prints on the head. If so, we should remove them, for which we will probably need to preheat the head and remove the excess plastic.
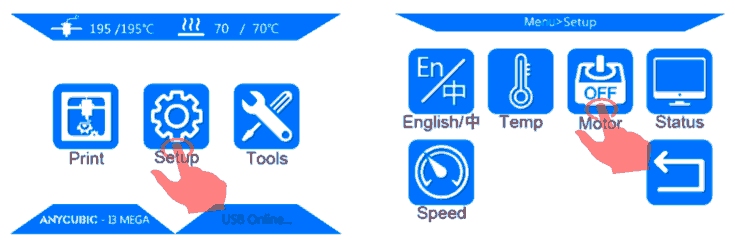
If the extruder is clean, or it’s the first time we are calibrating it, we can start with the calibration. The first thing is to put the head in the correct position. To do this, go to the “Tools/Home” menu and press “Home All”. The head will move to the starting position.

To do the calibration process, we will have to move the carriage by hand. Manually moving the motor is not a good habit; we could even damage the electronics. So before that, we must disconnect the motors. To do this, press “Tools/Motor OFF”.
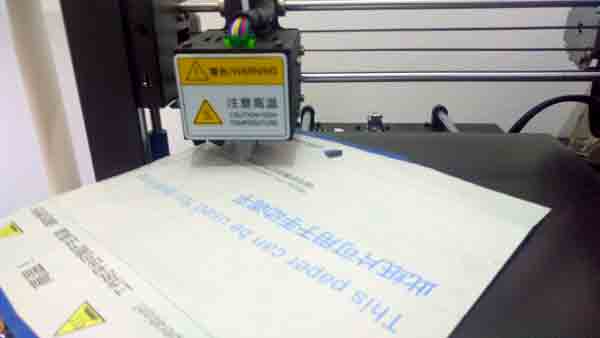
We need to leave the head at a distance of approximately 0.2mm from the bed. How do we measure 0.2mm? Well, because it’s approximately the thickness of a piece of paper. We can use the paper that comes with the printer and, by the way, we can also use it to cover the bed when not in use to prevent it from getting dusty.
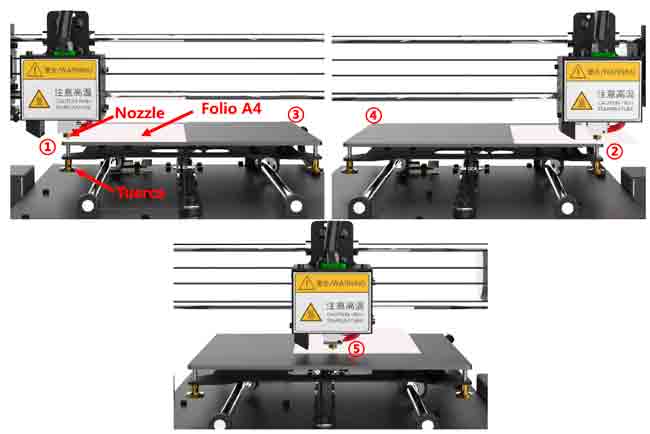
So we place the paper between the nozzle and the bed, and use the screw under the bed to adjust the bed height until it touches the paper.
How do we know the height is correct? Well, exactly when we feel that the paper starts to rub against the nozzle. Not when it’s loose and we don’t feel contact when moving the paper. Nor when the head “catches” the paper and we feel resistance. It’s right at the moment we feel it start to rub.
We repeat this process for the four corners of the bed, moving the head and the bed by hand gently. Finally, we adjust the center point of the bed, which is also the most important since we will print most parts around that area.
That simple! It’s a process that takes a few seconds, once we get used to it. Furthermore, with minimal modifications, it’s possible to make it self-calibrating by adding a BL Touch probe, which also corrects for possible lack of flatness in the bed.
But self-calibration will be covered in future entries about possible upgrades for the Anycubic i3 Mega. See you soon!