When we looked at using the serial port in Arduino in this post, we already mentioned that it is the main means we have for communication between Arduino and other devices.
This communication has the advantage that:
- It can be done with a wide variety of devices (like a computer, a tablet, a phone)
- It is independent of the operating system (including Windows, Linux, Mac, and Android)
- It can be done in many programming languages.
In this post, we are going to learn how to connect Arduino with C#, the popular Microsoft programming language, which natively provides objects to use serial ports very easily.
To do this, you need to have Visual Studio, Microsoft’s IDE, installed. The “Community” version is free for personal use and can be downloaded from this link.
Communication can be done both by cable and wirelessly via Bluetooth, as we saw in the post Connect Arduino via Bluetooth with HC-05 or HC-06 modules
To see how to connect Arduino with C#, we are going to look at two simple examples, the same ones we saw in the post Arduino Serial Port Communication. But this time we will perform the communication from a program developed in C#, instead of using the Serial Monitor of the Arduino IDE.
The C# code we are going to show is very simple (I’m almost embarrassed to publish it) because they are examples to illustrate how easy it is to use the serial port to connect Arduino with C#. But keep in mind that in a real project we should include some improvements.
For example, the use of the serial port would be integrated into our objects and we would have independence between the visual layer and the model. Furthermore, we would normally transmit bytes instead of text, and we would include checks to ensure the transmission was successful.
We will see this in future posts, but for now, we are content with learning how to use the basics of serial ports to communicate Arduino with C#.
Turn an LED On and Off
In this example, we are going to make a simple form with two ON and OFF buttons, which will allow us to turn on the integrated LED on the Arduino board, connected to Pin13.
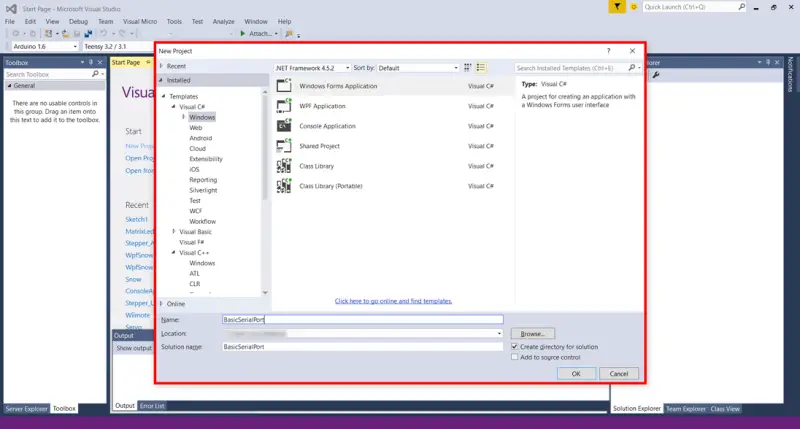
First, we start Visual Studio and create a new C# project. To do this, click on File/New/Project.
We choose the “Windows Form Application” template, the location where we want to save it on our hard drive, and as the project name “BasicSerialPort”.
An empty form will open, which will be the main window of our example. We drag two buttons from the Toolbox onto our form, and place them one on top of the other.
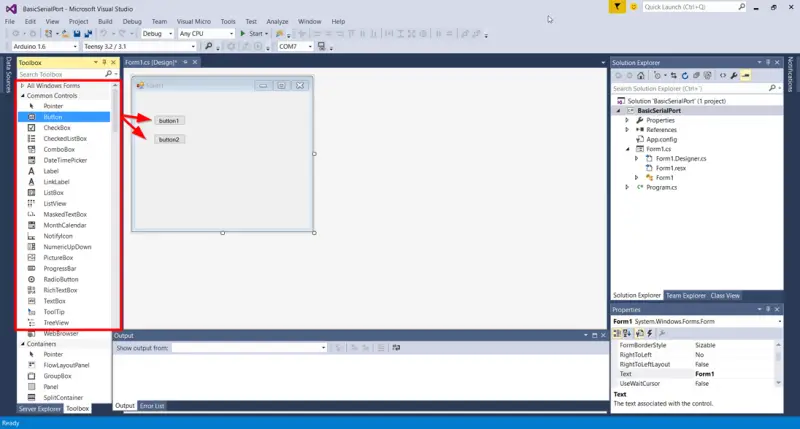
Now we use the properties bar to change the text and name of both the buttons and the form.
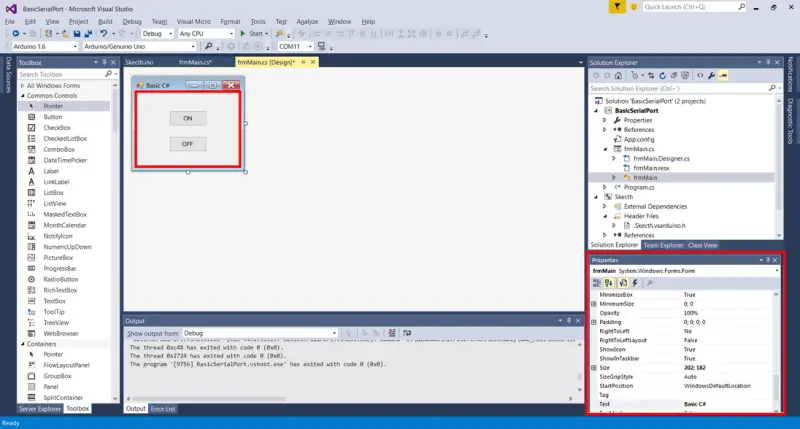
We leave the values as shown in the following table.
| Element | Name | Text |
|---|---|---|
| Form | frmMain | Basic C# |
| ON Button | btOn | ON |
| OFF Button | btOff | OFF |
Now, press F7 on the form to access the code (or right-click and choose “View code”).

We replace all the code with the following.
using System;
using System.Windows.Forms;

namespace BasicSerialPort
{
    public partial class frmMain : Form
    {
        System.IO.Ports.SerialPort ArduinoPort;

        public frmMain()
        {
            InitializeComponent();

            //create Serial Port
            ArduinoPort = new System.IO.Ports.SerialPort();
            ArduinoPort.PortName = "COM4";  //replace with your
            ArduinoPort.BaudRate = 9600;
            ArduinoPort.Open();

            //bind events
            this.FormClosing += FrmMain_FormClosing;
            this.btOFF.Click += BtOFF_Click;
            this.btON.Click += BtON_Click;
        }

        private void FrmMain_FormClosing(object sender, FormClosingEventArgs e)
        {
            //close port
            if (ArduinoPort.IsOpen) ArduinoPort.Close();
        }

        private void BtOFF_Click(object sender, EventArgs e)
        {
            ArduinoPort.Write("a");
        }

        private void BtON_Click(object sender, EventArgs e)
        {
            ArduinoPort.Write("b");
        }
    }
}
Remember to replace the serial port in the code, in the example “COM4”, with the serial port where you have Arduino connected.
Now we load this program onto Arduino.
const int pinLED = 13;

void setup()
{
  Serial.begin(9600);
  pinMode(pinLED, OUTPUT);
}

void loop() {
  if (Serial.available() > 0)
  {
    int option = Serial.read();
    if (option == 'a')
    {
      digitalWrite(pinLED, LOW);
    }
    if (option == 'b')
    {
      digitalWrite(pinLED, HIGH);
    }
  }
}
Run the program by pressing F5. Click the buttons, and we will see the integrated LED on Arduino turn on and off.
Make an LED Blink
We are going to modify the previous program to send a number from 0 to 9 to Arduino. Arduino will receive that number and make the integrated LED blink the received number of times.
To do this, we start by modifying the form from the previous example. We delete one of the two buttons and drag a new Textbox from the Toolbox.
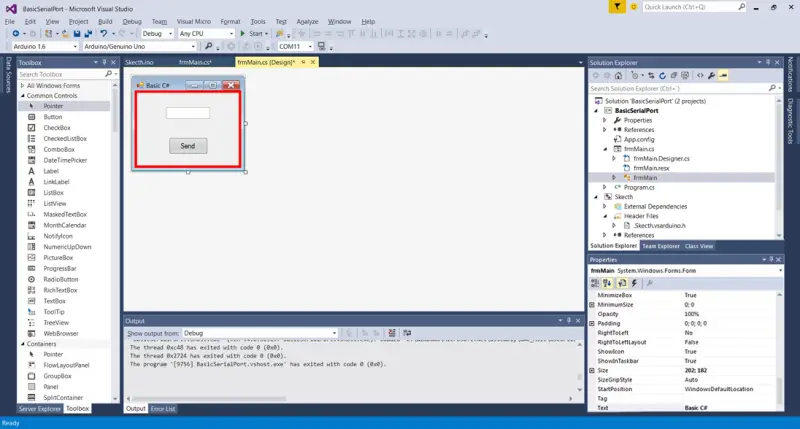
We use the properties palette to modify the properties of the Textbox and the remaining button. We leave the values according to the following table.
| Element | Name | Text |
|---|---|---|
| Form | frmMain | Basic C# |
| Send Button | btSend | Send |
| Textbox | txNumber |
Now we edit the form code, and replace it with the following.
using System;
using System.Windows.Forms;

namespace BasicSerialPort
{
    public partial class frmMain : Form
    {
        System.IO.Ports.SerialPort ArduinoPort;

        public frmMain()
        {
            InitializeComponent();

            //create Serial Port
            ArduinoPort = new System.IO.Ports.SerialPort();
            ArduinoPort.PortName = "COM4"; //replace with your
            ArduinoPort.BaudRate = 9600;
            ArduinoPort.Open();

            //bind events
            this.FormClosing += FrmMain_FormClosing;
            this.btSend.Click += BtSend_Click;
        }

        private void FrmMain_FormClosing(object sender, FormClosingEventArgs e)
        {
            //close port
            if(ArduinoPort.IsOpen) ArduinoPort.Close();
        }

        private void BtSend_Click(object sender, EventArgs e)
        {
            //convert Textbox text to integer
            int value;
            bool rst = Int32.TryParse(txNumber.Text, out value);

            //if the conversion is valid, and the number is between 0 and 9, send the number as text
            if (rst == true && value > 0 && value < 9 )
            {
                ArduinoPort.Write(value.ToString());
            }
        }
    }
}
We load this program onto Arduino.
const int pinLED = 13;

void setup()
{
  Serial.begin(9600);
  pinMode(pinLED, OUTPUT);
}

void loop()
{
  if (Serial.available()>0)
  {
    char option = Serial.read();
    if (option >= '1' && option <= '9')
    {
      option -= '0';
      for (int i = 0;i<option;i++)
      {
        digitalWrite(pinLED, HIGH);
        delay(100);
        digitalWrite(pinLED, LOW);
        delay(200);
      }
    }
  }
}
Run the program in Visual Studio by pressing F5. When entering a number between 0 and 9, we will see how the LED on the board blinks the indicated number of times.
That’s it for a first introduction to Arduino communication with C#. In the future, we will use more advanced methods to handle servos and robots.
Download the Code
All the code from this post is available for download on Github. 
