What is an HC-05 or HC-06 module?
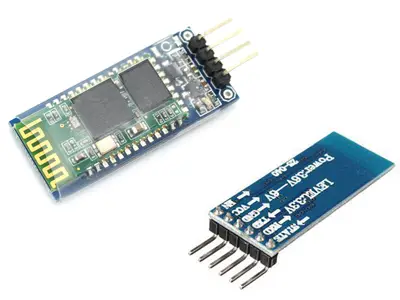
The HC-05 and HC-06 modules are Bluetooth modules that we can use to communicate with Arduino via Bluetooth.
Many people may have the impression that Bluetooth is an outdated technology, used to transmit data between devices, and that it is currently obsolete. Nothing could be further from the truth.
Bluetooth has the enormous advantage of being factory-integrated into most devices. Laptops, tablets, and smartphones have Bluetooth integrated. In addition, its use is independent of the operating system (Windows, Linux, Mac, or Android).
This makes Bluetooth technology one of the best means of wireless communication with Arduino. For example, we can use it to control a robot from a mobile or tablet, or receive measurements on a computer to record them on a web server.
It is even possible to program Arduino wirelessly via Bluetooth, as we will see in a later post.
Both the HC-05 and HC-06 modules allow us to easily connect an Arduino via Bluetooth. The difference between the two modules is that the HC-06 only allows receiving communications (follower) while the HC-05 can receive and initiate them (leader and server). Therefore, the HC-05 module is superior in technical features.
Price
Currently, we can find both the HC-05 and HC-06 for around €2.75, from international sellers on Ebay and Aliexpress.

Formerly, the price of the HC-05 was much higher than that of the HC-06. But, since currently both modules cost the same and the HC-05 is superior in features, we will always want to buy the HC-05 module.
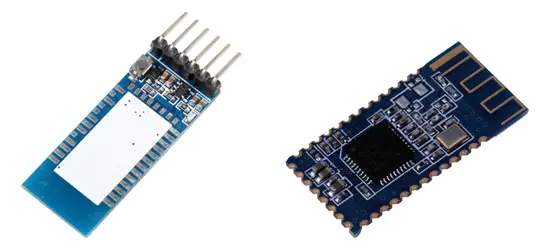
As a warning, both modules (HC-05 and HC-06) are made up of two components. The Bluetooth module itself, and a base to which it is soldered and that contains the rest of the circuitry. Be careful not to buy only the base or the module separately, which are also sold at a lower price.

How do the HC-05 and HC-06 modules work?
Bluetooth communication is similar to the use of the normal serial port, which we saw in this post. Therefore, it is very versatile and very easy to use.
The main difference is that, instead of connecting a cable, we will have to pair the module with our device. The pairing process depends on the operating system (and its version) but is generally a simple process.
To establish communication from the device, we can use the Arduino IDE’s Serial Monitor. We will also find applications on all systems (Windows, Linux, Mac, or Android) to establish communication via the serial port.
Finally, it is very easy to integrate the use of the serial port (and therefore Bluetooth) into our programs, in a wide variety of programming languages, including Java, C#, VB .Net, or Python, which have specific functions for them.
Assembly diagram
Using the Bluetooth module requires the use of a serial port on our Arduino board. Therefore, while we use the Bluetooth module, we cannot use the serial port on Uno, Mini, and Nano model boards. In the Mega model, this is not a problem, as it incorporates 4 serial ports.
While we are uploading a new program to the Arduino board, we have to disconnect the Bluetooth module, since programming is done through the serial port.
If we really need both communications, we can use the SoftSerial library to establish a serial port communication through any pair of digital pins, although this will entail an additional processing time cost on Arduino.
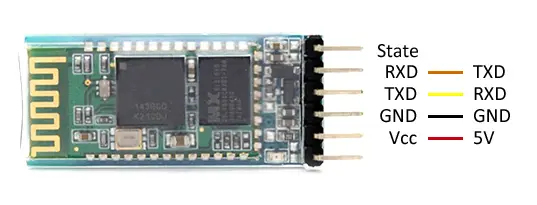
The connection is simple. We power it with Vcc and GND. Then we connect the TXD (transmission pin) and RXD (reception pin) to the opposites of the Arduino board (each TXD to an RXD). These are the module connections, with the Arduino pins.

While the scheme seen from Arduino looks like this.
Code examples
As we said, the use of the Bluetooth module is identical to the use of the serial port, which we saw in this post. Therefore, all the serial port usage codes that we saw in this and other posts on this blog work equally well via Bluetooth.
For example, the following code sends a number to Arduino via Bluetooth and flashes the integrated LED on the board the number of times we have sent.
const int led = 13;

int option;

void setup(){
  Serial.begin(9600);
  pinMode(led, OUTPUT);
}

void loop(){
  //if there is pending information
  if (Serial.available()>0){
    //we read the option
    char option = Serial.read();
    //if the option is between '1' and '9'
    if (option >= '1' && option <= '9')
    {
      //subtract the value '0' to obtain the sent number
      option -= '0';
      for(int i=0;i<option;i++){
         digitalWrite(led, HIGH);
         delay(100);
         digitalWrite(led, LOW);
         delay(200);
      }
    }
  }
}
Download the code
All the code in this post is available for download on Github.

