What is an RC transmitter?
A radio control (RC) transmitter is a type of wireless controller that, of course, we can also connect to a processor like Arduino to use it as a controller.
Radio control transmitters are one of the most common controllers we can find in the world of electronics, and are widely used to control remote-controlled vehicles.
There is a wide variety of RC transmitters, which vary in the number of channels, resolution, and range. Other factors to consider are the quality of manufacturing and materials, whether they include a screen and its type, if they have multiple software configurations, or even if they are reprogrammable.
The main variable is the number of channels, which represents the number of analog variables that we can control in the receiver. For example,
- In land and water vehicles, which move in a horizontal plane, we will need a minimum of 2 channels (acceleration and steering).
- In a tank we will need 4 channels (acceleration, steering, and two for the turret)
- In an aerial vehicle such as a plane, helicopter, or quadcopter, we will need a minimum of 4 channels (acceleration, and three angles).
Additional channels are used to transmit variables such as camera control, GPS, flight mode change, landing gear deployment, or activation of lights or devices.
In general, normal transmitters have 6 channels and, since it is a significant investment that we will not make frequently, it is advisable not to purchase a transmitter with a lower number of channels.
On the contrary, 9 and 10-channel transmitters can be considered almost professional and, in general, have much higher prices and are intended for complex vehicles and experienced users.
Currently, most transmitters operate in a 2.4 GHz band, a free frequency. The range can vary from a few hundred meters to several kilometers. The resolution usually varies between 10 bits (1024 levels) and 12 bits (4096 levels).
Together with the transmitter, we will need, logically, a receiver that must be compatible with our controller. In general, the receiver is usually purchased simultaneously with the transmitter, although it is possible to purchase additional receivers to integrate them into various projects, reusing the transmitter.
RC transmitters are one of the most advanced controllers that we can use for our electronic projects, and one of the longest-range ones. In general, it will be one of the preferred controllers for complex vehicles and robots.
Price
In general, we can say that RC transmitters are advanced controllers and, therefore, expensive. There is a wide variety of price ranges ranging from 20€ to 1000€.
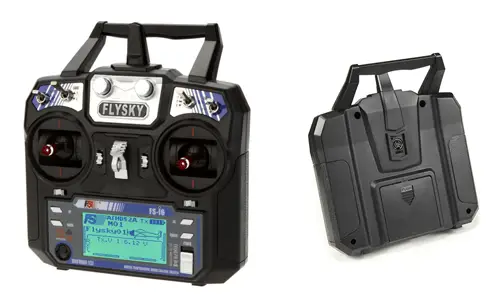
A very common controller is the FlySky FS-i6, which has 6 channels of 10 bits. We can find it for about 40€, including its FS-iA6 receiver, by searching international sellers on eBay or AliExpress.
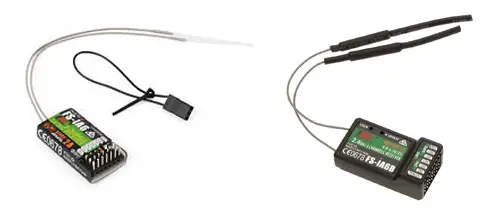
If you want to buy the receiver separately, you can find the FlySky FS-iA6 or the FS-iA6B for 10€.
For comparison, a 3-channel transmitter can be found for 25€, while 10-channel transmitters cost from 110€. As we said, a 40€ transmitter is a good starting point.
Connection diagram
The connection of an RC receiver with Arduino is really simple. In the transmitter, of course, we don’t have to take any action. Only make sure it has batteries, is turned on, and synchronize it with the receiver as usual.
The receiver has servo-type outputs (S = Signal, V = Vcc, G = Gnd), and a first row with the power pins.
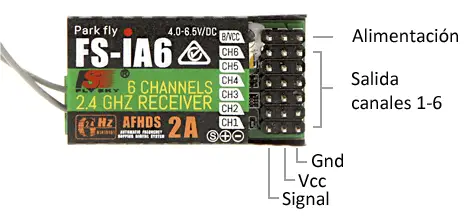
Simply power the Vcc and Gnd module of the receiver, respectively, to 5V and Gnd of Arduino. On the other hand, connect the signal pin of each of the channels we want to read to any digital input of Arduino.

The connection, seen from Arduino, would be as follows.
Code examples
The output signal of the receiver is similar to that of a servo. In fact, this is so that in a vehicle the receiver acts directly on servos, without the need for an additional processor.
To read the receiver signal from Arduino, we only have to measure the pulse width of each of the channels.
The following example shows the reading of the 6 channels using the PulseIn() function, and displays the value of each channel in Arduino.
int rcPins[6] = {5,6,7,8,9,10};
float chValue[6];

const int pulseInDelay = 20000;

void setup()
{
  Serial.begin(9600);
}

float fmap(float x, float in_min, float in_max, float out_min, float out_max)
{
  return (x - in_min) * (out_max - out_min) / (in_max - in_min) + out_min;
}

void readChannel(int channel)
{
  int rawValue = pulseIn(rcPins[channel], HIGH, pulseInDelay);
  chValue[channel] = fmap( (float)rawValue, 1000.0, 2000.0, 0.0, 1.0);
  chValue[channel] = chValue[channel] < 0.0 ? 0.0 : chValue[channel];
  chValue[channel] = chValue[channel] > 1.0 ? 1.0 : chValue[channel];
}

void printChannel()
{
  for(int iChannel = 0; iChannel < 6; iChannel++)
  {
    Serial.print("Ch #");
    Serial.print(iChannel);
    Serial.print(": ");
    Serial.println(chValue[iChannel]);
  };
  Serial.println("------------");
}

void loop()
{
  for(int iChannel = 0; iChannel < 6; iChannel++)
  {
    readChannel(iChannel);
  }
  printChannel();
  delay(2500);
}
Download the code
All the code from this post is available for download on Github. 
