Controlling GPIO and PWM from a web interface with Vue and WebSockets is a practical way to build a real-time panel for an ESP32 or ESP8266.
In this example we are going to combine several pieces: a Vue-based interface, WebSocket communication, and a small backend on the ESP that exposes actions to read GPIO, write outputs, and generate PWM.
Of course, if you have any doubts about these concepts, it goes without saying that it’s a good time to go and review them before moving forward.
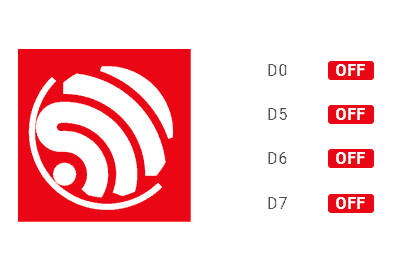
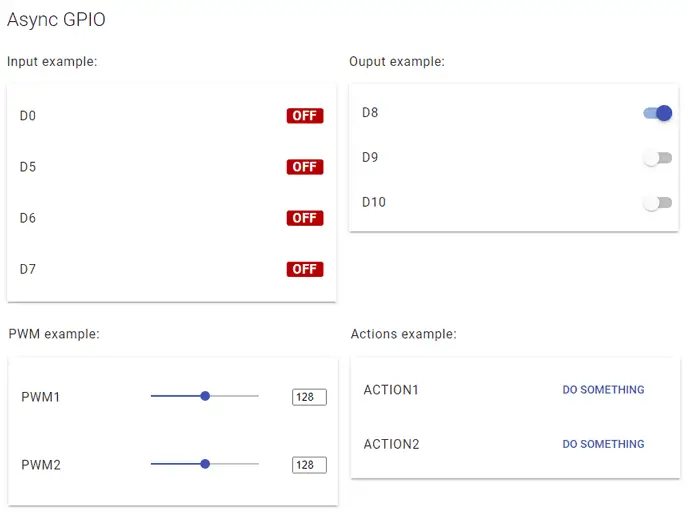
Our web interface will have the following form, where we include functions to read and write the state of the GPIOs, set PWM signals, and perform actions.
Of course, some of these functions will be mocks. Our goal is to present how to structure the parts. Your part is to adapt them to the real needs of your project.
Ready? Are we set? Let’s go for it. As always, we have the code divided into files to make it easier to understand and reuse.
Our main ‘.ino’ file looks like this.
#include <ESP8266WiFi.h>
#include <ESPAsyncWebServer.h>
#include <FS.h>
#include <ArduinoJson.h>

#include "config.h"  // Replace with your network data
#include "API.hpp"
#include "WebSockets.hpp"
#include "Server.hpp"
#include "ESP8266_Utils.hpp"
#include "ESP8266_Utils_AWS.hpp"
#include "ReactiveArduinoLib.h"

auto obsD0 = Reactive::FromDigitalInput(D0);
auto obsD5 = Reactive::FromDigitalInput(D5);
auto obsD6 = Reactive::FromDigitalInput(D6);
auto obsD7 = Reactive::FromDigitalInput(D7);

void setup(void)
{
  Serial.begin(115200);
  SPIFFS.begin();

  ConnectWiFi_STA();

  InitServer();
  InitWebSockets();

  obsD0.Distinct().Do([](int i) { updateGPIO("D0", i); });
  obsD5.Distinct().Do([](int i) { updateGPIO("D5", i); });
  obsD6.Distinct().Do([](int i) { updateGPIO("D6", i); });
  obsD7.Distinct().Do([](int i) { updateGPIO("D7", i); });
}

void loop(void)
{
  obsD0.Next();
  obsD5.Next();
  obsD6.Next();
  obsD7.Next();
}
As usual, we are using the AsyncWebSocket library. We also use AsyncWebServer to serve our web page. The InitServer() and InitWebSockets() functions are defined in our corresponding ‘utils’ functions. They are the same as in the other examples, so we won’t copy them again.
On the other hand, we are using the ReactiveArduino library (since it’s mine, I use it) to detect changes in the GPIOs and trigger callback actions. And little else in our main loop.
We come to the interesting part of this example regarding the backend, the ‘websocket.hpp’ file. Here we define the logic associated with Websocket communication, specific to our project.
AsyncWebSocket ws("/ws");

void ProcessRequest(AsyncWebSocketClient *client, String request)
{
  StaticJsonDocument<200> doc;
  DeserializationError error = deserializeJson(doc, request);
  if (error) { return; }

  String command = doc["command"];
  if(command == "setGPIO")
    setGPIO(doc["id"], (bool)doc["status"]);
  else if(command == "setPWM")
    setPWM(doc["id"], (int)doc["pwm"]);
  else if(command == "doAction")
    doAction(doc["id"]);
}

void updateGPIO(String input, bool value)
{
  String response;
  StaticJsonDocument<300> doc;
  doc["command"] = "updateGPIO";
  doc["id"] = input;
  doc["status"] = value;
  serializeJson(doc, response);

  ws.textAll(response);

  Serial.print(input);
  Serial.println(value ? String(" ON") : String(" OFF"));
}
As we can see, in this example we have two functions. One is ‘ProcessRequest’, which is responsible for receiving websocket calls from the client to the ESP8266/ESP32. Here we receive a Json file and, depending on the command received, we call the corresponding function of our API.
On the other hand, we have the only function in this example that sends data from the backend to the client, which corresponds to updating the client on the state of a GPIO. This function is called in response to state changes via ReactiveArduino, which we saw in the main loop.
The last “piece” we have left to see in our example is the ‘API.hpp’ file, which contains the definition of the functions called by the ‘ProcessRequest’ function in the Websocket file.
void setGPIO(String id, bool state)
{
   Serial.print("Set GPIO ");
   Serial.print(id);
   Serial.print(": ");
   Serial.println(state);
}

void setPWM(String id, int pwm)
{
   Serial.print("Set PWM ");
   Serial.print(id);
   Serial.print(": ");
   Serial.println(pwm);
}

void doAction(String actionId)
{
   Serial.print("Doing action: ");
   Serial.println(actionId);
}
As we can see, in this example all we do is display the data on the serial port. It’s up to you to adapt these demo functions to your hardware and project.
We have finished with the backend part, now let’s move on to the frontend part. Here we will use our already familiar VueJS for the client application, combined with the Material Design CSS we saw in this entry.
Thus our ‘index.html’ file looks like this.
<!doctype html>
<html lang="">

<head>
    <title>ESP8266 VueJS</title>
    <meta charset="utf-8">
    <meta http-equiv="x-ua-compatible" content="ie=edge">
    <title></title>
    <meta name="description" content="">
    <meta name="viewport" content="width=device-width, initial-scale=1">
</head>

<body>
    <link rel="stylesheet" href="vendor/google-fonts.css">
    <link rel="stylesheet" href="vendor/material.css">
    <link rel="stylesheet" href="css/main.css">

    <div id="app">
        <div class="mdl-shadow--2dp">
            <div class="mdl-card__title mdl-card--expand">
                <h2 class="mdl-card__title-text">Async GPIO</h2>
            </div>

            <div class="mdl-card__supporting-text"></div>
            <div class="mdl-grid">
                <div class="mdl-cell mdl-cell--3-col">
                    <h6>Input example:</h6>
                    <ul class="mdl-list mdl-shadow--2dp">
                        <gpio-input v-for="item in gpio_input_list" :gpio="item" :key="item.id" />
                    </ul>
                </div>

                <div class="mdl-cell mdl-cell--3-col">
                    <h6>Ouput example:</h6>
                    <ul class="mdl-list mdl-shadow--2dp">
                        <gpio-output v-for="item in gpio_output_list" v-bind:gpio="item" v-bind:key="item.id" />
                    </ul>

                </div>

                <div class="mdl-cell mdl-cell--3-col">
                    <h6>PWM example:</h6>

                    <ul class="mdl-list mdl-shadow--2dp">
                        <pwm v-for="item in pwm_list" :gpio="item" :key="item.id" />
                    </ul>
                </div>

                <div class="mdl-cell mdl-cell--3-col">
                    <h6>Actions example:</h6>
                    <ul class="mdl-list mdl-shadow--2dp">
                        <action v-for="item in action_list" :action="item" :key="item.id" />
                    </ul>
                </div>
            </div>
        </div>
    </div>
    </div>

    <!-- From CDN -->
    <!--<script src="https://cdn.jsdelivr.net/npm/[email protected]/dist/vue.min.js"></script>-->
    <script type="text/javascript" src="vendor/vue.min.js"></script>
    <script type="text/javascript" src="vendor/material.js"></script>
    <script type="text/javascript" src="vendor/nativeWs.min.js"></script>

    <!-- Load the file containing our Vue.JS App -->
    <script type="text/javascript" src="js/app.js"></script>
</body>
</html>
There’s not much to say, we simply have four columns corresponding, respectively, to Input GPIO, Output GPIO, PWM, and generic callback actions. The purpose, logically, is to show a variety of components, labels, sliders, etc. Then you adjust it to your needs.
As usual, the “magic” of our frontend resides in the JavaScript, where we define our VueJS application. Here there’s a bit more substance.
Vue.use(VueNativeSock.default, 'ws://' + location.hostname + '/ws', { format: 'json' })

Vue.component('gpio-input', {
  props: ['gpio'],
  template: `
            <li class="mdl-list__item">
                <span class="mdl-list__item-primary-content">{{gpio.text}}</span>
                <span class="mdl-list__item-secondary-action">
                    <label class="label-big" :class="{ \'On-style \': gpio.status, \'Off-style \': !gpio.status}"
                    :id="'input-label-' + gpio.id">{{ gpio.status ? "ON" : "OFF" }}</label>
                </span>
            </li> `
})

Vue.component('gpio-output', {
  props: ['gpio'],
  template: ` <li class="mdl-list__item">
                <span class="mdl-list__item-primary-content">{{gpio.text}}</span>
                <span class="mdl-list__item-secondary-action">
                    <label class="mdl-switch mdl-js-switch mdl-js-ripple-effect">
                        <input type="checkbox" class="mdl-switch__input"
                        :id="'output-switch-' + gpio.id"
                        v-model="gpio.status" @change="sendGPIO" />
                    </label>
                </span>
              </li>`,
  methods: {
    sendGPIO: function (evt) {
      console.log(this.gpio.text + ': ' + this.gpio.status);

      let data = {
        command: "setGPIO",
        id: this.gpio.text,
        status: this.gpio.status
      }

      let json = JSON.stringify(data);
      this.$socket.send(json);
    }
  }
})

Vue.component('pwm', {
  props: ['gpio'],
  template: ` <li class="mdl-list__item">
                <span class="mdl-list__item-primary-content">{{gpio.text}}</span>
                <span class="mdl-list__item-secondary-action">
                    <div class="mdl-grid">
                        <div class="mdl-cell mdl-cell--10-col">
                            <input :id="'slice-pwm-' + gpio.id" class="mdl-slider mdl-js-slider"
                                type="range" min="0" max="255"
                                v-model="gpio.value" @change="sendPWM" >
                        </div>
                        <div class="mdl-cell mdl-cell--2-col">
                            <input :id="'slice-pwm-text-' + gpio.id" style="width:35px;"
                              v-model="gpio.value" @change="sendPWM" ></input>
                        </div>
                    </div>
                </span>
              </li>`,
  methods: {
    sendPWM: function (evt) {
      console.log(this.gpio.text + ': ' + this.gpio.value);

      let data = {
        command: "setPWM",
        id: this.gpio.text,
        pwm: this.gpio.value
      }

      let json = JSON.stringify(data);
      this.$socket.send(json);
    }
  }
})

Vue.component('action', {
  props: ['action'],
  template: ` <li class="mdl-list__item">
                <span class="mdl-list__item-primary-content">{{action.text}}</span>
                <span class="mdl-list__item-secondary-action">
                <button class="mdl-button mdl-js-button mdl-button--primary mdl-js-ripple-effect" style="width: 160px;"
                @click="doAction">
                Do something
            </button>
                </span>
              </li>`,
  methods: {
    doAction: function (evt) {
      console.log(this.action.text + ': ' + this.action.id);
      let data = {
        command: "doAction",
        id: this.action.id,
      }

      let json = JSON.stringify(data);
      this.$socket.send(json);

      this.action.callback();
    }
  }
})

// Definition of our example app
var app = new Vue({
  el: '#app',
  data: function () {
    return {
      gpio_input_list: [
        { id: 0, text: 'D0', status: 0 },
        { id: 1, text: 'D5', status: 0 },
        { id: 2, text: 'D6', status: 0 },
        { id: 3, text: 'D7', status: 0 },
      ],
      gpio_output_list: [
        { id: 0, text: 'D8', status: 1 },
        { id: 1, text: 'D9', status: 0 },
        { id: 2, text: 'D10', status: 0 },
      ],
      pwm_list: [
        { id: 0, text: 'PWM1', value: 128 },
        { id: 1, text: 'PWM2', value: 128 },
      ],
      action_list: [
        { id: 0, text: 'ACTION1', callback: () => console.log("action1") },
        { id: 1, text: 'ACTION2', callback: () => console.log("action2") },
      ]
    }
  },
  mounted() {
    this.$socket.onmessage = (dr) => {
      console.log(dr);
      let json = JSON.parse(dr.data);
      let gpio = this.$data.gpio_input_list.find(gpio => gpio.text == json.id);
      gpio.status = json.status;
    }
  }
})

function sendAction(id) {
  let data = {
    command: "doAction",
    id: id,
  }

  let json = JSON.stringify(data);
  connection.send(json);
}
It may look like a lot, but if we break it down it is not that bad. First, we have the declaration of NativeWebsocket, which centralizes WebSocket communication.
Next, we have defined four Vue components, respectively for Input GPIO, Output GPIO, PWM, and callback actions. Each component has its template for display and the necessary code to send Json data via Websockets.
On the other hand, the VueJS App, where we have as data the lists of the four types of objects we are representing.
If we upload everything to the ESP32 and access the served web page, we will see our Vue application. If we change the state of one of the pins, we will see that the change is communicated to the client.
Similarly, if we interact with the web page, we can check in the browser’s developer console that the data is sent correctly.
At the same time, they are received by the ESP32, which we can check in the command console.
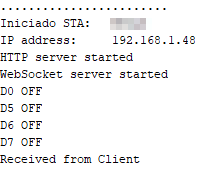
Alright, I’m aware that it’s a lot of code for a demo. But we’ve had many entries introducing the components of this application gradually. If you have any doubts, look at the code calmly (you have it all below), review the previous entries, or post a comment.
In the next entry we will move the code
Download the code
All the code from this entry is available for download on Github.

Version for ESP8266: https://github.com/luisllamasbinaburo/ESP8266-Examples
Version for ESP32: https://github.com/luisllamasbinaburo/ESP32-Examples
