In this article, we are going to see how to create and configure a project in ASP.NET, going through the initial steps that will allow us to start working with the technology.
Logically, it’s the starting point: it doesn’t matter if you’re taking your first steps or preparing to build a real project, the first thing is to create the project 😋.
But also, it will allow us to understand the structure, basic configuration, and operation of an ASP.NET project.
Don’t worry if you’re a bit lost at first. It’s normal, it’s the first project. You’ll get the hang of it quickly.
Prerequisites
Before installing and configuring ASP.NET, make sure you have the following installed on your system:
- .NET SDK: It’s the foundation for developing .NET applications.
- An IDE or code editor: I recommend using Visual Studio 2022 or Visual Studio Code.
- Basic knowledge of C#: It’s not mandatory but… yes, a little bit is needed 😉
If you are missing any of them, take a look at,
Create Your First ASP.NET Core Application
Creating an ASP.NET Core application is simple. We can use tools like Visual Studio or the .NET CLI.
Simply execute a command to create the project, depending on the type we want. For example, to create a new API project
dotnet new webapi -n MiPrimeraApp
Now change to the project directory,
cd MiPrimeraApp
Open Visual Studio and select Create a new project, and search for asp.net.
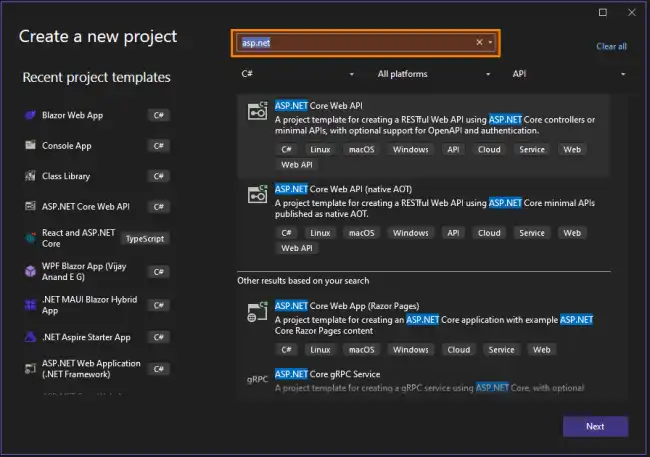
Accept, and configure the project details.
What This Code Does
When we create our project, it will have a basic structure, with minimal code (so we don’t start from scratch).
Specifically, it’s a very simple API made with ASP.NET that exposes an endpoint (/weatherforecast).
When a user accesses that route, the API returns a JSON with weather information for the next 5 days.
Let’s analyze the code of this base application, because it contains what’s necessary to understand how ASP.NET works.
var builder = WebApplication.CreateBuilder(args);
var app = builder.Build();

var summaries = new[]
{
    "Freezing", "Bracing", "Chilly", "Cool", "Mild", "Warm", "Balmy", "Hot", "Sweltering", "Scorching"
};

app.MapGet("/weatherforecast", () =>
{
    var forecast =  Enumerable.Range(1, 5).Select(index =>
        new WeatherForecast
        (
            DateOnly.FromDateTime(DateTime.Now.AddDays(index)),
            Random.Shared.Next(-20, 55),
            summaries[Random.Shared.Next(summaries.Length)]
        ))
        .ToArray();
    return forecast;
})
.WithName("GetWeatherForecast");

app.Run();

record WeatherForecast(DateOnly Date, int TemperatureC, string? Summary)
{
    public int TemperatureF => 32 + (int)(TemperatureC / 0.5556);
}
- ✅ Creates a C# API with ASP.NET Core
- ✅ Defines a
/weatherforecastendpoint that returns a JSON with the weather for the next 5 days - ✅ Generates random data (date, temperature, and weather description)
- ✅ ASP.NET automatically converts the response to JSON
Let’s look at each of these points in detail 👇,
The web application is created:
var builder = WebApplication.CreateBuilder(args);
var app = builder.Build();
builderis the one that configures the application.appis the application ready to run.
The /weatherforecast route is configured
app.MapGet("/weatherforecast", () =>
- This means that if someone makes a
GETrequest to/weatherforecast, the function defined there will be executed.
Each forecast is built using the WeatherForecast class
var forecast =  Enumerable.Range(1, 5).Select(index =>
new WeatherForecast
(
	DateOnly.FromDateTime(DateTime.Now.AddDays(index)),
	Random.Shared.Next(-20, 55),
	summaries[Random.Shared.Next(summaries.Length)]
))
.ToArray();
return forecast;
- The date is today +
indexdays. - The temperature is random between -20 and 55 degrees.
- A random weather summary is chosen.
Everything is converted into an array and returned as a response:**
return forecast;
- Since no return type is specified, by default ASP.NET automatically serializes it to JSON.
ASP.NET Core, by default, uses automatic serialization. When a function returns an object or a list of objects, it converts it to JSON without us having to do anything extra.
Example Response
For example, if we call GET /weatherforecast, the response could be something like this:
[ { “date”: “2025-04-01”, “temperatureC”: 12, “summary”: “Cool”, “temperatureF”: 53 }, { “date”: “2025-04-02”, “temperatureC”: 25, “summary”: “Warm”, “temperatureF”: 77 } ]
"date"→ Forecast date."temperatureC"→ Temperature in degrees Celsius."summary"→ Weather description."temperatureF"→ It is calculated inside the recordWeatherForecastand is returned automatically.
Run
Now you can try to run your application. To do this, you simply have to execute this command from the CLI.
dotnet run
Or press the ▶️ button if you are using Visual Studio.
In either case, you will see an output like the following.
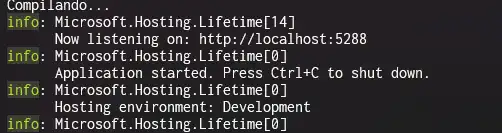
Now you can access from your browser (Chrome, Firefox, etc…) to this address,
localhost:5288/weatherforecast
And you will see ASP.NET’s response, with the weather forecast data (made up of course, it’s an example), in JSON format.

That’s how easy it is! It’s not much more complicated to launch an API with ASP.NET. Now you can continue reading the rest of the course to master this technology 😉.
