In the previous post we started with the installation of a Dual Boot system with Ubuntu or Linux Mint and Windows 7 or 8. For that, we saw how to obtain enough space for the Windows installation, either through a clean install or by resizing an existing partition. In this post, we will see how to configure partitions and finish installing Linux.
Linux can be installed across multiple partitions. This allows for improvements in performance and system maintenance. However, there isn’t a single configuration, and in this matter, every expert has their own approach. Typically, expert users on large servers use a greater number of partitions.
The partition configuration method we present is fairly standard, offers good performance, and is simple to configure and maintain. The example was done on a 100 GB installation. You should adjust the sizes according to your available space.
Configure Partitions for Ubuntu or Linux Mint
First, we boot our system from the CD or USB drive with the Ubuntu / Linux Mint distribution. On the desktop, there is a shortcut to start the installation. We run this shortcut, and on the first screen, we choose the installation language. 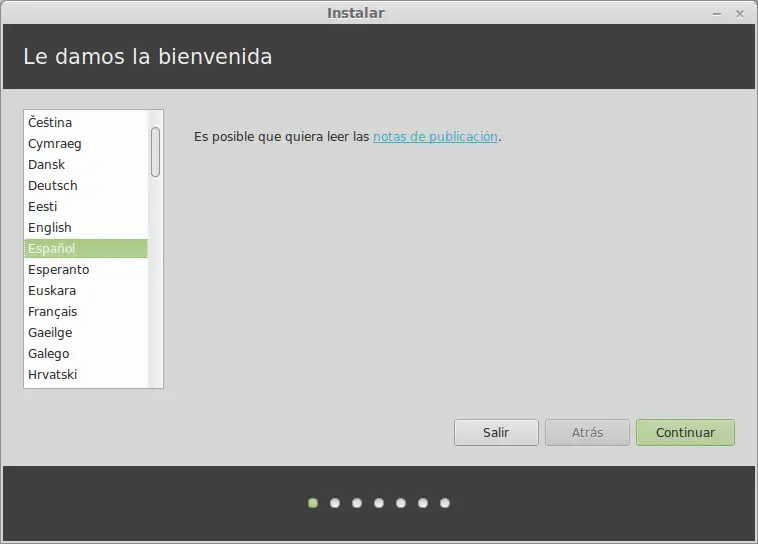 We check the installation requirements, which, while not strictly necessary, are always convenient.
 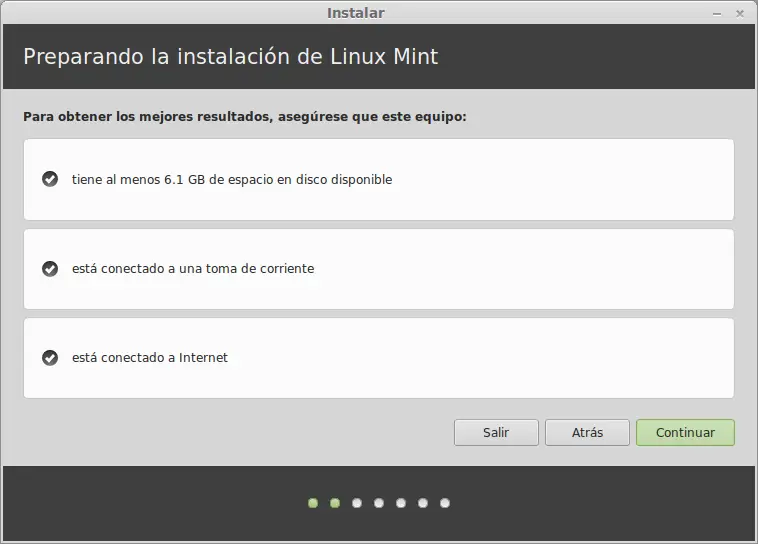 On the next screen, we choose the “More options” choice to do a fully customized installation, which will allow us to configure the system partitions.
 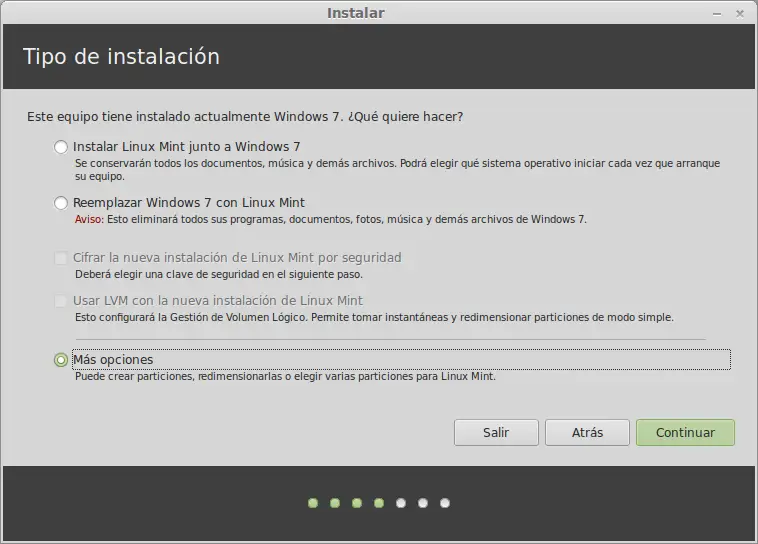 A window will appear with a list of the partitions available on your computer. We select the free space we created in the previous post and click the ”+” symbol to add new partitions.
 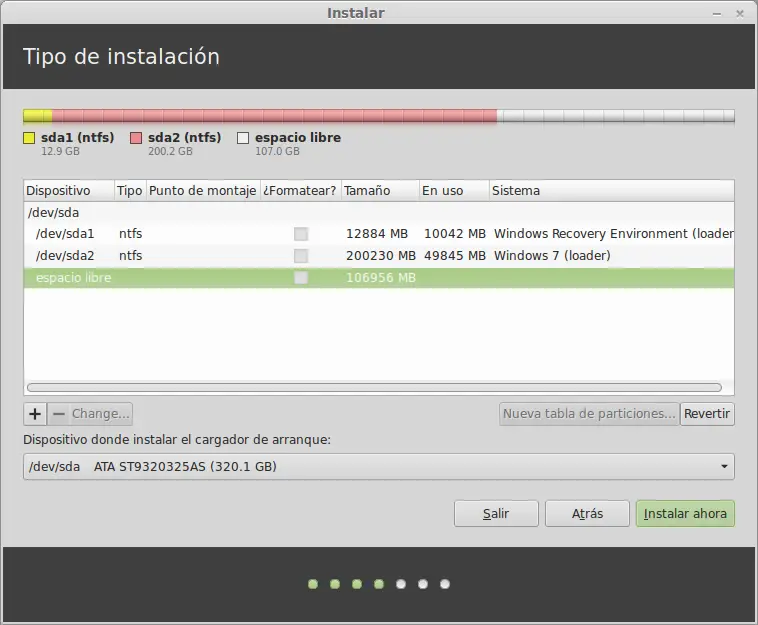 We configure a first partition according to the configuration shown in the following image. This partition will contain the boot files, i.e., the files essential for system startup. 512 MB is more than enough for this partition.
 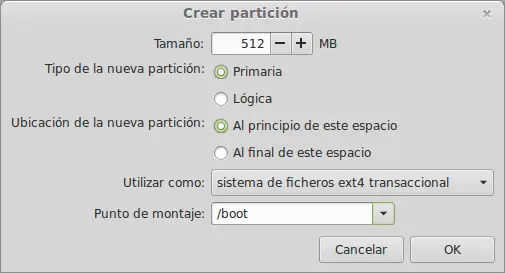 Next, we configure the root partition, which will contain most of the binary files and programs. It’s good to be generous with the size, as certain programs take up a fair amount of space (for example, programming suites, mathematics suites, office suites). In my case, I’ve allocated 30 GB to it.
 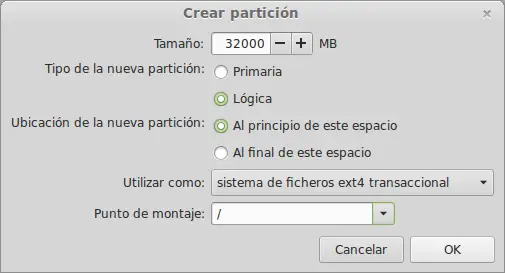 Next, the Swap partition. This partition is necessary for the correct functioning of Linux. In summary, it is used as additional memory when the system’s RAM is full. Although on modern systems with a large amount of RAM this partition is not as necessary as it used to be, it’s good to allocate between 2 to 4 GB of space to it.
 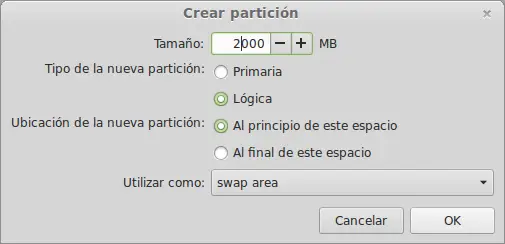 Finally, the /home partition, which contains all user files and documents. We will allocate most of the available space to this partition, as it contains images, movies, downloads, virtualized system images, etc… i.e., files that occupy a considerable amount of space. In this case, we dedicate 70 GB.
 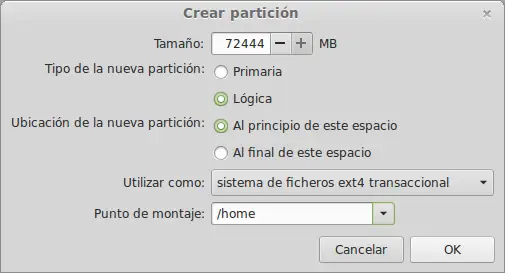 Upon finishing the process, your screen should look similar to the following.
 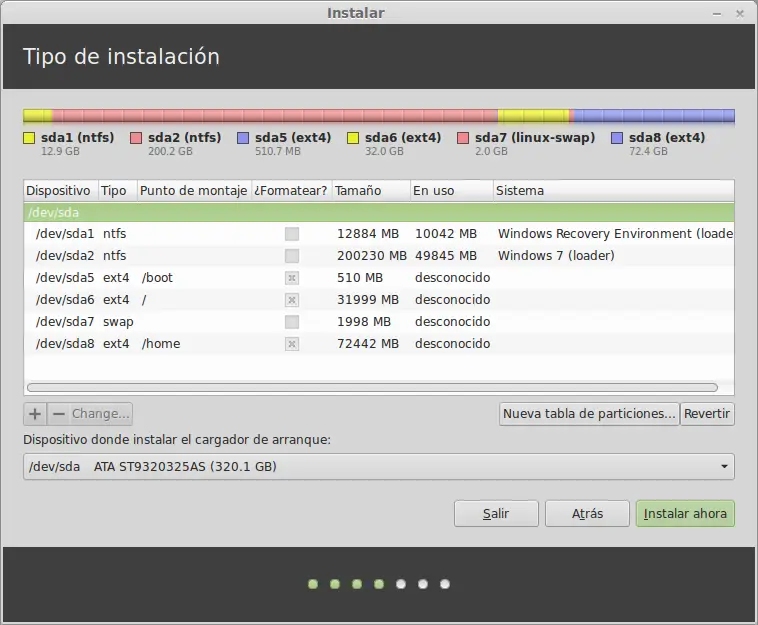 We verify that the configuration we have done is appropriate, and when we are sure, we click on “Install now”. The installation process will begin, and once finished, we will have our Dual Boot Windows / Linux system ready to boot. Enjoy!
