New tutorial about the ESP32 where we are going to see the ESP32 + camera module, with which we can capture images, or video streaming.
This ESP32 + camera module is one of the most popular and it has good reasons to be so. With it, we can easily carry out projects such as video surveillance, remote control of a robot, and even perform (modest) AI and visual recognition functionalities.
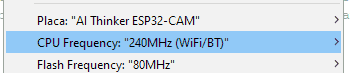
The heart of this module is our well-known ESP32 SoC from the manufacturer Espressif. At this point, we have repeated its characteristics a thousand times, but we summarize it as a 32-bit processor with 2 cores up to 240Mhz, with WiFi and BT connectivity.
As for the camera, it is compatible with the OV2640 (2 mpx), OV3660 (3 mpx), and OV5640 (5 mpx) cameras from the manufacturer Omnivision (OVT).
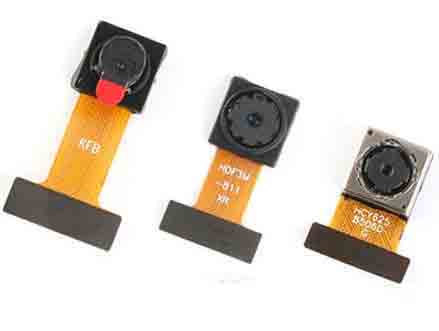
If you look for information on the manufacturer’s page you won’t find it because both sensors have been discontinued since 2009 and 2011. But it is still possible to find the Datasheet, which I recommend you do because it is very interesting to see the amount of electronics and processing that the camera itself carries, which sells for 1-2€.
The resolutions available in the OV2640 model are QVGA (320 x 240), CIF (352 x 288), VGA (640 x 480), SVGA (800 x 600), XGA (1024 x 768), SXGA (1280 x 1024) and UXGA (1600 x 1200), OV3660 adds QXGA (2048 x 1536) and OV5640 QSXGA (2592 x 1944).
As for the fps we can achieve, it logically depends on the camera we are using and the chosen resolution. Very generally, below 640x480 we will achieve real-time (25-30fps). At 800x600 we will notice a slight drop, and from there it starts to suffer. At 1600 x 1200 it is easy to have 3-5 fps.
As we anticipated at the beginning, the ESP32 Camera incorporates certain visual recognition and AI functions such as, for example, face recognition (these functions are available for low resolutions < CIF).
It seems like a big limitation, but the truth is that most similar applications work by doing downscaling as a first step (that is, they work at low resolutions).
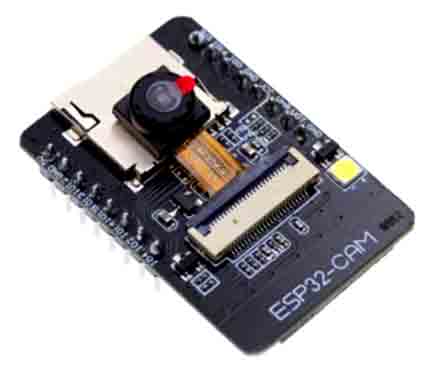
As for the price of the set, we can find several modules that incorporate ESP32 + Camera. The best known is from the manufacturer AI-Thinker, with an OV2640 camera, which we can find for about 4.5€.
This AI-Thinker board has the drawback of not incorporating a USB to UART converter. However, many sellers include a base with a converter for about 0.80€, which greatly facilitates programming and handling of the module (I recommend buying a base, which you can then share and use among several modules).
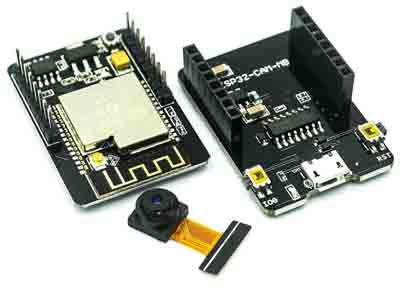
If you don’t want to buy the base, it’s okay. You can use an external USB to UART converter, connected to the U0T and U0X pins (but in the end, it will cost you more, and you’ll have an unnecessary mess of cables
Testing the ESP32 Camera
Well, and if we want to start testing with the ESP32 + Camera module, where do we start? By doing videostream over WiFi? It sounds good, but it seems very complicated.
Well, it’s not because, fortunately, the ESP32 library for the Arduino IDE includes a very complete example for the ESP32 as a camera (in fact, it’s not only very complete, it’s one of the best examples for the ESP32).
To make it work, we simply choose our hardware.
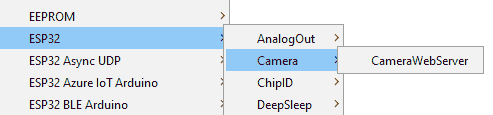
We load the example ESP32\Camera\Camera webserver
We modify the WiFi connection data with those of our network, load the program into the module and connect with a web browser to the IP assigned by the router, which will be shown on the serial port and …hey! There’s my hand.
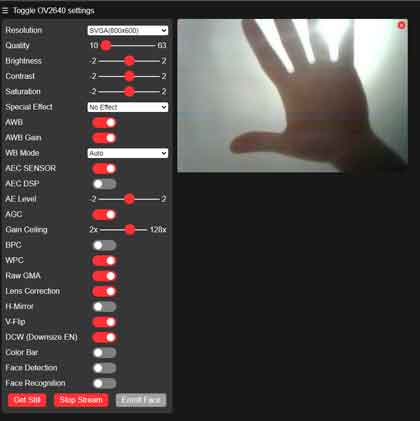
The serial port will also show the resolution of the captured images and the fps obtained. On the left side of the example web page, there is a configuration bar that allows modifying all the options (and there are many!) of the camera connected to the ESP32.

As I said, the example is very, very, very complete, and I recommend you read the code because you can learn a lot both about the ESP32 + Camera module and about how to perform communication in general.
And that’s it for this entry. I leave you on Github the code of the example (which is the same as you have in the official ESP32 repo, nothing new here) and the served web page, extracted from the binary code of the example. As I said, I recommend you take a look, and see you in the next entry.

