A servomotor (also known simply as a servo), is an electromechanical device used to control the angular position of a specific shaft to a specific angle.
Unlike conventional motors, servos are closed-loop devices. That is, they contain internal sensors and circuits to receive control signals and adjust their position to the angle we specify.
Servos are widely used in robotics projects, 3D printers, remote-controlled vehicles, robotic arms, and other systems where precise motion control is required.
Using a servo with the ESP32 in the Arduino IDE is a bit more complicated than with a conventional Arduino, because the ESP32 Core for Arduino does not include a version of the Servo library.
Connecting the Servo to the ESP32
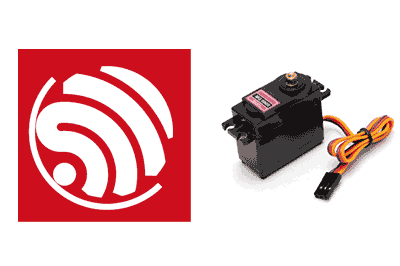
Before starting to control a servo with the ESP32, we must connect it correctly. A typical servo has three wires: one for power (VCC), another for ground (GND), and one for the control signal (signal).
Here is the servo pin configuration:
- Red wire (VCC): Connect to a 5V pin on the ESP32 or to an external 5V power supply.
- Brown or black wire (GND): Connect to a GND pin on the ESP32.
- Yellow or white wire (signal): Connect to one of the ESP32’s GPIO pins.
Except in the case of very, very small servos, you should not power the Servo from the ESP32. In fact, even for very small servos, it is always better if you power it from another source.
Servo Library for the ESP32
As mentioned, unlike a “conventional” Arduino, the ESP32 Core does not include a native library for controlling servos.
Instead, we will have to download one. Fortunately, the community has developed several libraries. For example, I like this one: GitHub - madhephaestus/ESP32Servo: Arduino-compatible servo library for the ESP32
This one is also very well-known. Although I like it less because it has lower compatibility with ESP32 variants: GitHub - RoboticsBrno/ServoESP32: Generate RC servo signal
In any case, pay attention to the compatibility with your specific ESP32 model, as not all libraries are compatible with all models.
Both libraries have their peculiarities and additional functions. Consult their documentation if you want to delve deeper into them.
How to Use a Servo with an ESP32
Include the Servo Library
To begin, we must include the Servo library in our program. Depending on your chosen library, you should add one of the following lines at the beginning of your code:
// for the madhephaestus library
#include <ESP32Servo.h>

// for the RoboticsBrno library
#include <Servo.h>
From here, the use of the servo should be the same as what we are used to. If in doubt, consult the documentation and examples of the library you are using.
Create a Servo Object
After including the library you have decided on, create a Servo object to interact with the servo. This is done with the following line of code:
Servo miServo;
This works with both libraries I have recommended.
Configure the Servo Pin
Before starting to use the servo, we need to tell the Servo library which pin it is connected to. Use the attach() function to do this:
const int pinServo = 18; // GPIO pin to which the servo is connected

void setup()
{
  miServo.attach(pinServo);
}
Control the Servo
Once you have configured the pin, you can control the servo using the write() function. The value passed as an argument to write() represents the angle you want the servo to move to. For example, a value of 0 degrees will move the servo to its leftmost position, while a value of 180 degrees will move it to its rightmost position.
void loop()
{
  miServo.write(0);    // Move the servo to 0 degrees
  delay(1000);         // Wait 1 second
  miServo.write(90);   // Move the servo to 90 degrees
  delay(1000);         // Wait 1 second
  miServo.write(180);  // Move the servo to 180 degrees
  delay(1000);         // Wait 1 second
}
In this example, the servo moves to the positions of 0, 90, and 180 degrees with a 1-second interval between each movement.
