We continue with our series of posts dedicated to the ESP8266 and ESP32, seeing how to connect an application made in VueJS through Websockets thanks to Vue Native Websockets.
We will refer to the ESP8266, but the same code is compatible for the ESP32, adjusting the library names. At the end, you have the code for both the ESP8266 and the ESP32.
In the previous post we reached one of our goals, which was to create a VueJS and Vuetify application, served from the ESP8266, and that communicated with the backend through Ajax calls with the Axios library.
Now we want, basically, to do the same but through Websockets. Which shouldn’t be too much of a problem because we already saw how to use Websockets in this post, as well as its advantages and disadvantages and when to use them in our project.
But the thing is, how do we integrate Websockets into our VueJS application on the frontend? Well, fortunately, it’s not too difficult thanks to the Vue Native Websockets library, available at https://github.com/nathantsoi/vue-native-websocket.
To illustrate it, we are going to start with a small example, similar to the one we saw in the post about Websockets. In the next post we will go further and integrate it with the rest of the API. But for now, let’s start with the basics. So let’s get to work!
The code on the ESP8266 is basically the same as we saw in the post about AsyncWebSockets, which we remember we have separated into files by functionality so that the code is more organized and reusable.
The main ‘.ino’ file simply has the initialization, and in the loop we send millis() without any delay. This serves as a stress test and to check the speed at which we can send a value.
#include <ESP8266WiFi.h>
#include <ESPAsyncWebServer.h>
#include <FS.h>
#include <WebSocketsServer.h>

#include "config.h"  // Replace with your network data
#include "Websockets.hpp"
#include "Server.hpp"
#include "ESP8266_Utils.hpp"
#include "ESP8266_Utils_AWS.hpp"

void setup(void)
{
  Serial.begin(115200);
  SPIFFS.begin();

  ConnectWiFi_STA();

  InitWebSockets();
  InitServer();
}

void loop(void)
{
  // Example 2, called from server
  ws.textAll(GetMillis());
}
In the “Server.hpp” file we have the code related to the server part. In this example we only need the basic code necessary to serve the page from SPIFFS, which we are already used to.
AsyncWebServer server(80);

void InitServer()
{
  server.serveStatic("/", SPIFFS, "/").setDefaultFile("index.html");

  server.onNotFound([](AsyncWebServerRequest *request) {
    request->send(400, "text/plain", "Not found");
  });

  server.begin();
  Serial.println("HTTP server started");
}
While the part related to Websockets is separated in the “Websockets.hpp” file, which has the following form. As we can see, we have only defined that when it receives a Websocket message, it returns the millis() value to the original sender.
AsyncWebSocket ws("/ws");

String GetMillis()
{
  return String(millis(), DEC);
}

void ProcessRequest(AsyncWebSocketClient * client, String request)
{
  String response = GetMillis();
  client->text(response);
}
Nothing new so far and not particularly interesting either. The changes come in the frontend part where we will have to adapt the Vue application to work via Websockets.
In the Html page we have simply added the reference to Vue Native Websocket.
<!DOCTYPE html>
<html>
<head>
  <title>ESP8266 Vue + Axios</title>
  <meta charset="utf-8">
  <meta http-equiv="x-ua-compatible" content="ie=edge">
  <meta name="description" content="">
  <meta name="viewport" content="width=device-width, initial-scale=1">
</head>

  <!-- Our simple example APP -->
  <div id="app">
  <div>This is a counter {{counter}}</div>
  </div>


  <!-- From CDN -->
  <!--<script src="https://cdn.jsdelivr.net/npm/[email protected]/dist/vue.min.js"></script>-->
  <script src="https://cdn.jsdelivr.net/npm/[email protected]/dist/build.min.js"></script>

  <script type="text/javascript" src="./vendor/vue.min.js"></script>
  <script type="text/javascript" src="./vendor/nativeWs.min.js"></script>

  <!-- We load the files that simulate our API and our Vue.JS app -->
  <script type="text/javascript" src="./js/app.js"></script>
</body>
</html>
And the most important part is in the application’s JavaScript file, where in the “mounted” method we have defined a callback function when we receive a message on the $socket object.
Vue.use(VueNativeSock.default, 'ws://' + location.hostname + '/ws')

var app = new Vue({
    el: '#app',
  data : function() {
      return {
      counter: 0
    };
  },
  mounted() {
    this.$socket.onmessage = (dr) => {
      console.log(dr.data);
      this.$set(this, 'counter', dr.data);
    }
  }
})
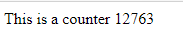
Result
It wasn’t that difficult, was it? Now we take all this, upload it to our ESP8266, and access the served web page. We will see the page counter increasing rapidly as the ESP8266 sends the millis data.
We now have a Vue application communicating with the ESP8266 as a backend via Vue Native Websockets. In the next post, we will see how to use all this to serve a Vue application that controls the state of the ESP8266’s GPIOs through Json sent via Websocket. See you next time!
Download the code
All the code from this post is available for download on Github.

Version for ESP8266: https://github.com/luisllamasbinaburo/ESP8266-Examples
Version for ESP32: https://github.com/luisllamasbinaburo/ESP32-Examples
