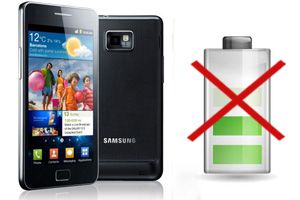
In the last two months, I have had to repair three Samsung Galaxy S2 phones due to problems associated with battery charging. Since it is a cheap and simple repair and these failures are happening frequently nowadays, we are going to show in a tutorial how to repair it and thus save a phone that, otherwise, continues to work wonderfully.
The problems presented by the phones were as follows:
- In one case, the phone did not charge the battery when connected to the charger. The phone also did not indicate it was charging.
- In another, the phone charged the battery, but with very little charge (barely a few minutes), despite the phone indicating a full charge.
- In mine, when disconnecting the phone from the charger, it indicated that it was still charging. The battery life had dropped to just about 3 hours.
In all cases, the failure was caused by the same part failing, the one responsible for controlling the charging process, which apparently has a natural tendency to break after a couple of years of use. If you have any of these problems, it is very likely that the cause is the same part, although, logically, I cannot guarantee it in all cases. The decision to attempt the repair is solely up to you.
You can find a replacement for this part without any difficulty on eBay. Search for “galaxy s2 flex dock” on eBay. It can be bought for €3.5 from China, with 14-21 day shipping, or for about €6.5 shipped from the UK, with about 7-10 day shipping (both cases with shipping included).
Galaxy S2 Repair
The following steps show how to repair the phone, accompanied by their images. You can click on each image to enlarge it.
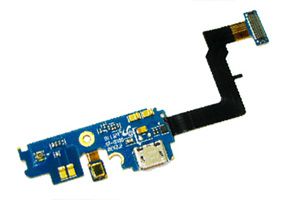
The following image shows the faulty part (top) and the new replacement (bottom).  In most cases, the new replacement will have adhesive on the bottom, and you will need to remove the protective plastics (A). In some cases, the replacement comes without the plastic cap (B). You can recover it from the part you are removing. Simply pull it out gently, being careful not to damage the part or the cable.
Next, remove the battery and the screws from the back cover. 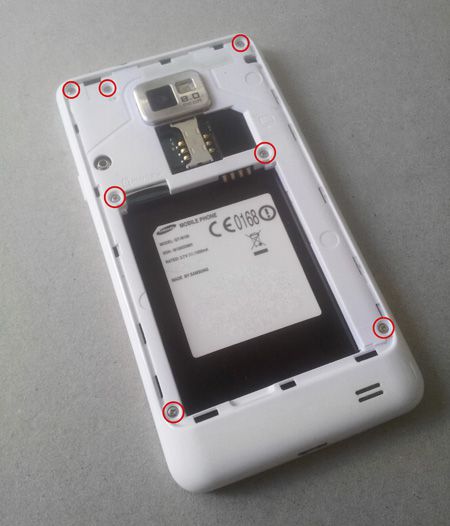 Remove the screws from the part we are going to replace (C). Release the cable (D) by gently pulling upwards.
 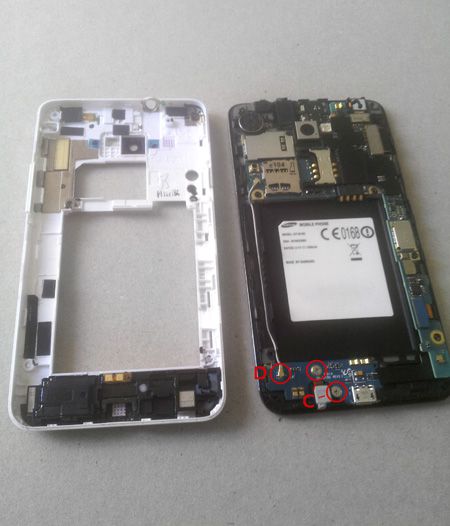 Disconnect the connector (E). Finally, remove the part (F) by gently lifting it in the directions indicated by the arrows.
 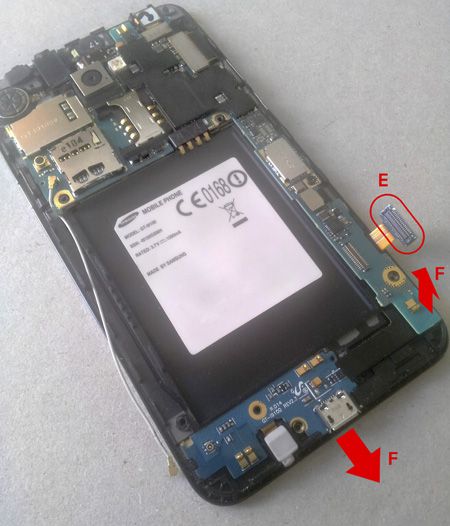 Replace the part with the new replacement, ensuring that the adhesive parts make good contact. Connect the connector (E) and the cable (D). The latter requires some skill, especially not forcing the contact. Place the screws (C), and the back cover, pressing gently along the contour to ensure closure. Be especially careful with the side volume and power buttons, it requires a bit of skill to place them correctly. Finally, screw in the cover screws (B) and place the battery.
Fixed! The total repair time is less than 15 minutes, and we now have a phone ready to work for several more years.
If you found this article useful, you can check out how to replace your camera lens and recover the quality in your phone’s photos for less than 2 euros.
Repairing a phone is a delicate operation that requires some experience and skill. We are not responsible for any damage you may cause to your device during the repair process.