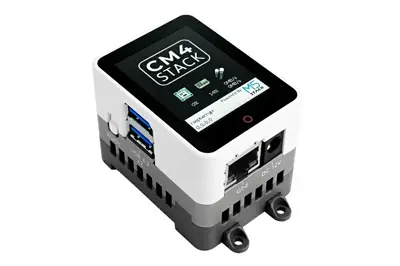
Today we are going to see how to flash the CM4 Stack with the stock image to restore it to factory conditions.
I have been testing the new CM4 Stack intensively. Apart from having a blast, as you know what happens with games… I’ve messed something up… these things happen.
In this case, it’s time to reflash the device to make it as good as new, fresh out of the box.
You have the process explained here https://docs.m5stack.com/en/quick_start/cm4stack/arduino but, between the instructions being in English, and the screenshots in Chinese? Japanese? I’m not entirely sure.
But anyway, the process is much easier than it seems, so I’m going to explain it in a mini tutorial, so if you have to do it, you can do it without fear.
Tools We Need
Before performing the flash, we need to download these tools.
- Factory image for the CM4Stack https://m5stack.oss-cn-shenzhen.aliyuncs.com/cm4stack/cm4stack_images/canary/2023-03-08-CM4StackOS-canary-2023-02-21-raspios-bullseye-armhf.gz
- RpiBoot https://github.com/raspberrypi/usbboot/raw/master/win32/rpiboot_setup.exe
- Panasonic SD Formatter https://www.waveshare.net/w/upload/d/d7/Panasonic_SDFormatter.zip
The first one is, logically, the manufacturer’s image for the CM4Stack. It contains all the installation files that your CM4 Stack had when it came from the factory.
Check that it is the latest version, because if you read this entry a year from now, the link will likely not be updated.
The other two tools are standard, and you might even have them downloaded and have used them before.
RpiBoot is used to connect Raspberry Pis that have eMMC (instead of SD) via USB to a computer, making it appear as a USB drive. This is to be able to write the files.
SD Formatter is an SD card formatter, widely used in the electronics world to ensure the card is formatted correctly.
Flashing the CM4 Stack
With those three things on the computer, the process is very simple.
Step 1: With the CM4 powered off, unplugged, press the boot button and connect it via USB-C to a USB port on the computer. Once connected, it will power on, and we can release the button (no need to hold it for long). It is also not necessary to power it with the charger, USB alone is sufficient.
Step 2: On the computer, you will hear the typical sound of new hardware being connected. You might get some screen about an unformatted drive, do you want to format it, etc. Ignore all of them.
Now run the RpiBoot application you downloaded. A console application will appear showing the configuration process. After that, a drive will appear on your computer, with about 256MB of space. This is the boot partition of your CM4.
Step 3: We take SD Formatter, and format this partition. Important, you must select the option “FORMAT SIZE ADJUSTMENT”. To do this, click the options button, and in the window that appears, set the dropdown to ON. Sometimes it fails to format. Don’t panic, just try again and that’s it. For me, it almost always fails the first time, and works the second.

Step 4: Open Raspberry Pi Imager. Select the image you downloaded, the network drive, and click “Burn”. Be patient, the process takes a few minutes.
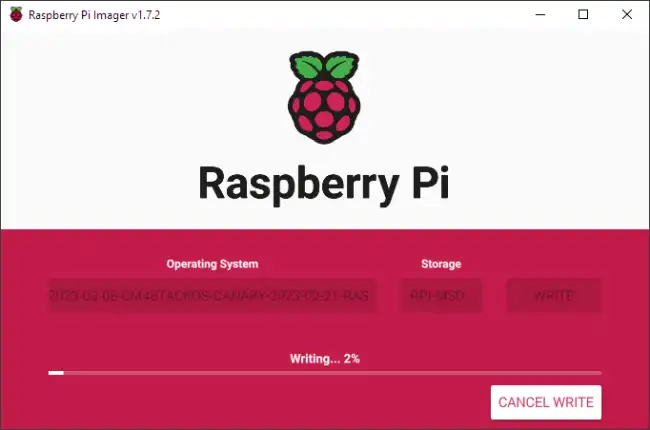
Optionally, but highly recommended, take advantage of being in Raspberry Pi Imager to configure the options (below, in the “gear” button). You can set the Hostname, enable SSH, change the username and password, and enter your WiFi password.
That’s how easy it is to flash the CM4 Stack and restore it to factory configuration. And next time, be more careful (I’m the first one, I can’t keep up with all the formatting!)
