
Those of you who know me and chat with me on Twitter will already know that I have been in a personal battle with my garage door, which has ended up becoming a full Maker project and a monumental exercise in sheer stubbornness.
I already told you that when I finished, I would take some time to explain in a series of entries what the heck happened with the door and why it took me 6 months to fix the darn door.
Because it is true that, even taking into account that I can only dedicate (part) of the weekends, and that in between there have been vacations, trips, other works, family events, etc… the truth is that it has consumed a lot of time.
So as promised, I am going to tell my “comings and goings” with the darn door, my war with the installation companies, an endless series of strokes of bad luck, and a repair that has come out more from stubbornness than anything else.
So it all starts with,
The story of a tragic ‘Clac’
It all starts on a quiet day in December with me, happy and naive (happy music… laralarala) parking the car in my garage. As the door closes, I hear a tiny ‘Clac’ in the motor, to which I didn’t pay attention at the time.
But the next morning, when I went to open the door, at about halfway… “Glan Glan Glan Glan”. And the door won’t go any further. Mmm… this looks really bad.
Well, I curse everything, unlock the door and open it by hand. I take the car out, park outside, go back inside, close the door by hand, lock it with the key, and go to work. Great way to start the day!
It happens that a neighbor works for the company that installed the doors in the neighborhood, long before I bought the house. In the evening, I see him and, very kindly, he comes to take a look. We take apart the reducer and we see that a tooth has broken in the gear that moves the chain.

The next day I call the company, which, to maintain anonymity, I’ll call “the most powerful river in Spain + machines”. I already knew them because, when I bought the house, I had to get in touch with them to sell me and reprogram the controls to open the garage (at €40 per control, ‘that’s nothing!’).
In short, they tell me they will call me the following week. They don’t call. I call them again. They say they are very busy, to bring them the gear and they will look for a replacement.
Two more weeks go by and, already a little annoyed, I call again. They tell me there are no replacements, and they give me a quote. €700 + labor plus VAT… over €1100. Well, that darn ‘Clac’ is expensive!
You might think (and I did) that a machine like this, better than the one they are quoting me, costs €200 at Leroy Merlin. But of course, if I buy another one it will stop working with the control for my door, which also controls the community entrance. So I’ll have to carry two controls and I don’t like it.
On the other hand, the ceiling of my basement is made of expanded polystyrene, so to screw something into the ceiling I would have to go through 20cm of white cork, drill the floor, lower two studs. Uf… This is starting to look really bad.
But it’s okay, we live in the age of 3D printing, so I switch to ‘Maker’ mode. I ask them if they are okay with me trying to get a replacement, and they say they are delighted.
So it comes to the reverse engineering phase!
Redesigning a gear
I take the broken gear and scan it in 3D. The original piece is made of Nylon, so I’m hardly going to be able to make a replacement that has the same piece, unless I have it printed in polyamide.

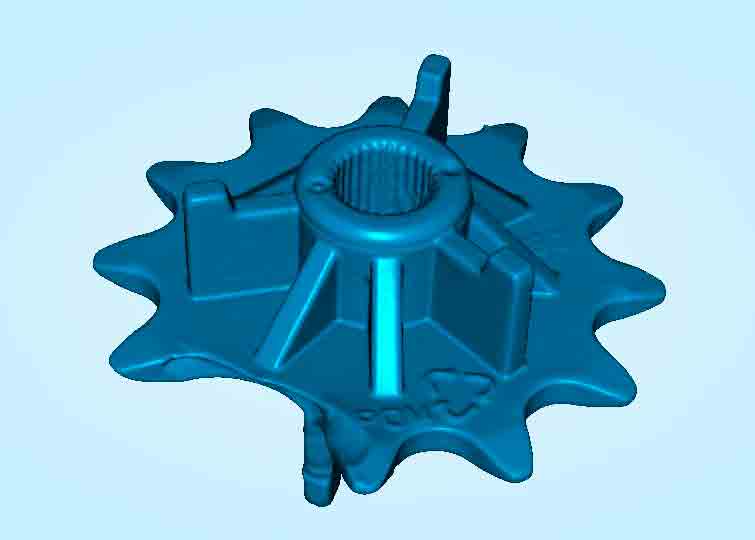
On the other hand, the gear is mounted on the motor shaft by means of a very fine 27-tooth spline. This is going to be a key adjustment element, and it makes it very difficult for me to subcontract the piece because it’s quite unlikely to work on the first try.
So I decide to redesign the gear into a set of 3 pieces, two plastic bodies and a metal gear.

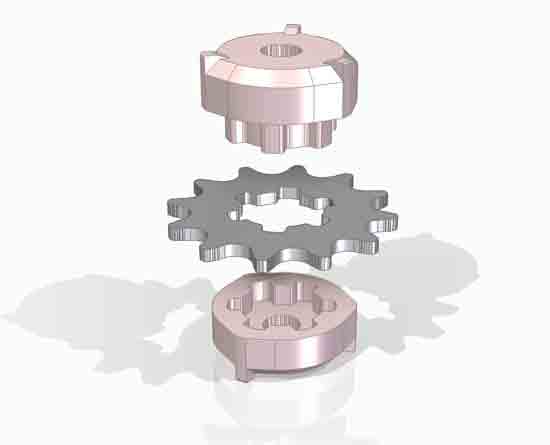
As for material, I opt for PETG for its mechanical characteristics and good layer adhesion.
I start by printing several test samples to check the fit on the shaft, and find the dimensions for the perfect fit, neither too loose nor too tight.
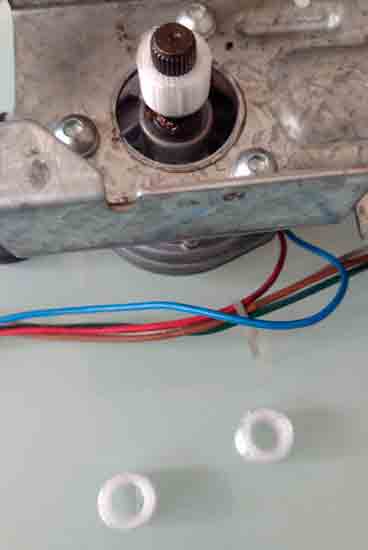
Finally, I print both bodies, and assemble everything in place.
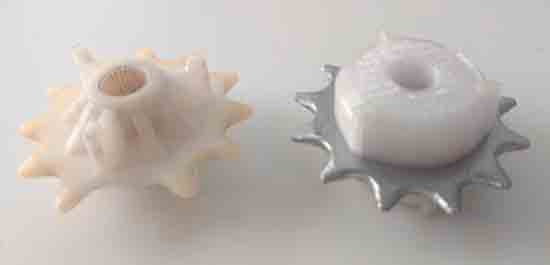
Hovering over disaster
I take my prototype and, with many doubts that it will work, or that it will break the 3D pieces, or the metal gear will damage the chain, or that the spline will wear out, I install it on the motor.

In the electronics there are two unlabeled buttons. With the first one, the door makes a “weird attempt” and stops. When I press the other one, I hear a “tic tac” of relays opening and closing. After a while, the sound stops, then starts again. I don’t understand what this machine is doing at all.
Suddenly, the door starts to open. Well, the gear seems to hold up. It opens, opens, opens, keeps opening… it goes past 90º, half pulls the door off the guides, pulls the machine down, and threatens to tear everything off the ceiling before I have time to stop it.
Well, it’s clear that this machine has “something more” than just the gear. Well, I think as a small Maker experiment it’s been fine… but let’s call someone who knows about this before I break something and make it worse.
Ha! Did you think this was going to be so easy? I thought so, but not at all! To be continued in the next entry
