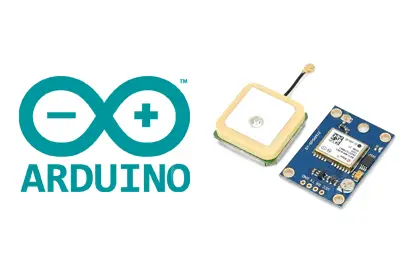
What is a NEO-6 GPS?
NEO-6 devices are a family of receivers manufactured by U-Blox, which can be easily connected to an automaton or processor like Arduino.
The NEO-6 GPSs have UART, SPI, DDC (I2C), and USB communication interfaces. They support the NMEA, UBX binary, and RTCM protocols.
The NEO-6 GPS receiver family is designed to have a small size, low cost, and low power consumption. The required current intensity is about 37mA in continuous measurement mode.
The supply voltage is 2.7 to 3.6V for NEO-6Q/6M models, and 1.75-2.0V for NEO-6G models.
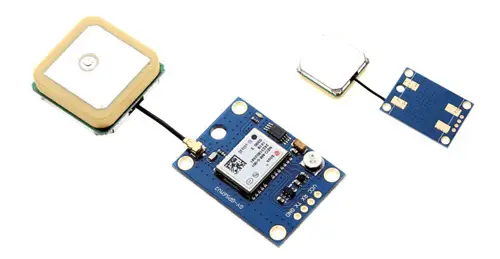
They are frequently integrated into modules that incorporate the necessary electronics to connect them easily to an Arduino. In most modules, this includes a voltage regulator that allows direct power supply to 5V.
The NEO-6 GPS has a cold and warm startup time of about 30s, and 1 second in hot mode. The maximum measurement frequency is 5Hz.
The position accuracy is 2.5m, 0.1m/s in speed, and 0.5° in orientation, values more than acceptable for a GPS positioning system.
GPSs are widely used in electronics and Arduino projects, especially in the case of robots and vehicles such as quadcopters.
Price
The NEO-6 GPS receivers are designed to be low-cost devices. We can find modules like the NEO6MV2 for about €3.60 on international sellers like AliExpress or eBay.
Wiring Diagram
The connection is simple, as we use the UART available on the GPS receiver. First, we power the module by connecting Vcc and Gnd of the module to 5V and Gnd of the Arduino.
To prevent the connection from interfering with the normal serial port, we will use the SoftSerial library to establish communication using any of the pins.
In the example, we will use Pin 3 for RX and Pin 4 for TX. Remember that in serial communication, the pins are connected with their opposites, i.e., RX - TX and vice versa, so the wiring is as follows.
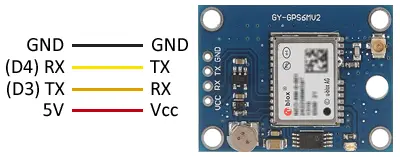
While the connection with the module, seen from Arduino, would be as follows.
Code Examples
Get NMEA Reading
The necessary code is also very simple, as it is done through the serial port. We use the SoftSerial library to create a port on any pair of Arduino pins.
#include <SoftwareSerial.h>

const int RX = 4;
const int TX = 3;

SoftwareSerial gps(RX, TX);

void setup()
{
  Serial.begin(115200);
  gps.begin(9600);
}

void loop()
{
  if (gps.available())
  {
    char data;
    data = gps.read();
    Serial.print(data);
  }
}
The data obtained from the NEO-6 is in the format $GPRMC, one of the available sequences in the NMEA (National Marine Electronics Association) protocol.
This sequence has the form
$GPRMC,hhmmss.ss,A,llll.ll,a,yyyyy.yy,a,x.x,x.x,ddmmyy,x.x,a*hh
Where,
| hhmmss.ss | UTC Time |
| A | Receiver Status (A = OK, V = warning) |
| llll.ll,a | Latitude (a = N or S) |
| yyyy.yy,a | Longitude (a = E or W) |
| x.x | Speed in knots |
| x.x | Course in degrees |
| ddmmyy | UT Date |
| x.x,a | Magnetic Variation in degrees (a = E or W) |
| *hh | Checksum |
For example, the sequence
$GPRMC,225446,A,4916.45,N,12311.12,W,000.5,054.7,191194,020.3,E*68
Has the following meaning
| 225446 | Time 22:54:46 UTC |
| A | Receiver Status A = OK |
| 4916.45,N | Latitude 49º 16.45 min North |
| 12311.12,W | Longitude 123º11.12 min West |
| 000.5 | Speed 0.5 knots |
| 054.7 | Course 54.7º |
| 191194 | Date 19 November 1994 |
| 020.3,E | Magnetic Variation 20.3º East |
| *68 | Checksum |
Get Coordinates with TinyGPS
To interpret the $GPRMC sequence easily, we have the TinyGPS library, which allows us to parse the data obtained from the GPS module.
The following example uses the TinyGPS library to get the coordinates (latitude and longitude) and display them on the screen.
#include <SoftwareSerial.h>
#include <TinyGPS.h>

TinyGPS gps;
SoftwareSerial softSerial(4, 3);

void setup()
{
  Serial.begin(115200);
  softSerial.begin(9600);
}

void loop()
{
  bool newData = false;
  unsigned long chars;
  unsigned short sentences, failed;

  // Try to receive sequence for one second
  for (unsigned long start = millis(); millis() - start < 1000;)
  {
    while (softSerial.available())
    {
      char c = softSerial.read();
      if (gps.encode(c)) // New sequence received
        newData = true;
    }
  }

  if (newData)
  {
    float flat, flon;
    unsigned long age;
    gps.f_get_position(&flat, &flon, &age);
    Serial.print("LAT=");
    Serial.print(flat == TinyGPS::GPS_INVALID_F_ANGLE ? 0.0 : flat, 6);
    Serial.print(" LON=");
    Serial.print(flon == TinyGPS::GPS_INVALID_F_ANGLE ? 0.0 : flon, 6);
    Serial.print(" SAT=");
    Serial.print(gps.satellites() == TinyGPS::GPS_INVALID_SATELLITES ? 0 : gps.satellites());
    Serial.print(" PREC=");
    Serial.print(gps.hdop() == TinyGPS::GPS_INVALID_HDOP ? 0 : gps.hdop());
  }

  gps.stats(&chars, &sentences, &failed);
  Serial.print(" CHARS=");
  Serial.print(chars);
  Serial.print(" SENTENCES=");
  Serial.print(sentences);
  Serial.print(" CSUM ERR=");
  Serial.println(failed);
}
Download the Code
All the code from this post is available for download on Github. 
