In the previous post we began assembling an adjustable voltage source for our electronics projects. This module works as an extension of the ATX power supply that we assembled in this tutorial, and will allow us to obtain all the voltages we may need in our projects.
In the previous post we saw the necessary materials and the total cost, which is approximately 20 euros. In this second post we are going to explain the electrical assembly and finish our adjustable voltage source.
Electrical scheme
As we mentioned in the first post, our power supply has an input that we will power with 12V from the ATX power supply. We also have two outputs, one reducing and one increasing voltage. The voltage is regulated by two potentiometers and displayed on two voltmeters. We also have a power switch, fuses, and protection diodes.
Below is the electrical diagram of the power supply (click on the image to enlarge) 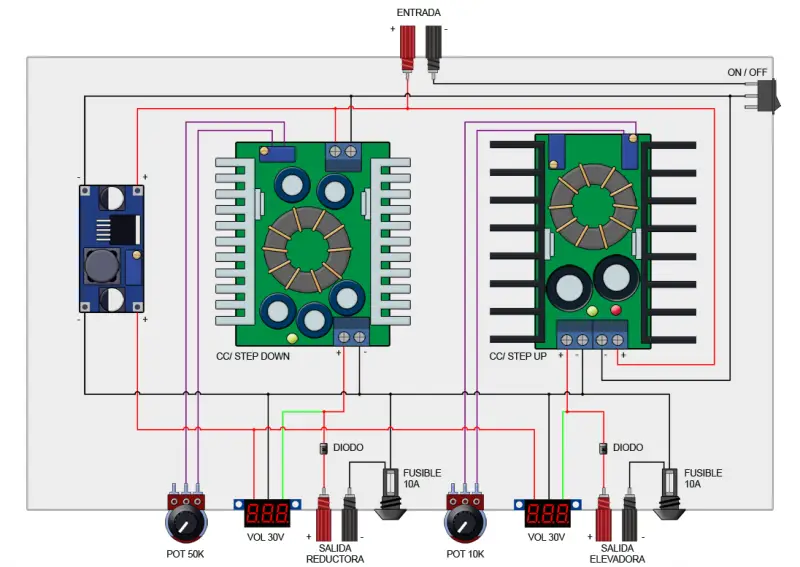
The diagram is not overly complicated. We need two stages of high-power DC/DC converters (10 or 15A each) to power the voltage outputs. On the other hand, we need a low-power DC/DC converter to power the screens independently.
In the primary stage (before the converters) we simply have to power the three converters from the input of the adjustable voltage source. We put a switch in the negative phase to turn our power supply on and off comfortably.
On the other hand, we desolder the potentiometers of the high-power DC converters, and replace them with our own to be able to regulate the voltage. You must measure the value of the removed potentiometer in order to replace it with one of the same resistance.
As for the secondary stage, the most important thing is to interconnect all the negative terminals so that they have the same voltage reference. Failure to do this could cause a short circuit when using both stages in the same project.
We connect the voltmeters, which have three conductors. Two of them are used to take the voltage reference from each of the outputs. The third conductor of each screen is connected to the low-power converter, to power them.
Finally, we connect the outputs of both stages to the banana terminals. We connect a fuse on the negative phases, and a protection diode on the positive. In my case, I will use 10A fuses and diodes.
All elements used must support the nominal voltage of the adjustable source. This includes conductors, switches, and diodes.
Electrical assembly
We start the assembly by placing the voltmeters. In my case, I used an all-purpose adhesive bar to fix the screens. 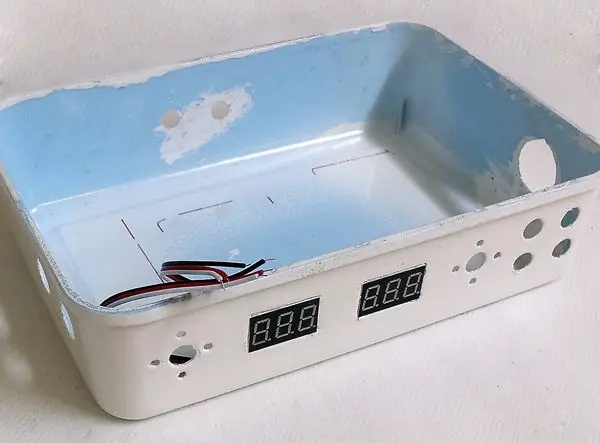
In my case, I used an all-purpose adhesive bar to fix the screens, putting a cord around it, and molding it with my hands. We make sure the screens are aligned, and let it harden. 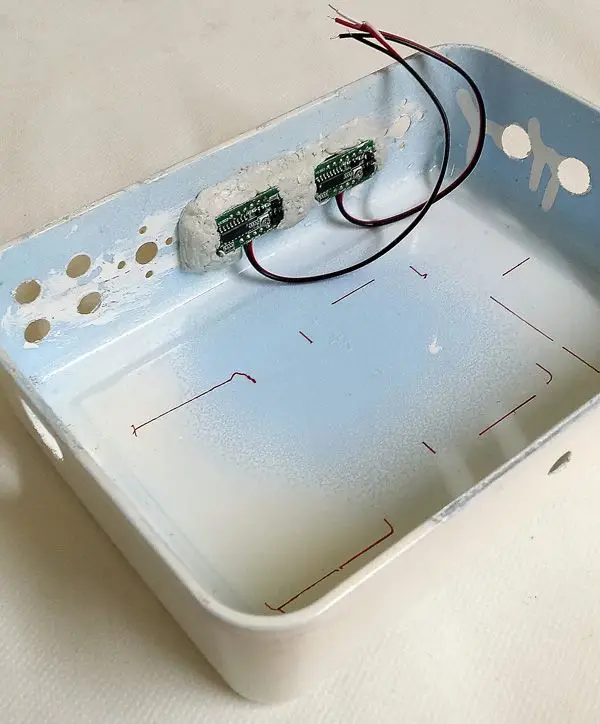
Next, we wire the DC converters. We connect cables to the inputs and outputs of the stages. We also remove the potentiometers installed on the boards and solder long cables in their place. 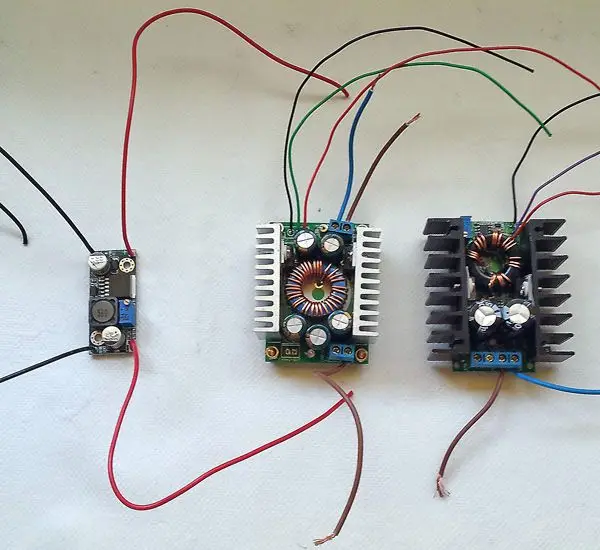
We install the boards in the plastic housing. In my case, I used double-sided tape to fix the stages. 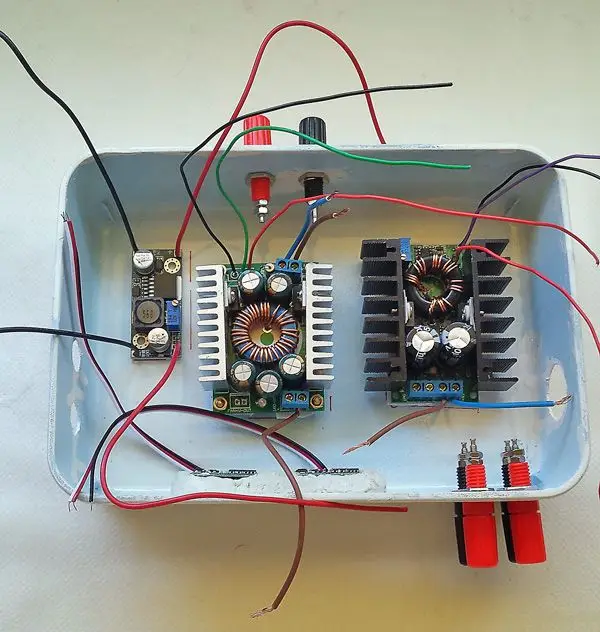
We wire the primary stage. We connect the converters to the input bananas and the switch in the negative phase. We also solder our potentiometers to the cables we installed earlier. 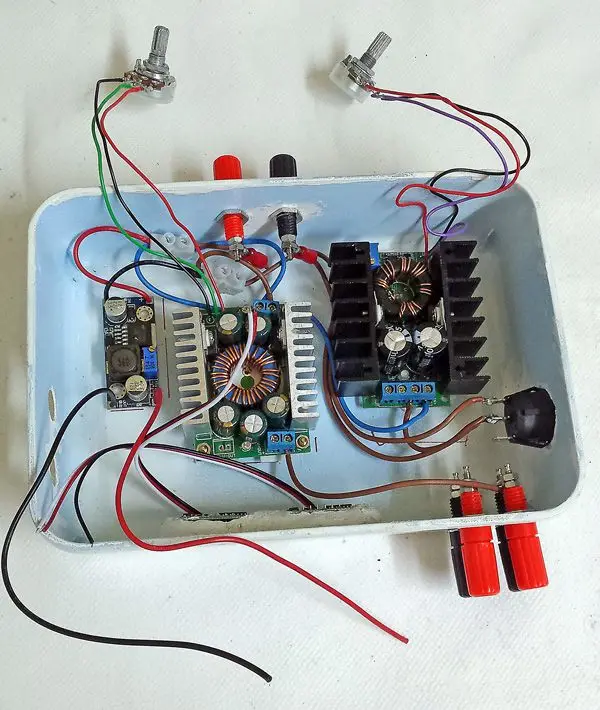
We finish the assembly by wiring the secondary phase. We connect all the negative phases together. We connect the converters to the output bananas, inserting the fuses in the negative phase, and the protection diodes in the positive phase. Finally, we connect the voltmeters to the voltage outputs. 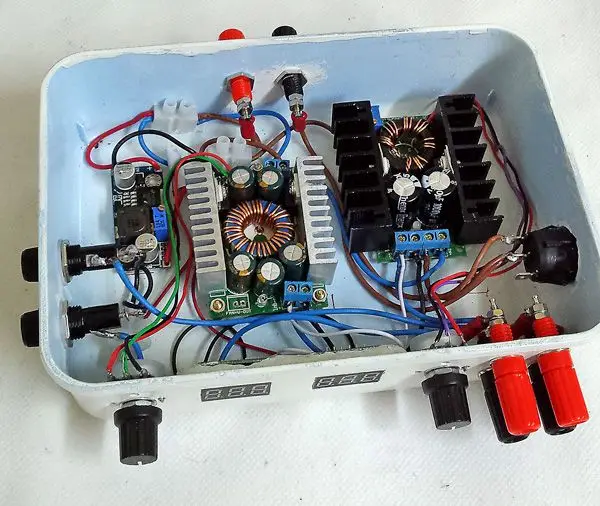
In the image below, the final assembly can be seen in operation. To power the adjustable voltage source, we used two 12-volt cables from our ATX power supply, which we left coiled at the back of the power supply precisely to power devices without using the banana terminals of the ATX power supply. 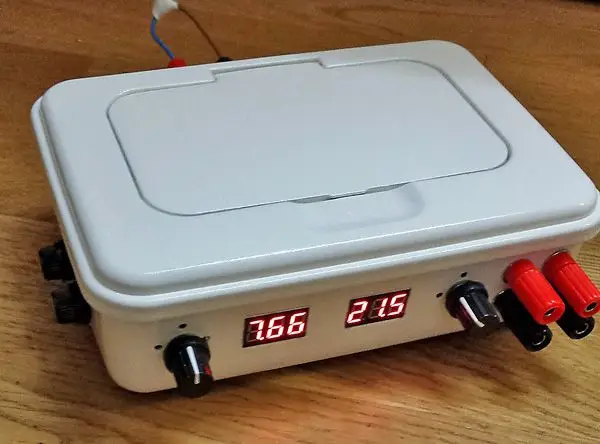
Another finished project! We now have an adjustable voltage source that, combined with our ATX power supply, gives us enormous versatility to supply voltage to all conceivable electronics and robotics projects, and at minimal cost.
