If you want to make electronics and robotics your hobby, sooner or later you will need a good power supply. The best option, by far, is to use an ATX computer power supply, as they have a great power in relation to their price and outputs for voltages usual in electronics (3.3V, 5V, and 12V).
In this post we are going to see how to assemble our own high-power homemade power supply with minimal cost.
The ATX power supply
ATX power supplies are those that are commonly used in computers. As we have said, they are ideal for our electronic projects since they have a great power and outputs at various levels of voltage common in electronics. In addition, having to comply with the ATX power supply standards, they are required to have a high degree of precision and regularity in the voltage outputs.
In fact, it is common to find projects that include an ATX power supply as the main power source. For this reason, ATX power supplies are one of the main components that we must keep and recycle in old computers (so if you weren’t doing it until now, you know!)
We can find power supplies in capacities from 300 to 700W. However, this does not mean that the power supply always consumes that energy, nor even that it is capable of supplying it. The power value should be taken as an approximate value provided by the manufacturer. To know exactly how much power it can supply at each voltage level, manufacturers provide a table with the maximum current available at each level.
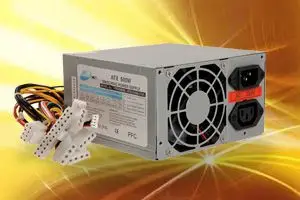
Specifically, the power supply I am going to use in this project is a 550W power supply. The table (figure in a tag on the side) informs that it can provide 25A at the 3.3V output, 35A at 5V, and 12A at the 12V output. That is, more than enough power for all our projects. In general, any power supply has more than enough power, so there is no need to spend more money on buying a more powerful power supply.
In the following image we can see the power supply that I am going to use in this project (click on the images in this post to enlarge them).
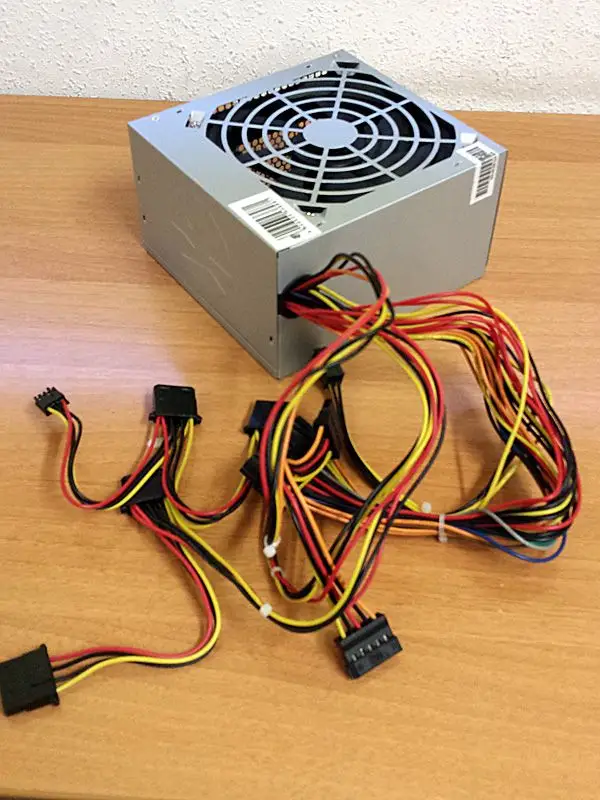
The first thing we see is a elegant bush large number of cables coming out of the power supply. The largest connector is the ATX connector, which in computers is connected and feeds the motherboard. This connector used to have 20 pins and later changed to 24. If you have old power supplies, you may still find the 20-pin connector. On the other hand, many power supplies have the additional 4 pins on an additional cable that can be separated (as shown in the image) to serve old computers.
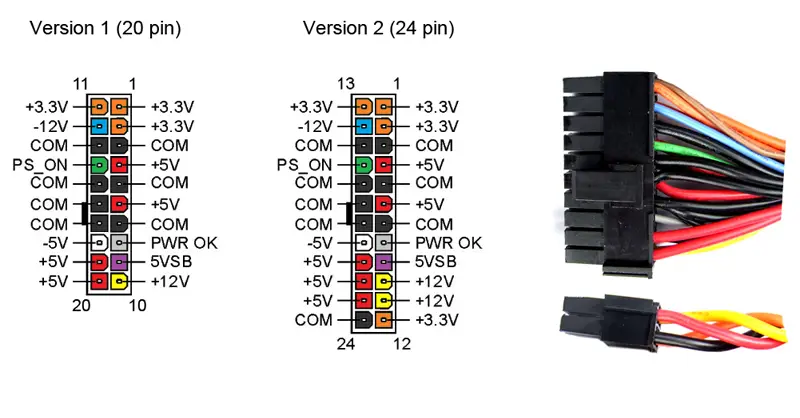
Each cable is color-coded, so two cables with the same color will have the same function. We have to choose which cables are of interest from all those available. In my case, I am interested in the following cables:
- Power on signal: Green (PS-ON).
- Voltage outputs: Yellow (+3V), Red (+5V), Purple (+5V SB), and Yellow (+12V).
- Ground: Black (GROUND).
The +5V SB conductor (where SB stands for Stand By) is a somewhat special output. This output remains under voltage even when the power supply is turned off. This will allow me, in the future, to power small sensor systems that turn on the power supply on their own.
On the other hand, although in some tutorials you will find that they take advantage of the outputs with negative voltages, I am not interested (nor do I recommend using them) as the current they allow is extremely small, and it is very easy to damage the power supply with a bad connection.
In addition to the ATX connector, the power supply has many other connectors. We can use these cables to connect plugs or quick connectors for devices that we use regularly (for example, a connector for an Arduino board, a micro USB connector, etc). The color code on the cables is the same as explained for the ATX connector. However, the following figure shows the diagrams of the most common connectors.

As a comment, it is worth mentioning that the 12V2 pin cable should not be confused with the cable extension (pay attention to the color of the cables). On the other hand, the IDE and SATA molex connector cables are the same, only the connector itself changes.
Components
In addition to the power supply, and of course solder and cables, we will need a few components to make our power supply look cool. The following image shows the components that we are going to use.
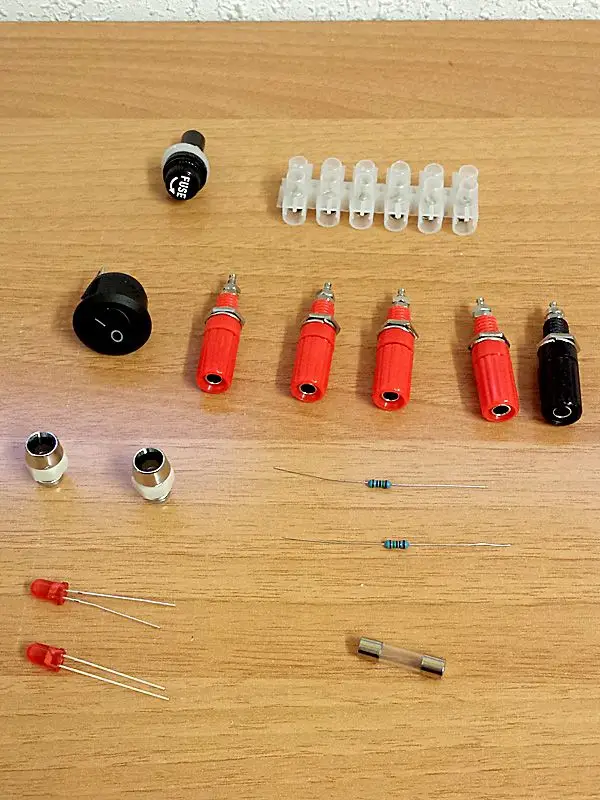
The complete list of components is as follows, including the prices of the items purchased on eBay from international sellers.
- Banana connectors (5 units): €1.5
- Fuse holder (1 unit): €0.50
- LED holder (2 units): €0.30
- 10A fuse (1 unit): €0.25
- Red LED (2 units): €0.10
- Connection plug (half plug): €0.50
- 220 Ohm resistors (2 units): €0.02
On certain occasions, a 10 Ohm and 10W resistor is needed, which costs €2, as in the following image.

We will see the function of this resistor in due course, but I will tell you that with the assembly we will carry out, it is most likely not necessary (I have never needed it). However, it is worth noting that it may be necessary in some power supplies.
Final budget
In summary, to carry out our project we will need an ATX power supply, although ideally we can take advantage of a power supply that we have saved. In any case, we can find a new power supply for €7 to €11. In principle, the power should not be a problem for us, as any ATX power supply in good condition will serve us, although logically, for the same price, we would prefer a 500W power supply to a 300W one.
The rest of the necessary components cost between €3 and €4. In case you need a cable with clamps and bananas, add another €1.20 (strictly speaking, it is not a component, but if you don’t have it, you will have to buy it).
Therefore, we can assemble our electronic power supply for about €5 if we can take advantage of a power supply, or €10 to €15 if we have to include the purchase of an ATX power supply. As you can see, these are very reasonable prices for a component that will be essential in all our future projects.
In the next post we will see the schematic and the assembly process, and we will finish the project of our high-power electronic power supply.
