Source control is an essential tool for any developer. In this post, we will see how to configure Bitbucket with Visual Studio.
Nowadays, it’s hard to imagine working without source control even on personal projects, and practically impossible in team projects.
There is a wide variety of alternatives for source control. From Visual Studio Team, the most common in Microsoft systems, in its Foundation (self-hosted) or Services (cloud) versions. To the well-known Github, widely used in Open Source projects.
In its free version, Teams Services allows an unlimited number of private repositories for teams of up to 5 people. While the free version of Github only allows public repositories.
In this post, we will see another widely known alternative, Bitbucket, an online service from the company Atlassian. Like Teams Services, the free version allows unlimited private repositories and teams of up to 5 members.
In certain situations, it is preferable to use Bitbucket over Teams Services. For example, if a team member uses an incompatible IDE, or if the team prefers Bitbucket’s way of working.
In any case, using Bitbucket with Visual Studio for source control is very simple and the integration is almost perfect, as we will see below.
Installing Bitbucket with Visual Studio
The latest versions of Visual Studio include Git compatibility, so they are basically compatible with Bitbucket. We only need to install an extension to simplify the process.
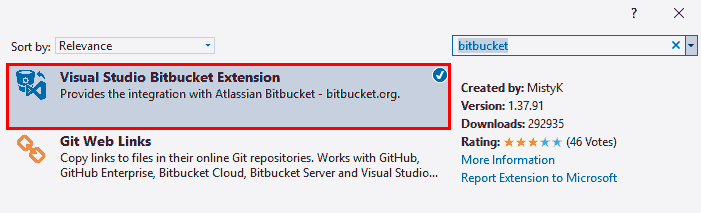
So, we search for and install the Visual Studio Bitbucket Extensions.
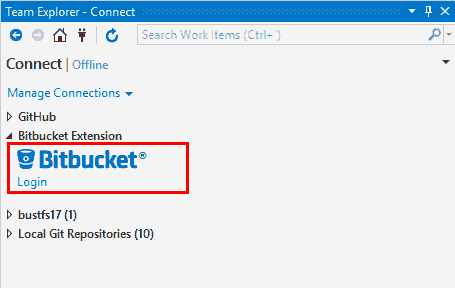
Once installed, we go to the Team Explorer tool window, expand the Bitbucket Extensions section, and click on login.
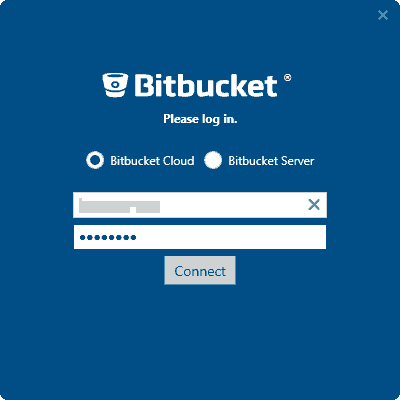
We enter our Bitbucket login credentials.
It’s that simple, we now have Visual Studio configured with Bitbucket. Now let’s see how to work with it.
Using Bitbucket with Visual Studio
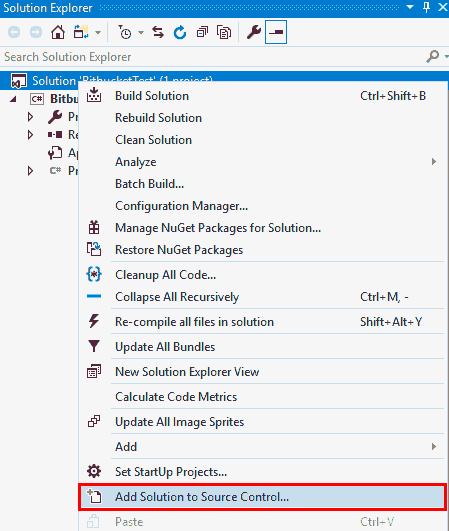
Let’s test using Bitbucket. We open any existing project, or create one for testing. We right-click on it and choose “Add Solution to Source Control”
Next, we choose “Sync”.

Since it’s the first time we are syncing the project, it will ask us to create a repository. The name should contain only lowercase letters, without spaces.

A local Git repository will be created, and it will be synchronized with the newly created remote repository in BitBucket.
Testing Bitbucket with Visual Studio
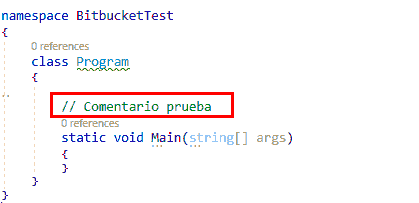
Let’s test using Bitbucket. For example, we write a comment in any file of our project.
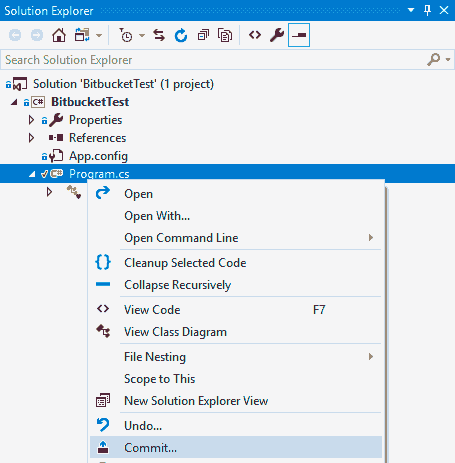
We right-click on the modified file and select “Commit”.
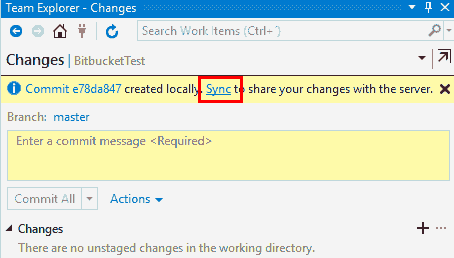
We add a comment describing the Commit.

The commit is created in the local Git repository. Now, to synchronize it with the remote Bitbucket repository, we click on “Sync”
Now we will have, in each function, all the changes uploaded by all project authors.
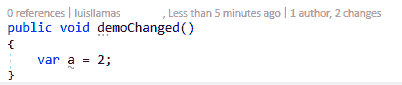
Clicking on this header will allow us to see all changes made by users.

Of course, we have all the usual Git repository functions (retrieve any version, compare versions, branch, merge)
It’s that simple. Using Bitbucket with Visual Studio is a good alternative to Github or even Teams Services for source control, and we can use it in our projects or in small teams.