In this tutorial, we are going to see how to create a hybrid desktop application that combines WPF, Webview2, ASP.NET Core, and React as the frontend.
In the previous article, we explained how to set up the application’s backend. Today we will see how to consume that backend from a React application.
If you haven’t seen the previous article yet, you can check it out here: How to Create a Hybrid WPF + ASP.NET Core + Web as UI Application
Create the React Project
The first step is to create our web application, which will serve as the user interface (UI). In this case, we will use React to build a simple application.
To create the project, open a terminal at the solution’s root and run the following commands:
npm create vite@latest ClientReact —template react cd ClientReact npm install
Configure the React Application
Now we are going to configure the React application to communicate correctly with our backend.
To do this, create a .env file in the ClientReact directory and add the following configuration:
VITE_API_URL=http://localhost:5000
However, when the app starts in desktop mode, the port will vary (it won’t always be 5000). To manage this, we create a .env.production file.
VITE_API_URL=
With this, when we are in production, calls to the backend will be made with relative paths, so it will work because the web will be served from the backend with the correct port.
Next, modify the vite.config.js file as follows:
import { defineConfig } from "vite";
import react from "@vitejs/plugin-react";

export default defineConfig({
  plugins: [react()],
  server: {
    proxy: {
      "/api": "http://localhost:5000", // Redirects API requests to the C# API
    },
  },
});
This configuration redirects API routes to our WPF application with ASP.NET, avoiding CORS issues during development.
Create the React Application
Next, we are going to create a simple React application to verify that the connection with the ASP.NET backend works correctly. First, create the App.jsx file with the following content:
import { Link } from 'react-router-dom';

function App() {
  return (
    <div>
      <nav>
        <Link to="/">Home</Link>
        <Link to="/about">About</Link>
        <Link to="/fetch">Fetch</Link>
        <Link to="/signalr">SignalR</Link>
      </nav>
    </div>
  );
}

export default App;
Add the Router
To handle routes in our application, install react-router-dom with the following command:
npm install react-router-dom
Then, create the router.jsx file and add this code:
import { BrowserRouter as Router, Routes, Route } from 'react-router-dom';
import Home from './views/Home';
import About from './views/About';
import Fetch from './views/Fetch';
import SignalR from './views/SignalR';
import App from './App';

function AppRouter() {
  return (
    <Router>
      <App />
      <Routes>
        <Route path="/" element={<Home />} />
        <Route path="/about" element={<About />} />
        <Route path="/fetch" element={<Fetch />} />
        <Route path="/signalr" element={<SignalR />} />
      </Routes>
    </Router>
  );
}

export default AppRouter;
Create the Views
Now we will create the views for our application in the src/views folder. Our Demo will have the following views.
The main page:
export default function Home() {
  return (
    <div>
      <h1>Home</h1>
      <p>This is the home page.</p>
    </div>
  );
}
A simple page that displays static information about the application (to demonstrate how to create simple pages).
export default function About() {
  return (
    <div>
      <h1>About</h1>
      <p>This is the application information page.</p>
    </div>
  );
}
A page that shows how to make API calls using fetch. It will connect to our three endpoints (demo, forecast, and files):
import { useEffect, useState } from 'react'

function App() {
  const [data, setData] = useState(null)
  const [forecasts, setForecasts] = useState()
  const [files, setFiles] = useState()


  useEffect(() => {
    fetch(`${import.meta.env.VITE_API_URL}/api/demo`)
      .then(res => res.json())
      .then(data => setData(data))
  }, [])

  useEffect(() => {
    populateWeatherData()
    getFiles()
  }, [])

  async function populateWeatherData() {
    const response = await fetch(`${import.meta.env.VITE_API_URL}/weatherforecast`)
    if (response.ok) {
      const data = await response.json()
      setForecasts(data)
    }
  }

  async function getFiles() {
    const response = await fetch(`${import.meta.env.VITE_API_URL}/files`)
    if (response.ok) {
      const data = await response.json()
      setFiles(data)
    }
  }

  const contents = forecasts === undefined || files === undefined
  ? <p><em>Loading... Please refresh once the ASP.NET backend has started. See <a href="https://aka.ms/jspsintegrationreact">https://aka.ms/jspsintegrationreact</a> for more details.</em></p>
  : <>
    <ul>
      {files.map(file => <li key={file}>{file}</li>)}
    </ul>
  </>

  return (
    <>
      <h1>{data?.message || "Loading..."}</h1>
      <ul>
        {contents}
      </ul>
    </>
  )
}

export default App
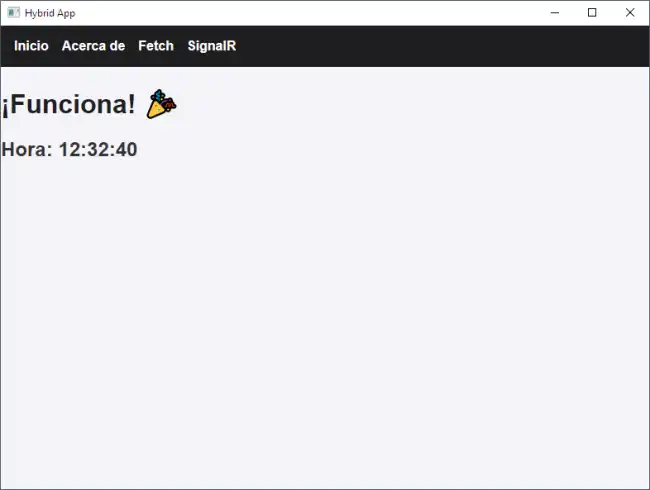
A page that shows real-time communication via SignalR:
import { useEffect, useState } from 'react'
import * as signalR from '@microsoft/signalr'

function App() {
  const [data, setData] = useState(null)
  const [time, setTime] = useState("") // New state for the time

  useEffect(() => {
    fetch(`${import.meta.env.VITE_API_URL}/api/demo`)
      .then(res => res.json())
      .then(data => setData(data))
  }, [])

  useEffect(() => {
    const connection = new signalR.HubConnectionBuilder()
      .withUrl(`${import.meta.env.VITE_API_URL}/clockHub`) // Hub route
      .withAutomaticReconnect()
      .configureLogging(signalR.LogLevel.Information)
      .build()

    connection.start()
      .then(() => console.log("Connected to SignalR"))
      .catch(err => console.error("Error connecting to SignalR:", err))

    // Listen for the "ReceiveTime" event from the hub
    connection.on("ReceiveTime", (time) => {
      console.log("Time received:", time)
      setTime(time)
    })

    // Cleanup on component unmount
    return () => {
      connection.stop()
    }
  }, [])

  return (
    <>
      <h1>{data?.message || "Loading..."}</h1>
      <h2>Time: {time || "Disconnected"}</h2> {/* Displays the time in real-time */}
    </>
  )
}

export default App
Style the Application
Finally, we add a bit of CSS to our project. You can use any library or framework you want, or do it with CSS. Here is a simple example just for the demo.
body {
  font-family: Arial, sans-serif;
  margin: 0;
  padding: 0;
  background-color: #f4f4f9;
  color: #333;
}

nav {
  background-color: #1f1d21;
  padding: 1rem;
  display: flex;
  gap: 1rem;
}

nav a {
  color: white;
  text-decoration: none;
  font-weight: bold;
}

nav a:hover {
  text-decoration: underline;
}

.container {
  padding: 2rem;
}

h1 {
  color: #1f1d21;
}
Run the Application
Now we can launch our application, either as a web app or as a Desktop application, simply by changing the configuration (as we saw in the previous post).
Download the Code
All the code from this post is available for download on Github.

In the next tutorial, we will see how to integrate Vue.js into our hybrid application. Don’t miss it! 🚀