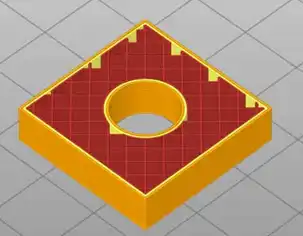
The infill is the internal filling of a 3D printed part, generated to give it strength and rigidity without needing to use an excessive amount of material.
Imagine you are printing a cube. If you print it completely solid, you will use a lot of material, and it will also take a long time to print.
When we print an object, it is not always necessary for it to be completely solid (in fact, in most cases, it isn’t).
By printing the part partially hollow, we can significantly reduce print time and material consumption, while maintaining a good portion of the part’s strength and rigidity.
Infill is important for several reasons:
- Strength and rigidity: The infill provides the necessary internal structure for the part to be strong and rigid.
- Material consumption: It allows you to significantly reduce the amount of material you use.
- Print time: It reduces print time, as the printer has to deposit less material.
- Part weight: A low-density infill also reduces the weight of the part.
Infill Density
The infill density is one of the most important factors to consider when talking about filling.
Density refers to the amount of material used for the internal filling of the part and is expressed as a percentage.
For example, 20% infill means that 20% of the internal volume of the part is filled with material, while the remaining 80% is empty.
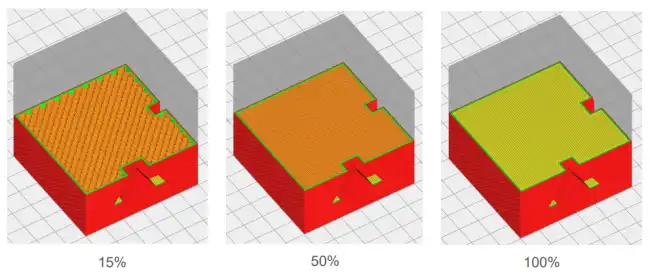
Logically, the lower the percentage of the part we fill with material,
Less material (less time, less cost, less weight)
But also, less strength of the part
Choosing the Correct Percentage
The choice of infill density depends on several factors, such as the strength you need, print time, and material consumption. Here are some general guidelines:
Low density (0-20%): For decorative parts or quick prototypes where strength is not critical. These parts will be lightweight and quick to print.
Medium density (20-50%): Used in functional parts that require a combination of strength and lightness. It’s a good option for objects that must withstand moderate loads.
High density (50-100%): Recommended for parts that must withstand high stresses or impacts. These parts will be heavier and take more time and material to print, but will provide maximum strength.
The 70-99% range is best avoided. It doesn’t offer significant material advantages compared to the time/material saving factor (due to stress concentrators).
For example, if you are going to fill at 90%, you might as well fill directly at 100%.
Types of Infill
Another parameter is the geometry of the infill we are going to create. There are several types of infill, each with its own characteristics and applications. Let’s look at the most common ones:
Rectilinear infill, also known as Grid, is one of the simplest and most common patterns.
It consists of a series of straight lines that intersect at right angles, forming a grid.
This type of infill is easy to print and provides good strength in all directions.
Triangle infill is similar to rectilinear, but instead of straight lines, it uses triangles.
This pattern provides greater strength than rectilinear, especially in applications where the part is subjected to forces in different directions.
Hexagon infill, also known as Honeycomb, is one of the most efficient patterns in terms of strength and material consumption.
Hexagons are a very stable geometric shape, making this type of infill ideal for parts that require high strength with a minimum of material.
Cubic infill is a three-dimensional pattern that provides uniform strength in all directions.
This type of infill is ideal for parts subjected to forces in multiple directions, as it provides a very stable internal structure.
Gyroid infill is a very interesting three-dimensional pattern. It consists of a series of curved surfaces that interlace, forming a very strong and lightweight structure.
This type of infill is ideal for parts that require high strength with a minimum of material.
In general, the most normal and simple is rectilinear. It’s usually not necessary to change it.