What is a CCS811
The CCS811 is a sensor from the manufacturer AMS for measuring indoor air quality, which we can easily use together with a processor like Arduino.
To determine indoor air quality, the CCS811 is a multi-gas MOX (Metal-Oxide) sensor that includes measurement of carbon monoxide (CO) and volatile compounds (VOCs) such as ethanol, amines, or aromatic hydrocarbons.
With them, the CCS811 can determine the equivalent carbon dioxide (eCO2) amount. The measurement range is from 400 to 8192 ppm in eCO2 and from 0 to 1187 ppb in TVOC. The datasheet does not provide data on measurement accuracy.
Like most chemical sensors, the CCS811 needs a pre-heater. The manufacturer recommends that the sensor operate for 20 minutes for the measurements to stabilize, and for 48 hours if the location is changed.
The CCS811 includes an internal ADC converter, an internal processor to perform calculations, and communication via an I2C bus. So it is very easy to connect it with a processor like Arduino.

It has 5 measurement modes (continuous measurement, or measurement every 0.250, 1, 10, 60 seconds) that allow it to be adapted to low-power applications powered by batteries.
The voltage of the CCS811 is 1.8 to 3.3V, although in many modules a level adapter is incorporated that allows it to operate directly with 5V.
Price
CCS811s are one of the cheapest indoor quality sensors we can find. We can find them for 4.5 - 5€ from international sellers on eBay and AliExpress.
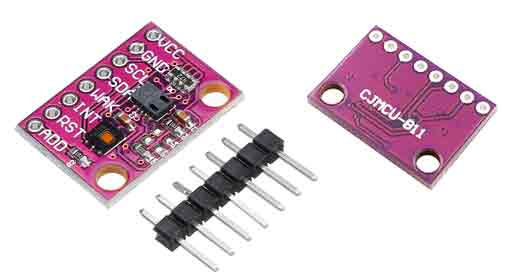
Assembly scheme
The connection with the CCS811 is simple, as communication is done through I2C. The operating voltage is 1.8 to 3.3V, but many modules incorporate 5V adaptation.
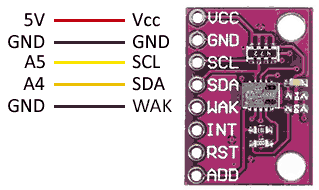
Therefore, to power the module we will connect the module pins GND and Vin, respectively, and GND and 5V on Arduino.
On the other hand, for communication via I2C, we must connect the SCK and SDA pins with the corresponding pins of our Arduino model.
The WakeUp pin activates the sensor when it is set to GND. On the other hand, the RST pin resets the sensor when it is set to GND. Both are pulled Up, so, for it to work, we must explicitly set WAKE to GND.
Finally, the INT pin is used in some operating modes, to detect when the sensor has a new measurement or exceeds a threshold.
The connection, seen from Arduino, would be as follows.
Check that your module is compatible with 5V, otherwise use a level converter.
Code examples
To read the sensor, we will use the library developed by Adafruit, available at this link.
The library incorporates several usage examples that it is advisable to review. The code below is a simplified code based on the examples in the library.
#include "Adafruit_CCS811.h"

Adafruit_CCS811 ccs;

void setup() {
  Serial.begin(9600);

  Serial.println("CCS811 test");

  if(!ccs.begin()){
    Serial.println("Failed to start sensor! Please check your wiring.");
    while(1);
  }

  // Wait for the sensor to be ready
  while(!ccs.available());
}

void loop() {
  if(ccs.available()){
    if(!ccs.readData()){
    Serial.println(ccs.calculateTemperature(););
    Serial.print("ºC, CO2: ");
      Serial.print(ccs.geteCO2());
      Serial.print("ppm, TVOC: ");
      Serial.println(ccs.getTVOC());
  }
    else{
      Serial.println("ERROR!");
      while(1);
    }
  }
  delay(500);
}
Download the code
All the code in this post is available for download on Github. 
