What is a MAX9812?
The MAX9812 is a sound amplifier specially designed to process signals from microphones. We can use it with Arduino to measure sound from a processor like Arduino.
When we saw the microphone modules, we mentioned that, in general, the generated signal is too low to be properly recorded. If we want to be able to measure sounds, we need to amplify the signal.
The MAX9812 has single/dual inputs, fixed gain of 20dB, bandwidth of 500 kHz, low noise, and low signal distortion of 0.015% THD. There are two models, the MAX9812L has a supply voltage of 2.7V to 3.6V, and the MAX9812H has a supply voltage of 45V to 5.5V.
We can use sensors with MAX9812 for applications that require measuring the intensity or frequency of sound. For example, we can vary the lighting of an LED strip based on sound, or display an equalizer on a TFT screen.
If we only want to detect the sound, and not measure its volume or frequency, we can use a module like the KY-038 microphone with comparator, which provides a digital output when the sound exceeds a certain threshold.
Price
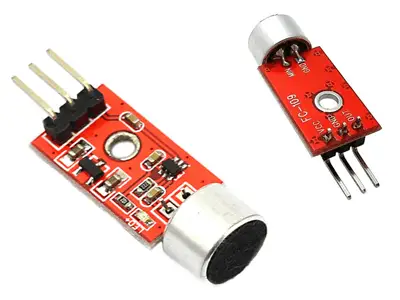
Sensors with MAX9812 are very cheap. We can find modules like the FC-109, which incorporate the microphone and MAX9812 amplifier on a board that is easy to connect to Arduino for €0.85, by searching international sellers on eBay or AliExpress.
There is also an improved version, the MAX9814, which has a variable gain at 40, 50, or 60DB, although the price is much higher, around €2.45.
Assembly diagram
The electrical diagram is simple. We power the module by connecting GND and 5V to the corresponding pins on Arduino. On the other hand, we connect the sensor’s analog output to an analog input on Arduino.
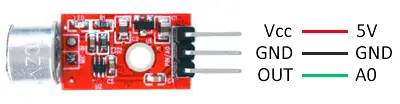
While the connection seen from Arduino would look like this,
When handling sounds, the first thing we must understand is that the signal we obtain varies rapidly and also has a lot of noise. In this way, the specific value of a measurement is usually not important, and we must carry out the integration over a certain period. For this, it is usual to work with time windows, that is, an interval in which we take the measurement.
To do this, we define a time window of 50 ms, equivalent to a frequency of 20 Hz, and calculate the maximum and minimum recorded within the window. Then we display the value recorded through the serial port.
const int sensorPIN = A0;
const int sampleWindow = 50; // Window width in mS (50 mS = 20Hz)

void setup()
{
   Serial.begin(9600);
}

void loop()
{
   unsigned long startMillis= millis();

   unsigned int signalMax = 0;
   unsigned int signalMin = 1024;

   // Collect during window
   unsigned int sample;
   while (millis() - startMillis < sampleWindow)
   {
      sample = analogRead(sensorPIN);
      if (sample < 1024)
      {
         if (sample > signalMax)
         {
            signalMax = sample;  // Update maximum
         }
         else if (sample < signalMin)
         {
            signalMin = sample;  // Update minimum
         }
      }
   }
   unsigned int peakToPeak = signalMax - signalMin;  // Sound amplitude
   double volts = (peakToPeak * 5.0) / 1024;  // Convert to voltage
   Serial.println(volts);
}
Download the code
All the code from this post is available for download on Github. 
