The REPL (Read-Eval-Print Loop) is a fundamental tool in MicroPython that allows us to interact directly with the board in real time.
In our first program already (previous tutorial) we saw how the REPL took the program sent by the IDE, and it was executed by the interpreter in the MicroPython firmware.
The REPL is an interactive environment that allows executing MicroPython commands directly on the board.
Basically, it allows us to communicate with the Python interpreter on the device, from outside of it, through a serial communication.
Its name comes from the acronym Read-Eval-Print Loop, which describes its operation:
- Read: The REPL reads the command you enter.
- Eval: It evaluates and executes the command.
- Print: It displays the execution result.
- Loop: It repeats the process, allowing you to enter new commands.
The REPL is not exclusive to MicroPython. It’s a concept that exists in other languages and technologies. They are useful for running quick tests, debugging code, and exploring functionalities without needing to load complete programs.
In this article, we will see how it works, its main features, and how to get the most out of it in MicroPython project development.
Accessing the REPL in MicroPython
To access the REPL, you simply need to connect your device to your computer using a USB cable (that easy!).
Then, you can use a terminal tool like Arduino Lab for MicroPython, Thonny, PuTTY (Windows only) to establish communication with the board.
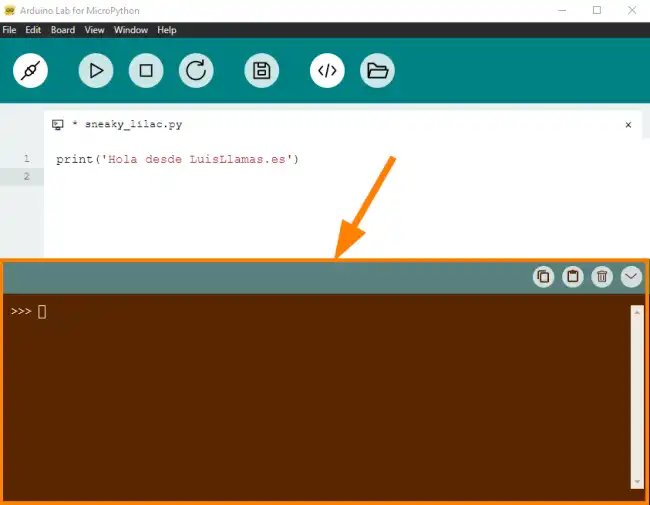
In Arduino Lab for MicroPython, the REPL is always there, occupying the bottom part of the program.
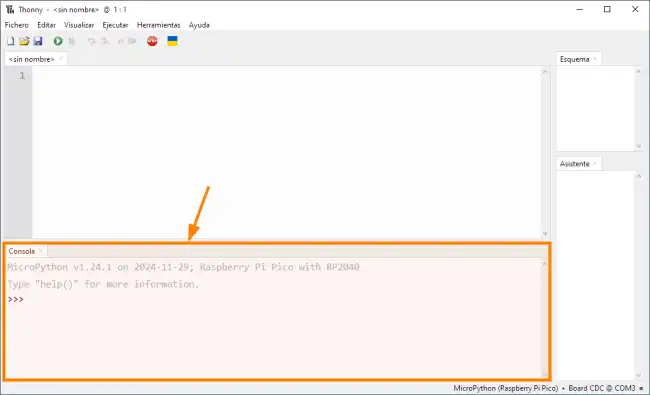
Similarly, in Thonny we also find the REPL at the bottom of the program.
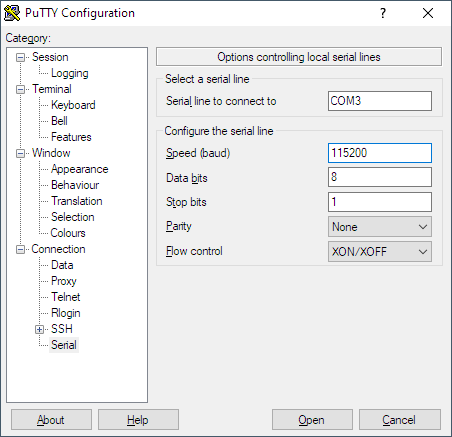
If you want to use PuTTY, simply select the serial port corresponding to your board. Configure the speed (baud rate) to 115200, and press Open to view the REPL.
Testing the REPL
Let’s test the REPL in a simple way. In the IDE you have chosen, type the following in the REPL.
print("Hello from LuisLlamas.es")
You will see that, very similarly to what happens with a PC Python interpreter, MicroPython responds through the REPL.
>>> print("Hello from LuisLlamas.es")
Hello from LuisLlamas.es
But you can try more things! For example:
# Sum of two numbers
a = 10
b = 5
sum = a + b
print("The sum is:", sum)

# Read a text variable from user input
name = input("Enter your name: ")
print("Hello,", name)
And it will respond:
>>> a = 10
>>> b = 5
>>> sum = a + b
>>> print("The sum is:", sum)
The sum is: 15
>>> name = input("Enter your name: ")
Enter your name: Luis
>>> print("Hello", name)
Hello Luis
Isn’t it cool? Well, it’s only a small part of what we can do.
Advanced REPL Features
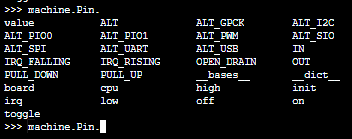
The REPL in MicroPython supports command autocompletion. This is especially useful when exploring modules or functions. To use it, type part of a command and press Tab. For example:
>>> import machine
>>> machine.Pin. #<-- here you press Tab
This will show a list of available methods and attributes in the Pin class.
You can navigate through the command history using the arrow keys ↑ and ↓. This allows you to reuse previous commands without having to retype them.
The REPL allows editing lines of code before executing them. You can move the cursor with the ← and → arrows, and delete characters with Backspace or Delete.
Although the REPL is designed for single-line commands, you can execute more complex code blocks using indentation. For example:
>>> for i in range(5):
...     print(i)
...
0
1
2
3
4
