
What is a PIR sensor?
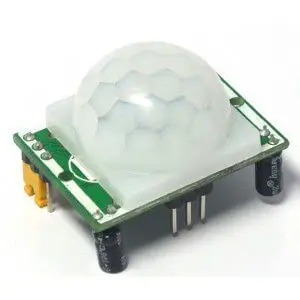
Passive infrared sensors (PIR) are devices for motion detection. They are cheap, small, low-power, and easy to use. For this reason, they are frequently used in toys, home automation applications, or security systems.
PIR sensors are based on the measurement of infrared radiation. All bodies (living or not) emit a certain amount of infrared energy, which is higher the higher their temperature. PIR devices have a pyroelectric sensor capable of capturing this radiation and converting it into an electrical signal.
In reality, each sensor is divided into two fields and has an electrical circuit that compensates for both measurements. If both fields receive the same amount of infrared, the resulting electrical signal is zero. On the contrary, if the two fields make a different measurement, an electrical signal is generated.
In this way, if an object passes through one of the fields, a differential electrical signal is generated, which is captured by the sensor, and a digital signal is emitted.
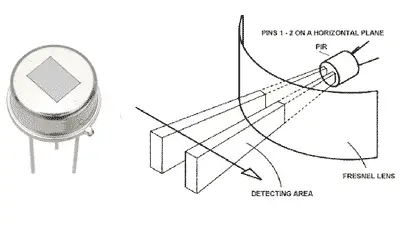
The other remaining element for everything to work is the optics of the sensor. Basically, it is a plastic dome formed by fresnel lenses, which divides the space into zones and focuses the infrared radiation on each of the PIR’s fields.
In this way, each of the sensors captures an average of the infrared radiation in the environment. When an object enters the sensor’s range, one of the zones marked by the optics will receive a different amount of radiation, which will be captured by one of the PIR sensor’s fields, triggering the alarm.
Price
PIR sensors are cheap devices. PIR sensors can be found for €0.80 from international sellers on Ebay or AliExpress.
Electrical schematic
This is the pinout diagram for a PIR sensor.
The electrical schematic we need is the following.

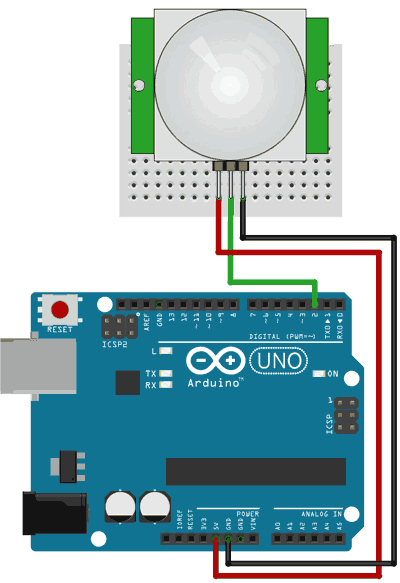
Assembly schematic
While the assembly on a breadboard would be as follows.
Code example
The code needed to perform the reading is simple. We simply read the output of the PIR, and flash the LED while the signal is active.
const int LEDPin = 13;
const int PIRPin = 2;

void setup()
{
  pinMode(LEDPin, OUTPUT);
  pinMode(PIRPin, INPUT);
}

void loop()
{
  int value = digitalRead(PIRPin);

  if (value == HIGH)
  {
    digitalWrite(LEDPin, HIGH);
    delay(50);
    digitalWrite(LEDPin, LOW);
    delay(50);
  }
  else
  {
    digitalWrite(LEDPin, LOW);
  }
}
If we wanted to perform an action only once when motion is detected, instead of all the time the signal is active, we would use the following code.
const int LEDPin = 13;        // pin for the LED
const int PIRPin = 2;         // input pin (for PIR sensor)

int pirState = LOW;           // by default there's no movement
int val = 0;                  // pin state

void setup()
{
  pinMode(LEDPin, OUTPUT);
  pinMode(PIRPin, INPUT);
  Serial.begin(9600);
}

void loop()
{
  val = digitalRead(PIRPin);
  if (val == HIGH)   //if it's activated
  {
    digitalWrite(LEDPin, HIGH);  //LED ON
    if (pirState == LOW)  //if it was previously off
    {
      Serial.println("Sensor activated");
      pirState = HIGH;
    }
  }
  else   //if it's deactivated
  {
    digitalWrite(LEDPin, LOW); // LED OFF
    if (pirState == HIGH)  //if it was previously on
    {
      Serial.println("Sensor stopped");
      pirState = LOW;
    }
  }
}
Download the code
All the code from this post is available for download on Github. 
