Today we are going to see how to configure the new Windows Terminal to get the most out of this interesting command console from Microsoft.
In the previous post we saw what the new Windows Terminal is, and how it incorporated important functional and aesthetic improvements over the previous console application.
Now we are going to configure it, for which we will use its customization capability by including additional modules.
Install Developer Font
The first thing we must do to configure the Windows terminal is to install a font specially designed for developers, suitable for displaying code snippets.
This type of fonts include typographies specially prepared to be especially legible. They also include other interesting features such as icons, ligatures, or adequate spacing.
We can download fonts for developers from the page https://www.nerdfonts.com/. Personally, I like the Incosolata font (model with Windows Compatibility), but use the one that suits your preferences.
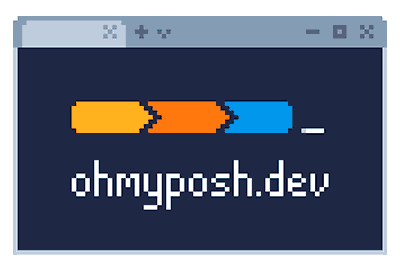
Install Oh My Posh
Next we are going to install PowerLine, which allows us to improve the appearance of the current console line. It is a popular plugin, available in many terminal developments.
To install it in PowerShell we will use Oh-My-Posh, for which we execute the following command,
winget install JanDeDobbeleer.OhMyPosh -s winget
Next we must configure Oh-My-Posh by editing the $profile file. If it is the first time we edit it, we will previously have to create it by executing,
New-Item -Path $PROFILE -Type File -Force
Once created, we can edit it with notepad (or any other text editor) by doing,
notepad $PROFILE
In the $profile file we must add this line, which simply starts Oh-MyPosh when PowerShell starts.
oh-my-posh init pwsh | Invoke-Expression
Finally, we make the changes to the profile effective by executing the following command,
. $PROFILE
Customize Oh-My-Posh Appearance
Next we have to select one of the available Themes. For that, first we execute the following command to list all the Themes,
Get-PoshThemes
We can select one of these predefined Themes, or create our own Theme. If we want to create our own Theme, we would go to the themes folder, located in the following environment variable
%POSH_THEMES_PATH%
There, we would create a JSON file containing the configuration of our Theme. However, it is normal to work based on one of the existing JSON files and modifying it to our liking, rather than starting one from scratch.
In any case, whether with one of the predefined Themes or with our own Theme, we will have to modify the configuration file to indicate that it loads the Theme during PowerShell startup.
To do this, we edit the $profile file again, replacing the line we have put with this one
oh-my-posh init pwsh —config “$env
Where ‘default.json’ is the name of the Theme we want to apply.
Install Git Module
Another interesting improvement we can include in our Windows Terminal is adding Git compatibility to the PowerLine. For this we would install the posh-git module using the following command
Install-Module posh-git -Scope CurrentUser
Now we must load this module at startup. To do this, we include it in our $profile in the same way we did with Oh-My-Posh, adding the following line at the end of the file
Import-Module posh-git
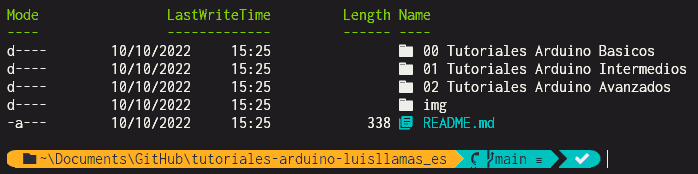
Install Icons for Files and Folders
Finally, another interesting module we can use to personalize our Windows terminal is adding the Terminal-Icons module, which adds icons to files and folders. First we install it using the following command,
Install-Module -Name Terminal-Icons -Repository PSGallery
As in the previous cases, we will have to add it to our $profile configuration file, including the following line
Install-Module -Name Terminal-Icons -Repository PSGallery Import-Module -Name Terminal-Icons
Code Links
https://github.com/jandedobbeleer/oh-my-posh https://github.com/devblackops/Terminal-Icons https://github.com/dahlbyk/posh-git
References
https://ohmyposh.dev/docs/installation/windows https://www.hanselman.com/blog/how-to-make-a-pretty-prompt-in-windows-terminal-with-powerline-nerd-fonts-cascadia-code-wsl-and-ohmyposh
