We continue looking at how our FFF 3D printer works, within our section dedicated to design for 3D printing.
In this introductory post we saw how an FFF 3D printer works and in the previous post how its kinematics work. Now it’s time to go into detail, looking at the main parts of a 3D printer.
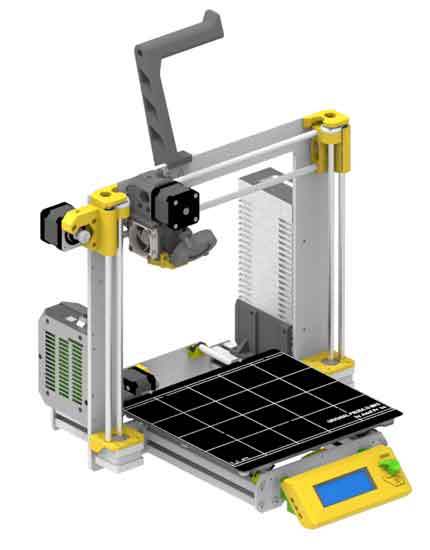
We are going to talk about printers “in general”, without focusing on any specific model. Although, if you want, you can have the image of any of them, like the well-known Prusa I3.
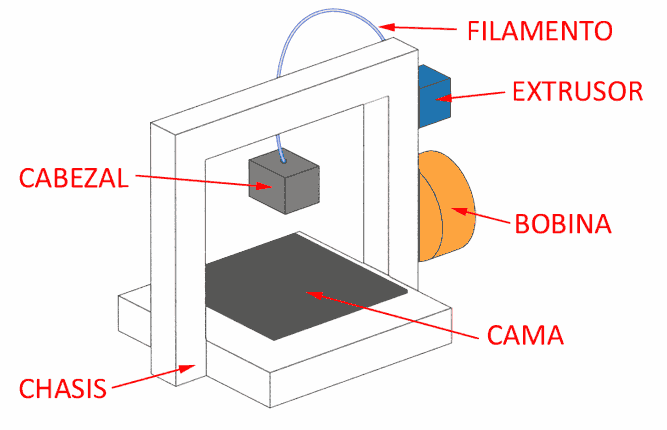
 Speaking generally, we have already seen that the main objective of a 3D printer is to position the print head at a precise relative position relative to the bed.
The bed is the surface where we will build our part. Usually the bed is heated, to improve the adhesion of the part (in fact, if it is not heated, you would have a “hard time”).
As we said, another fundamental element is the head or hotend, the element that melts the filament. We will see it in detail in due time, but we advance that it contains an element that heats the plastic, and a sensor that is responsible for controlling the temperature.
Of course, at some point on the printer, either next to it, on top of it, or on a stand on the table, we will have a spool with the material we are loading. The material is provided in the form of filament, wound on a plastic spool.
This filament is fed into the head by the extruder, which precisely controls the material deposited. The extruder can be located on top of the head itself, or on the chassis. We will see the difference between both options in due time.
Finally, all this has to be held in some way. And for that we have the printer chassis, that is, the whole set of profiles and structure that give body to the printer, and that supports the rest of the elements.
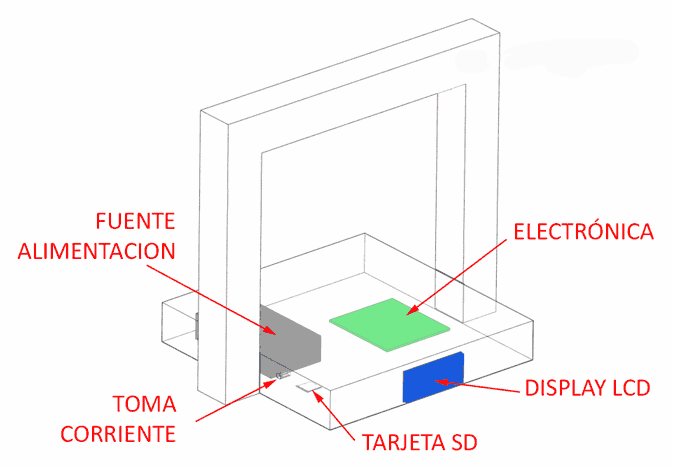
In addition to these mechanical parts, our printer has a series of electronic components. Of course, the electronics will vary from one printer to another but, again, they have many elements in common.
Logically, we are going to have a power socket to connect the printer to the electrical grid, which will be connected to a power supply that will provide energy to the printer converting the mains voltage to the voltages used in the printer (typically 24V, 12V and 5V).
On the other hand, we have the electronics themselves, responsible for controlling the operation of the printer. This includes the processor that runs the program, the drivers that control the motors, and the control of the thermal elements of the printer.
Normally we will also find an SD slot to load designs onto the printer, and an LCD or TFT screen to view the status, and a button panel (or the TFT will be touch-sensitive) to interact with the printer.
Now that we have presented these main parts, common to almost all domestic printers, we can “play” at identifying them in the Prusa I3 printer that we presented at the beginning of the post.
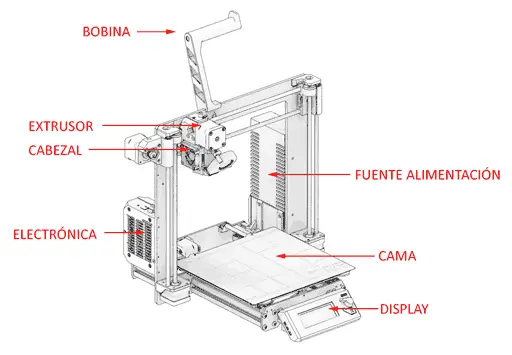
Thus, we easily identify the bed, the head and the extruder (which in this case is mounted on the head) and the support intended to hold the filament spool.
We also identify the power supply and the electronics, as well as the rest of the elements such as the display and the SD slot.
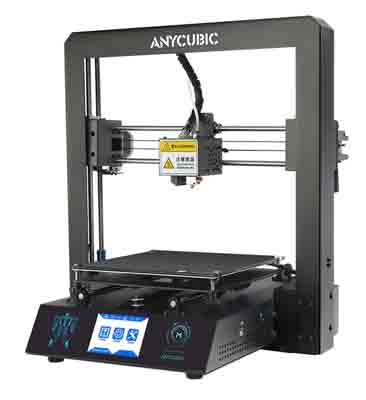
We encourage you to identify the basic parts in other types of printers, like our friend Anycubic I3 Mega. You will see that, in reality, all printers are quite similar.
Now that we know how to identify the main parts of a 3D printer, in the next post we will go into greater detail, looking at the different components that we will commonly find in FFF 3D printers.