In this post, we are going to see how to program Arduino and many other processors with the popular Open Source text editor Atom and the platformio IDE package, a programming environment specially designed for IoT applications.
By now you know that we are big fans of Arduino and the entire ecosystem it has generated. But we often say that one of its weakest parts is its IDE. Despite its multiple updates, it remains very limited and lacks most of the features we might expect in a modern development environment.
Update:
I currently recommend using Visual Studio Code + Platformio
On the blog, we have already seen several alternatives to the standard Arduino IDE, such as Programming Arduino with Eclipse, or The best IDE for Arduino, Visual Studio with Visual Micro. This time it’s Atom + PlatformIO’s turn.
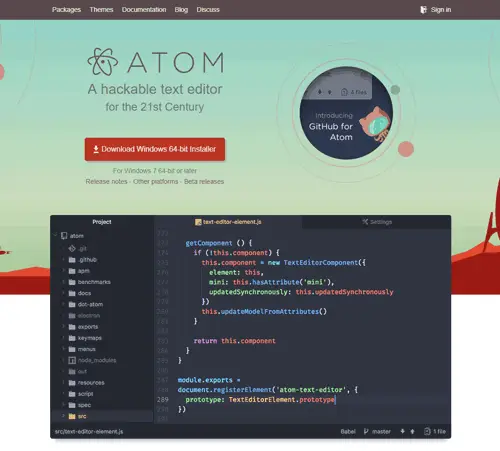
Atom is an Open Source text editor developed by GitHub Inc, which has recently gained great popularity. This is due, among other reasons, to its enormous capacity for customization and extension through modules.
On the other hand, PlatformIO is a development environment designed for IoT applications, which runs on the Atom editor or Microsoft Visual Studio Code. It is compatible with more than 400 development boards, including Arduino (AVR), ESP8266, STM32.
Install Atom
The first step is to install the Atom text editor. The installation is very simple, just go to the address https://atom.io/ and download the installer for your operating system.
Run the installer and wait patiently for it to install (it can be a bit long process, be patient).

Install PlatformIO
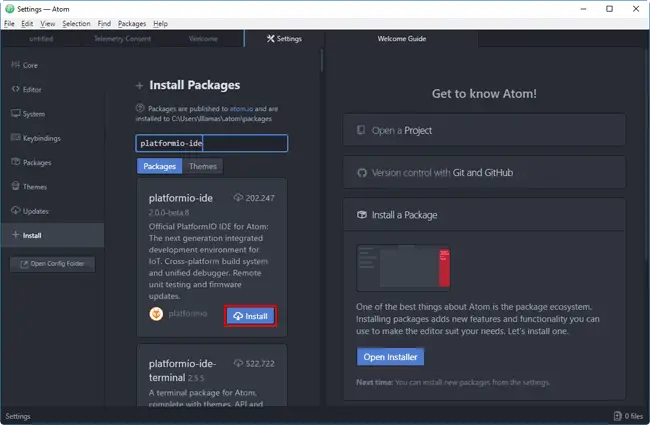
Now we are going to install PlatformIO IDE in Atom. To do this, we start Atom and select “Install a Package”, then “Open Installer” and in the text box we type “platformio-ide”.
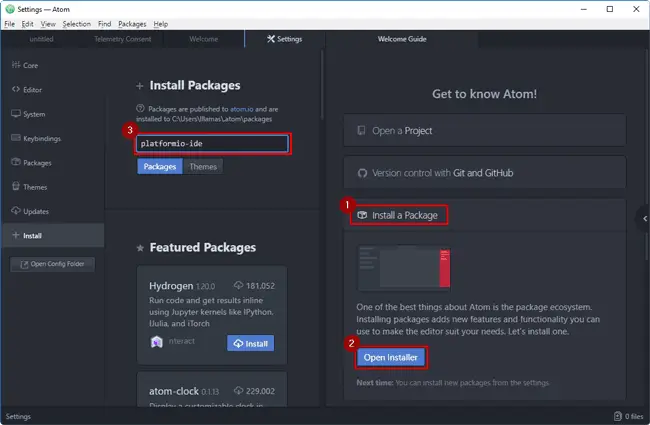
We will get several search results. We make sure to correctly choose the “platformio-ide” Package, and click “Install”.
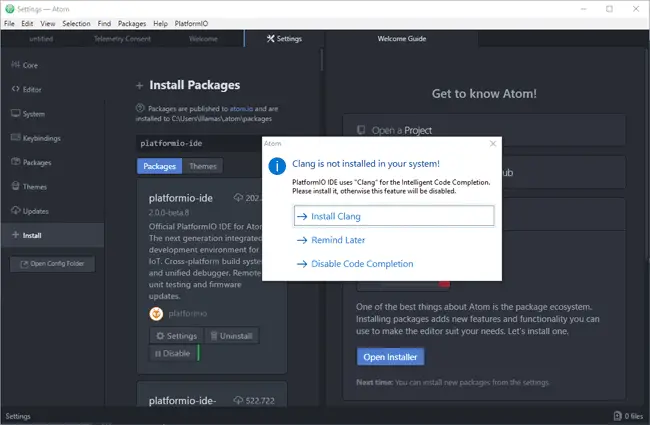
We wait patiently for PlatformIO IDE to install (it takes quite a while). During the installation, a message will indicate that we must install Clang, which allows for code completion while we write.
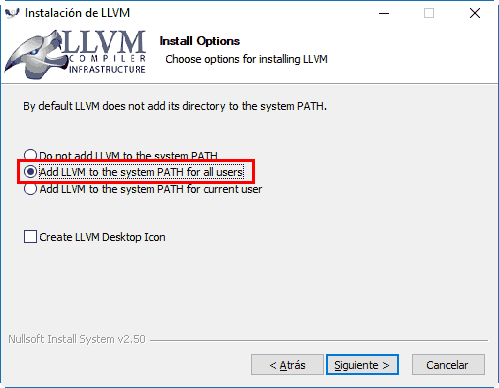
We leave the PlatformIO installer as is, and on the other hand we download Clang from this address and install it. In the process, we make sure to select the option “Add LLVM to system path”.
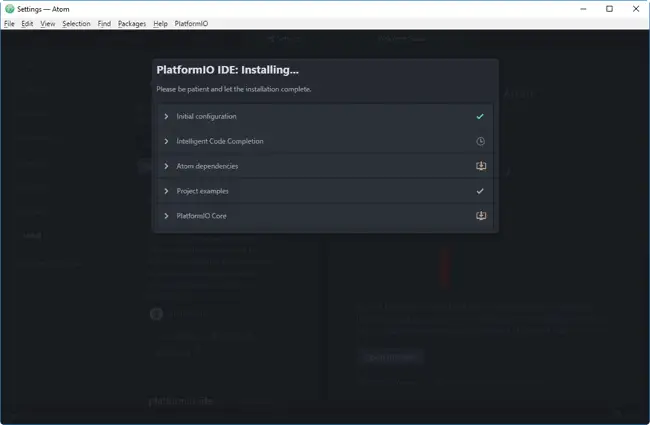
We can continue with the PlatformIO installation. We return to Atom, and wait patiently for the polar ice caps to melt again as the process is somewhat long.
Once the installation process is finished, Atom will indicate that we must restart the program. We accept, and close Atom.
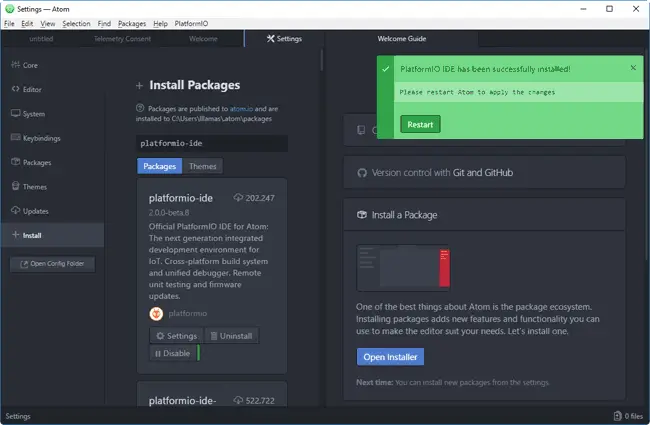
We now have Atom + PlatformIO correctly configured!
Create our first project in PlatformIO
Let’s test our new Atom + PlatformIO IDE environment by starting a new project, to make sure everything is correctly configured.
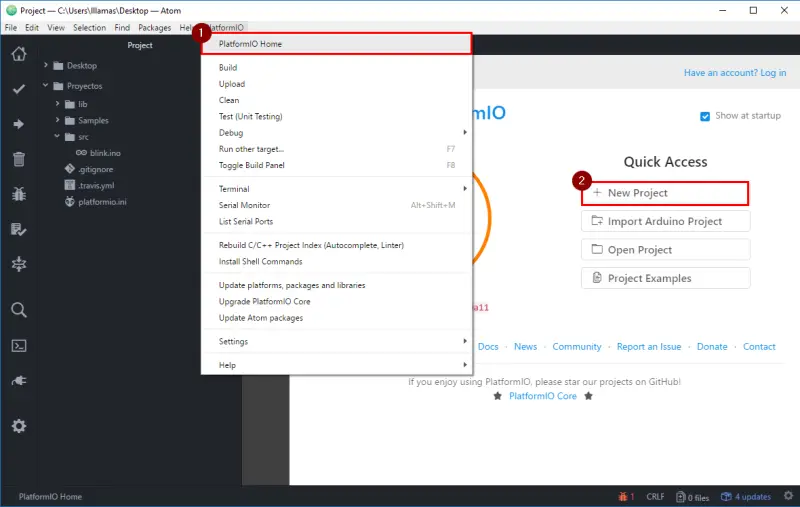
When opening Atom, a PlatformIO tab will appear. We select ”+ New Project” to create a new PlatformIO project. If at any point it asks you if you want to register, you can do so, or simply click “Skip”.
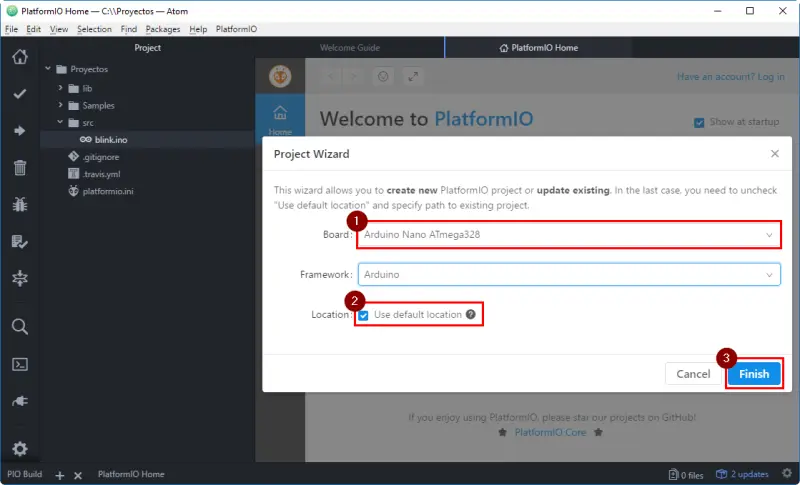
In the next window, we select a board and the folder where we want to save the project.
If everything went well, PlatformIO will show a message indicating that the project creation was successful.
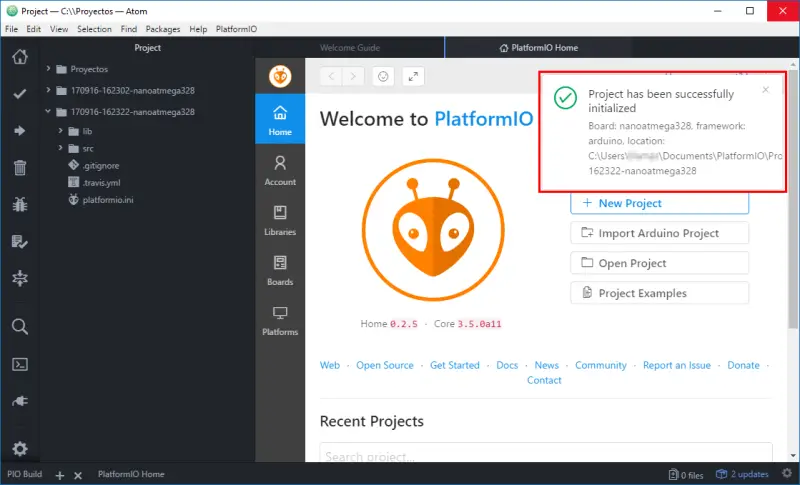
The project has a basic structure
- platformio.ini, file containing the project configuration
- src, folder where we put our source code
- lib, folder to add our own libraries
Blink on Arduino
To finish, let’s test by making the “blink” program, which as we know is the equivalent of “hello world” in Arduino, and simply blinks the LED integrated into most development boards.
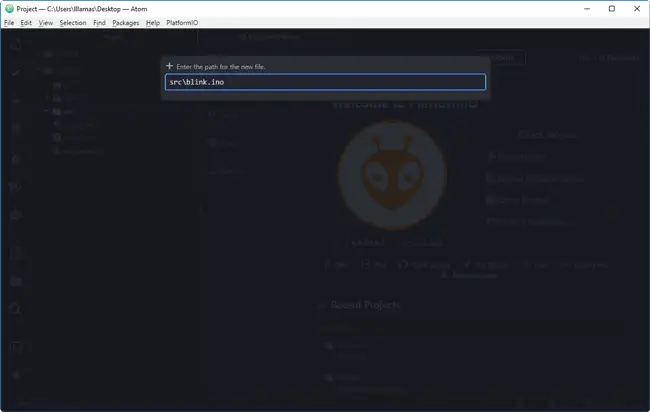
To do this, we create a file containing our code by right-clicking on the “src” folder. We add a new file that we will call “blink.ino”
Inside it, we paste the code of the well-known blink, which simply blinks the LED integrated into most Arduino boards.
void setup() {
  // initialize digital pin 13 as an output.
  pinMode(13, OUTPUT);
}

void loop() {
  digitalWrite(13, HIGH);   // turn the LED on (HIGH is the voltage level)
  delay(1000);              // wait for a second
  digitalWrite(13, LOW);    // turn the LED off by making the voltage LOW
  delay(1000);              // wait for a second
}
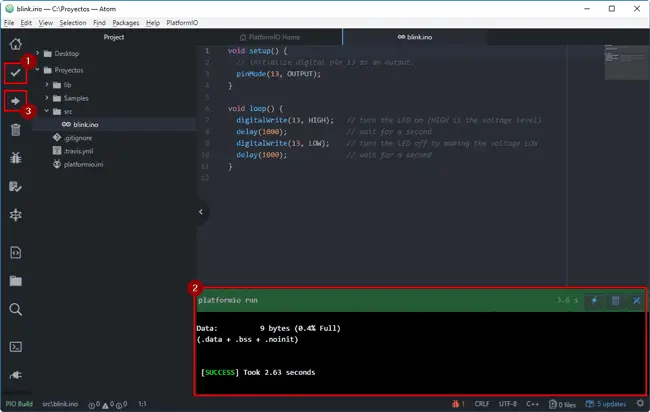
Now we click compile and check that the job finishes correctly. Finally, we can upload it to the board by pressing the corresponding button.
Download the code
All the code from this post is available for download on Github. 
