
In the previous post we saw how to set up our system to program Arduino with Eclipse, the popular multiplatform IDE, and enjoy all the power of the C language without the many limitations imposed by using the Standard IDE.
Update: This post is from 2014.
I currently recommend using Visual Studio Code + Platformio
In this post we will learn how to retrieve Arduino libraries, and load programs directly onto our device. This way we will achieve programming Arduino with Eclipse, maintaining the functionality and convenience of the standard IDE, and adding all the advantages of development in Eclipse.
Retrieve Arduino Libraries
To retrieve our Arduino function libraries in Eclipse we have three options
- Compile the libraries directly from their source code.
- Generate a program from the Arduino IDE, and copy the temporary compiled file (called a.out) to our project file.
- Use a pre-generated project where the libraries have been correctly configured.
Logically, the easiest option is the third one, using a correctly configured project as a template. Fortunately, this is even easier thanks to the work of Rico Van Genugten, a developer who took the trouble to configure and share a template with the community in a git repository.
To download the template we must go to the following address https://github.com/ricovangenugten/Arduino-Blink-Eclipse-Project or, if we are on a Linux system, simply from a terminal we type the following to clone the repository to our hard drive.
sudo apt-get install git git clone https://github.com/ricovangenugten/Arduino-Blink-Eclipse-Project
It is advisable to save the template and always work with a copy. This way we preserve the original as a backup, in case the aforementioned repository becomes unavailable.
Now we import the project into Eclipse. We select “Import” and, from all the options, we choose “Existing projects into Workspace” 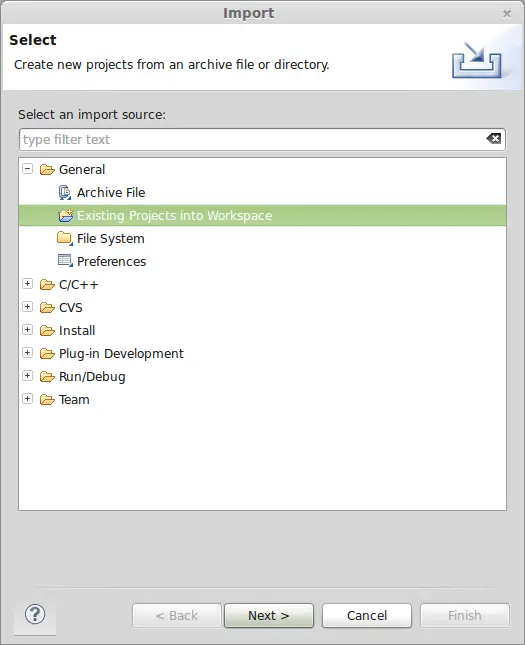 In the next screen we select the folder where we have the project template. We click on “Select All” and check the option “Copy projects into workspace”
 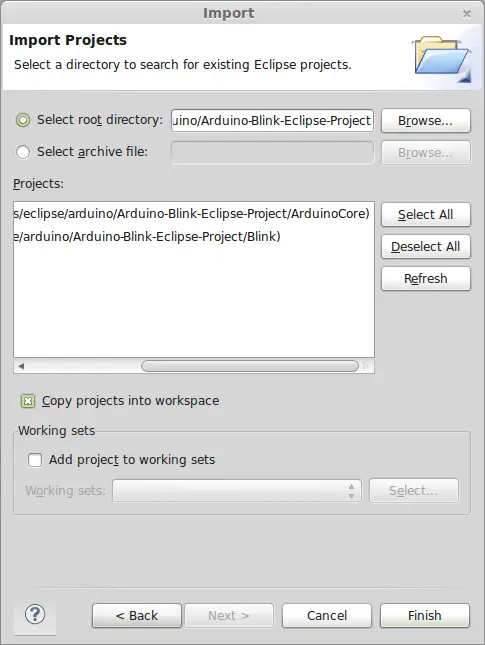 Now we have the Arduino function libraries correctly imported and configured.
Configure the Loader
Now we are going to select the loader, to be able to directly load the programs we create onto our Arduino with Eclipse. We right-click on project properties. In the AVR tab we select AVRDude, and click the Edit button. 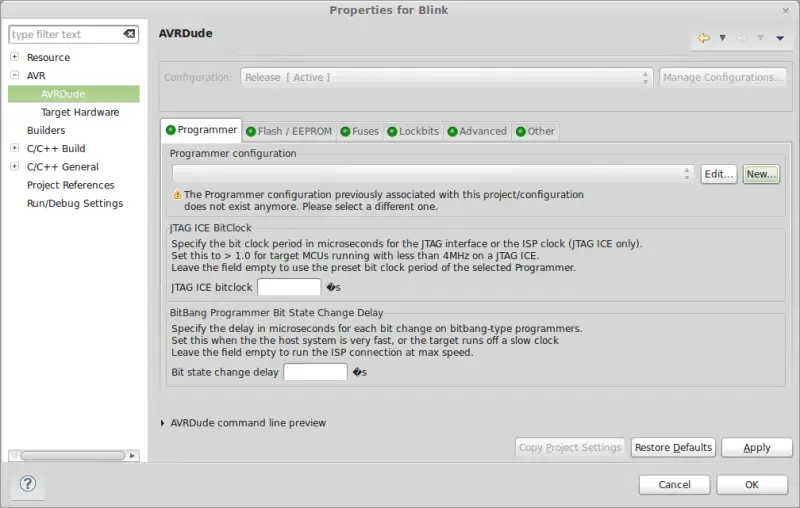 In the next screen we must configure the loader for our device. We correctly configure the USB port to which our device is connected. Next, we choose the loader model:
- Atmel stk500 v2 loader for Arduino Mega
- Arduino loader for the rest of Arduino models
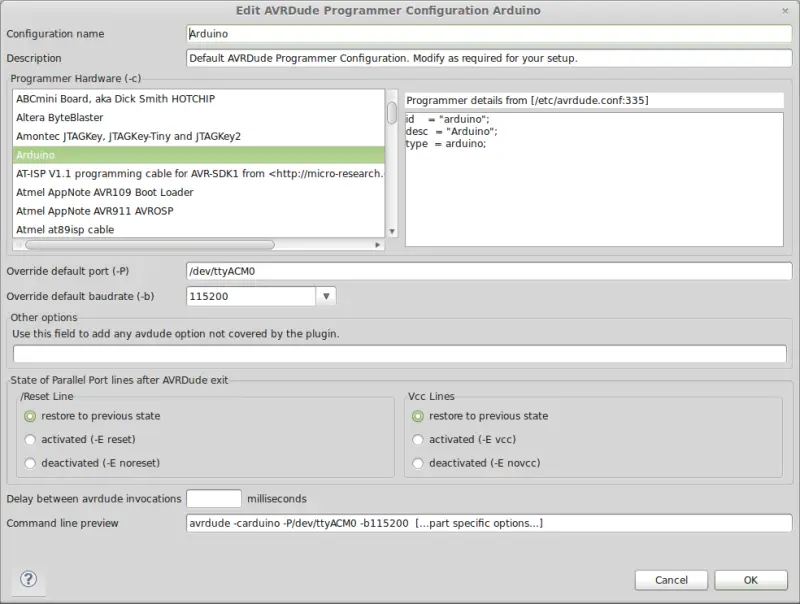 Regarding the speed (baudrate) we must choose
- 115200 for Arduino Mega
- 19200 for Arduinos based on ATmega168
- 57600 for Arduinos based on ATmega328p
We accept the changes made and the loader is now configured.
Configure the Device
Finally, we must indicate to Eclipse and the AVR plugin the type of device we are working with. To do this, within project properties, we select the “Target Hardware” section 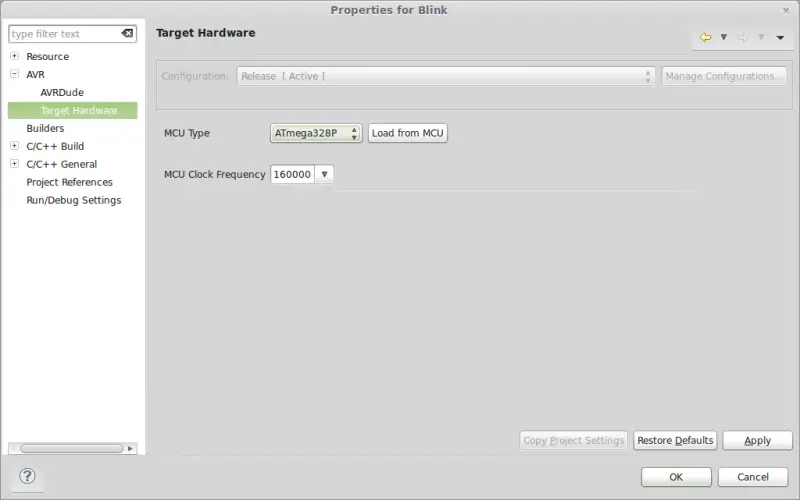 We click the “Load from MCU” button and, if we have configured everything correctly, it should automatically select the type of Arduino we have connected and its speed. We verify the data, and if they do not appear or are incorrect, we modify them manually.
Final Test
Finally, it remains to check the final setup and that we have performed the configuration correctly. To verify that everything is working, with the template project loaded, we click on the button indicated in the image. 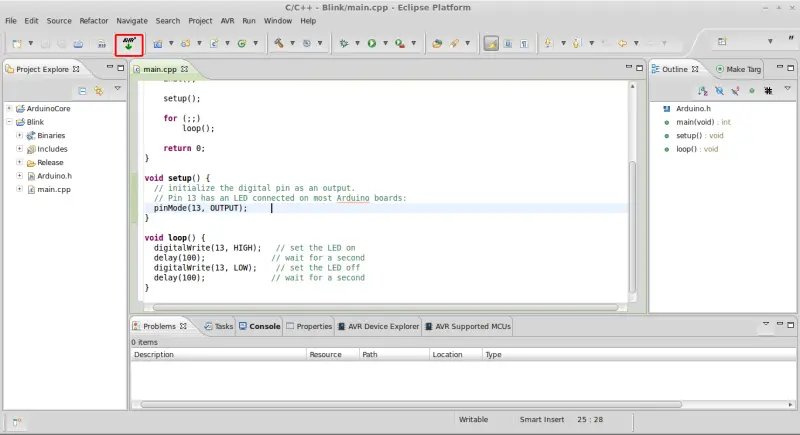 If everything went well, the program should load onto our device, and the integrated LED will start blinking slowly. Congratulations! You can now program Arduino with Eclipse, with the same ease and functionality as the Standard IDE, but adding all the power of the C language without limitations.
Download the Code
All the code from this post is available for download on Github. 
