After some entries dedicated to Digispark, we are going to see how to program this small development board with the Arduino IDE.
Fortunately, Digispark boards can be integrated into the board manager, so their installation is quite simple.
The only problem we may have is that the computer does not recognize the drivers (especially in Windows 10). But well, it’s something we are already used to.
Install Digispark in the Arduino IDE
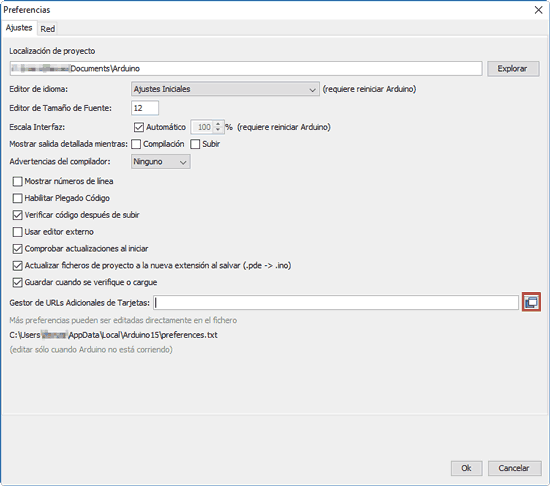
To add Digispark to the Arduino board manager, first, access the IDE configuration menu. Here, where it says “Additional board manager URLs” (which, by the way, is difficult to have translated worse), click on the small button on the right.
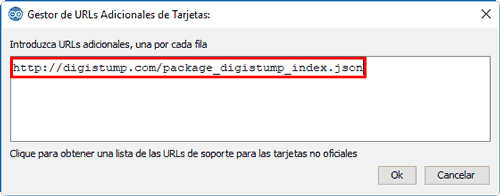
In the window that appears, add the following URL.
http://digistump.com/package_digistump_index.jsonIf we had other boards previously, we would add each one on a different line.
Restart the Arduino IDE. Launch it again, and now we can access the board manager.
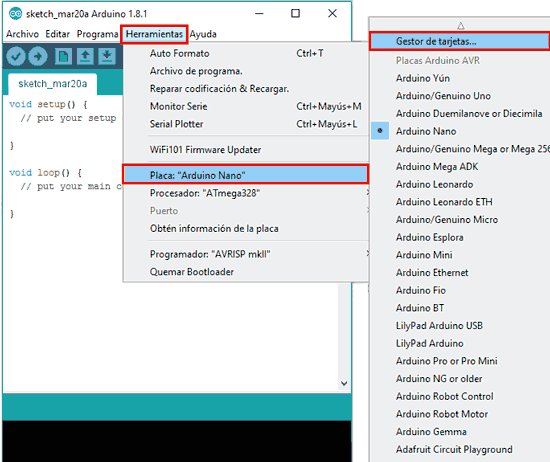
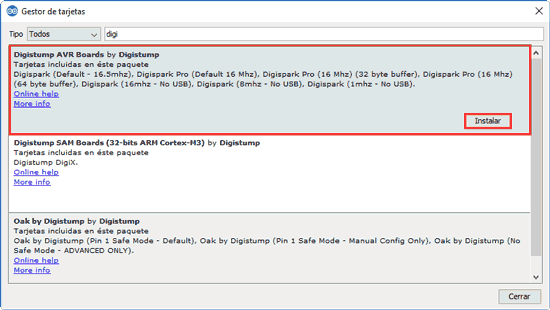
Here, select and install Digistump AVR boards by Digistump. The Arduino IDE will install the boards and the appropriate drivers.
As an additional precaution in Windows, and to avoid problems with the drivers, I recommend launching the installation manually.
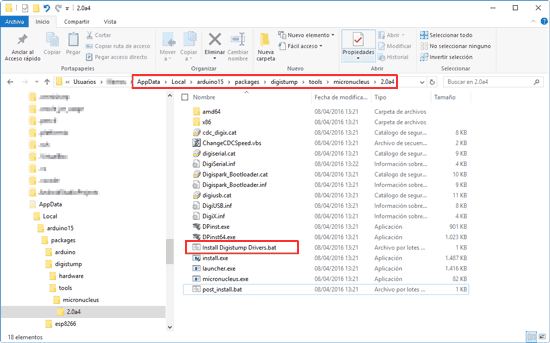
To do this, go to the path where the IDE has installed the Digispark files, located at the following path (replacing, logically, USER with your username).
C:\Users\USER\AppData\Local\arduino15\packages\digistump\tools\micronucleus\2.0a4Finally, run the “Install Digistump Drivers.bat” file as Administrator, and keep our fingers crossed for everything to go well.
Hello world on Digispark
To check that everything has gone correctly, we are going to load our first file into the Digispark. As always, we will use Blink as “Hello World”.
In the IDE environment, open a new file and paste the following code, which simply makes the integrated LED blink.
const int ledPin = 1;

void setup()
{
  pinMode(ledPin, OUTPUT);
}

void loop()
{
  digitalWrite(ledPin, HIGH);
  delay(1000);
  digitalWrite(ledPin, LOW);
  delay(1000);
}
In the board type, we choose Digispark (Default - 16.5 Mhz).

Here comes an important difference compared to conventional Arduino models. We have to start the upload with the Digispark disconnected. Therefore, we do not choose the COM port.
Click on upload program. After the compilation, the Arduino environment informs us that we have 60 seconds to plug in the board.
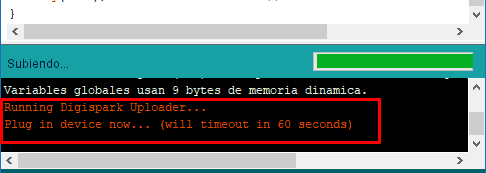
Connect the Digispark and, if everything has gone correctly, we will see that the upload is finished and the LED on the board starts blinking.
Achieved! To continue playing, when installing the Digispark board, many examples are added to experiment with this board. I recommend you take a look at them. Let’s play!
