The command line is a text interface that lets us control a system by running commands.
On Raspberry Pi and Linux, the command line is a fundamental tool. It can feel a bit intimidating at first, because it looks like a screen made for people who have spent twenty years living inside a cave of commands. But after using it for a while, you quickly see that it is more practical than it looks.
The reason why the command line is still used is simple. It is a very fast and flexible way to perform actions on a computer. We can combine commands, automate tasks, and work comfortably even when we do not have a graphical environment.
Of course, it’s not about memorizing hundreds of commands. Not at all. In fact, no matter how many years you’ve been using Linux, you will probably always be able to find a new one. Furthermore, there is a lot of documentation on the subject, the command console itself has tools to give you help, and it’s even normal to have “cheat sheets” or compilations of useful commands.
Therefore, we must lose our fear of the command console. Besides, it really isn’t as difficult as it seems. It’s a matter of starting to use it and little by little, almost without realizing it, you will be surprised at how comfortable you find it.
So, to start losing our fear of it, let us see what the command line or CLI actually is.
What is the command console?
The command-line interface (CLI), or simply command console, is a system for controlling a computer or program through instructions entered as a simple line of text.
The command console is a common tool in Unix-based operating systems, such as Linux. In general, it appears as a simple interface where the user writes commands and receives information from the system through text messages.
Over the years, in an era dominated by graphical user interfaces (GUIs), the command console may seem archaic. However, it remains a powerful, fast, and very common tool in Unix systems.
CLIs are not exclusive to Unix. Windows has traditionally used cmd.exe as its command console. In recent versions, Microsoft has enhanced its CLI by introducing PowerShell, which is much more powerful.
Most CLIs not only allow entering commands manually but also allow executing commands automatically from a text file called a script (equivalent to batch files in Windows).
Additionally, another reason why CLIs are still in full use is the remote control of a computer. Using a remote CLI (like ssh, which we will see in due time) allows executing actions very quickly and efficiently, since we only send text and don’t have to send/receive the video signal required by a GUI.
Command Console, Terminal, or Shell?
It is common to refer to the CLI as command console, terminal emulator, or shell. Although they are distinct concepts, in practice it is common for them to be used (incorrectly) as synonyms because they are very closely related.
To clarify the terms, a shell is any interface that allows controlling an operating system. Therefore, the CLI is a shell, but there are also graphical shells.
The term terminal comes from the first computers, where you controlled the computer from a “device” that was basically a screen and a keyboard. The terminal emulator is the program that allows us to run a CLI in a graphical system and, as its name suggests, “emulates” these early terminals.
Finally, the CLI itself is the command interpreter, the program that receives commands and executes the appropriate actions in the OS.
To summarize. On a computer with a windowing environment, the windowing system with mouse and keyboard capture is a shell. When we open a command console, that is also a shell.
The program we open is the terminal emulator. And what is inside it is the command interpreter or CLI.
To illustrate, as an example, when we write a command and press Enter, it is the CLI that processes the data. But, for example, the function of copying and pasting a command, or displaying the CLI output, are features of the terminal emulator.
What is that Bash thing?
In Linux there is more than one command-line interpreter. In fact, there are many. Some examples are Bash, Dash, KornShell (ksh), Tcsh, Fish, or Z Shell (zsh), among others, each with its advantages and disadvantages (and fans and detractors).
GNU Bash is the CLI implemented predominantly in Linux distributions. Examples of distributions that use Bash as the default CLI are Debian, openSUSE, Ubuntu, Fedora, Slackware, Mandriva.
Raspberry Pi OS is based on Debian. That is why Bash has traditionally been the default CLI on Raspberry Pi.
Bash, Bourne-Again SHell, was released in 1989. It is the successor to SH, The Bourne Shell, which is one of the original Unix CLIs. Bash scripts are compatible with SH, but Bash added additional features like autocompletion or command history.
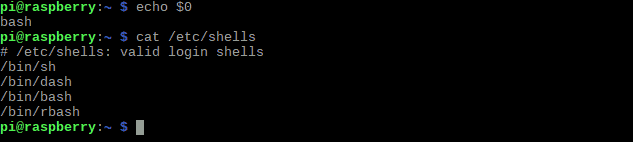
In case anyone is curious, to check which CLI we are currently using we can use this command
echo $0
And to list all CLIs available on a system
cat /etc/shells
What is that LXTerminal thing?
In a Linux system, just as there is more than one CLI available, there is more than one terminal emulator. Some examples of terminals are LXTerminal, Gnome Terminal, xterm, UXTerm, Lonsolem, among many others.
LXTerminal was for a long time the default terminal emulator in Raspberry Pi OS, associated with the LXDE/LXQt desktop traditionally used on Raspberry Pi.
If, out of curiosity, anyone wants to check which terminal emulators are available on their system, they can type,
sudo update-alternatives —config x-terminal-emulator

As we can see, in that installation only LXTerminal appears.
How to Launch the Command Console in Raspberry Pi
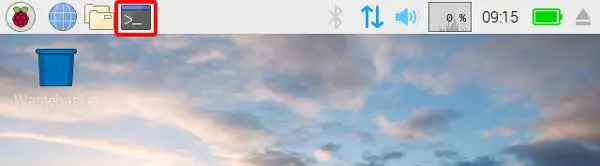
Launching Bash, the default command console on Raspberry, is very simple. We have a button available on the top bar that launches Bash directly.
In other distributions, like Ubuntu, the CLI is associated with the Control+Alt+T keyboard shortcut. If your Raspberry Pi OS installation does not bring it configured, you can add it yourself.
At the beginning of each line where the user can enter a command, we will see a header with information provided to the user.
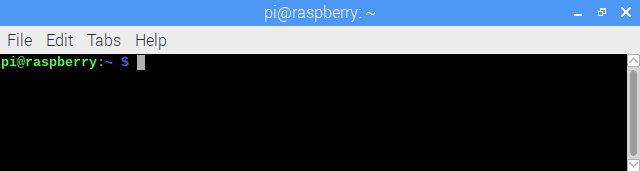
pi@raspberrypi:~$
The meaning of this data is:
- pi: indicates the user connected to the terminal
- @raspberrypi: indicates the name of the machine we are connected to
- ~: indicates the path we are in, in this case the default home path
- $: prompt to start writing commands (it will be # if we are logged in as root user)
Execute Commands in the Command Console
Executing an instruction is as simple as typing the command and pressing the enter key. If the command is correct, the CLI will perform the appropriate actions and the terminal emulator will display the result on the screen.
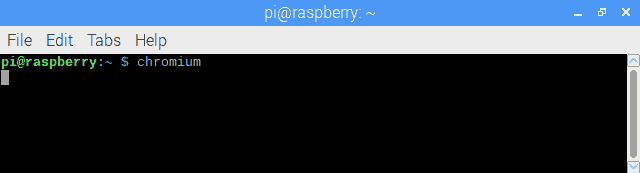
For example, to launch Chromium, if we have it installed, we simply type the following command
chromium
Many commands accept additional parameters that modify the command’s behavior. Thus, chromium allows passing a URL as a parameter, and when it opens it will load the indicated URL directly. For example, to load the Google page directly we type.
chromium www.google.com
If a command executes a process, and we want to cancel it, we can press the keyboard shortcut
control + C
If we want to clear the screen, removing all previously written commands, we execute the command
clear
Autocompletion with Tab
One of the great “tricks” when using Bash that will save us an enormous amount of time is the autocompletion function with the tab key.
If at any time while typing a command, a filename, or some arguments, we press the tab key, Bash suggests the option that starts with what we have typed. If there is more than one match, the available options are cycled through.
If there are many matches, pressing tab will not show anything. Pressing it a second time will show us a list of available commands. We can add a few more letters and press tab to complete the command.
So, continuing with the chromium example, if we type ‘ch’ and press tab twice, it will show us a list with multiple available options.
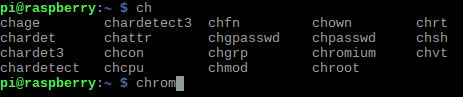
If we complete up to ‘chrom’ and press tab, Bash autocompletes to chromium
The autocomplete function is especially useful when dealing with paths or filenames.
Command History
Another function that will save us a lot of time and is one of the improvements that Bash introduced over its predecessor SH, is the command history.
At any time we can retrieve a previously typed command by pressing the “up” arrow key on the keyboard. Pressing it successively will bring us the previous command, up to the start of the terminal session. If we have gone too far, we can press the “down” arrow key to go to the next command.
A Little Bit of Help
Bash has certain commands that allow us to get help about the available commands.

Some of these commands are
Show a summary of the function of command xxxxx
whatis xxxxx
Show the most likely location for the program xxxxxx
whereis xxxxx
List the manual pages that deal with command xxxxx
apropos xxxxx
Show the usage or configuration manual for program xxxxx
man xxxxx
Show the manual pages containing the word xxxxx
man –k xxxxx
Up to this point, this is enough to start losing your fear of the Raspberry Pi terminal emulator. From here on, the command line is going to appear constantly throughout the course, so it is worth keeping a “cheat sheet” with some of the most useful Bash commands close at hand.
