APT is the usual package manager on Debian-based distributions, such as Raspberry Pi OS.
Naturally, as with any other computer, we will need to install programs. On Linux-based systems, this task is usually performed through a package manager.
If you are not accustomed to software installation on Unix-based systems (like Linux), there are certain concepts related to software installation that may seem surprising or confusing at first.
That’s why, before diving into the subject and seeing how to install and update software with APT, we will take a moment to explain these concepts briefly.
Packages, Dependencies, and Repositories
The usual installation system in Linux systems is using a package manager. This might seem strange if we are used to installation via installers, as is the case with Windows.
As we know, an installer is an executable that installs (obvious, right?) software. The installer is created by the software developer and can follow one of many “standards” or none at all. In general, the installer is only responsible for the integrity of the software it installs.
In the case of Linux, the software installation mechanism is integrated into the operating system. This centralized system uses a single local database and verifies, manages, and maintains the integrity of all system packages.
We will see that we constantly talk about ‘packages’. In short, a package is a file that contains the necessary structure to install, update, and uninstall specific software conveniently and securely.
Each package can have dependencies, which are other software or packages it requires to function correctly. For example, this includes components and libraries, usually in a specific version (or a range of them).
Managing packages and their dependencies manually would require a lot of work. For this reason, packages are designed to function within a package system (of course, as almost always in Linux, there is more than one package system).
In general, each Linux distribution uses a default package system.
Thus, among others, we have:
- DPKG for Debian-based systems (Ubuntu, Raspberry Pi OS)
- RPM for RedHat-based systems (Fedora, CentOS)
- PACMAN for ArchLinux-based systems
On the other hand, we have package managers. These are programs that simplify the user’s interaction with a package system.
Thus, for example:
- For DKPG (Debian and derivatives) we have APT
- For RPM we have YAST (SuSe), YUM (Fedora and CentOS) or URPMI (Mandriva) among many others.
Where do we get the packages from? This is where repositories come in. Simply put, repositories are servers intended to host packages, for one or many software.
The “main” repositories are maintained by the developers of each Linux distribution and the community that supports them. But there are also other “additional” repositories created and maintained by the developers of specific software.
We should only use trusted repositories. Otherwise, we risk installing malware on our system.
The APT Manager
And finally, we arrive at APT. As we said, Debian-based systems (like Raspberry Pi OS) use the DPGK package system for software installation and updates. The extension of these packages is .deb.
On the other hand, APT (Advanced Packaging Tool) is the package system manager used by default in Debian-based systems. APT simplifies the use of the DPGK system for the user.
APT consists of a series of utilities and libraries developed in C and bash. Among them, the most used is APT-GET and, to a lesser extent, APT-CACHE and APT-FILE.
Now let’s look at some of the most used functions of the APT package manager.
How to Use APT
Install Packages
Installing packages with APT is very simple. We just need to execute the ‘install’ command from the command console.
sudo apt-get install package
Where “package” is the name of the package we want to install. In most cases, the package name will be obtained from the developer’s documentation, which will provide the command to execute for installation.
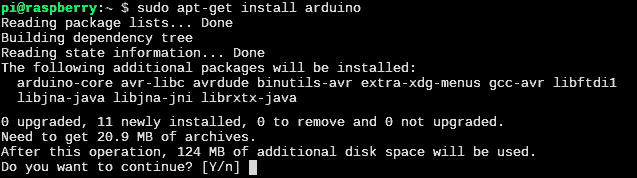
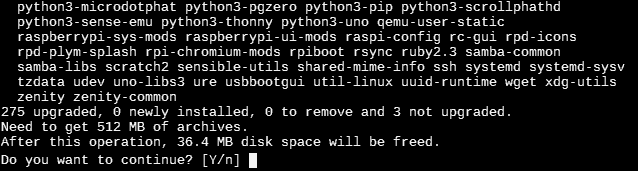
Before installing a package and its dependencies, APT asks for confirmation and we must respond by pressing ‘y’ to install. This is common in most APT commands. If we don’t want it to ask, we can add the ‘-y’ parameter as follows:
sudo apt-get -y install package
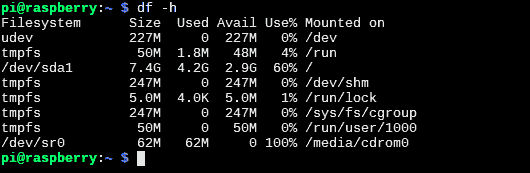
As we install packages, the free space on our SD card will decrease. To check the available space, we can use the ‘df’ command:
df –h
Search for Packages
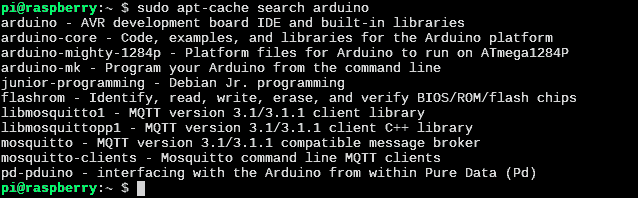
It is also possible to search for a package by its name. This search is performed against the local cache saved by APT. Therefore, to perform the search, we use the command:
sudo apt-cache search package
APT will show us a list of all packages that contain the word we searched for.
Remove Packages
To remove a previously installed package from the system, we have two options. The more “conservative” one is the ‘remove’ command, which removes the package but not its configuration files or dependencies.
sudo apt-get remove package
To completely remove a package, including configuration files and dependencies, we can add the ‘—purge’ parameter or use the ‘purge’ command directly. Therefore, the following two commands are equivalent:
sudo apt-get purge package sudo apt-get remove —purge package
Update Packages
One of the operations we will use APT for most frequently is updating the packages we have installed. Updating our software is important both to get new features and to fix possible security errors.
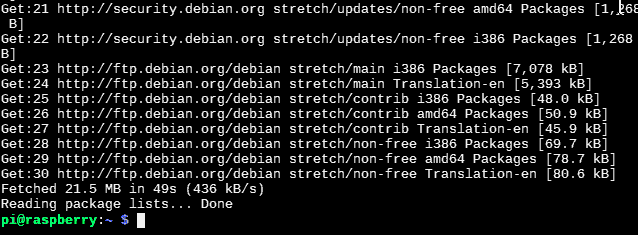
In APT, the update process is done in two steps. On one hand, the ‘update’ command updates the local package cache. It looks for new changes by comparing with the information contained in the repositories, but does not download or install any packages.
sudo apt-get update
To actually install the updated packages, which we previously determined with the ‘update’ command, we use the ‘upgrade’ command.
sudo apt-get upgrade
These two commands are normally used together, one after the other. If we want to run them directly with a single command, we can use:
sudo apt-get -y update && sudo -y apt-get upgrade
Clean APT System
As time passes and we update software, some files will become obsolete. To avoid unnecessary loss of space, it’s good to perform certain maintenance tasks periodically.
First, we have the ‘autoremove’ command. This uninstalls packages that were installed as dependencies of other packages but are no longer required (for example, because the new version of the package no longer uses them). Therefore, these packages are no longer needed and can be uninstalled.
sudo apt-get -y autoremove
On the other hand, the information stored in the local cache also becomes obsolete. These files are stored in /var/cache/apt/archives/ and /var/cache/apt/archives/partial/.
To prevent it from growing unnecessarily, we have more maintenance tools. Note that they do not uninstall installed software, they only clean the files in APT’s local cache.
Thus, to clean the local cache file, we have the ‘autoclean’ command. This removes downloaded packages that can no longer be downloaded from the repositories. This means these packages are obsolete and can be deleted.
sudo apt-get autoclean
Finally, we have the ‘clean’ command, which removes all packages we have downloaded from the local cache. It is used less than the previous one because it is more ‘aggressive’.
sudo apt-get clean
The ‘autoremove’ and ‘autoclean’ commands are frequently used together, which we can combine into a single command:
sudo apt-get -y autoremove && sudo apt-get autoclean
Add a Repository
As we said, APT searches for packages in repositories. The addresses of the repositories are configured in lists stored on our computer. In Raspberry Pi OS these lists are usually stored in:
/etc/apt/sources.list/etc/apt/sources.list.d/raspi.list
We can add or remove repositories by editing these lists. Or, if we simply want to add a repository, we can use the following command directly:
sudo sh -c ‘echo repositoryURL’ >> /etc/apt/sources.list
Of course, we should only add secure repositories, such as those from our distribution’s developers or from trusted software. Otherwise, we run a great risk of installing malware on our system.
With this, we have covered the basic operations for installing, uninstalling, and updating software with APT. It is a tool you will use constantly in Raspberry Pi OS and in almost any Debian-based distribution.
