
In this post, we are going to see how to control a Raspberry Pi remotely via VNC remote desktop connection with the help of RealVNC.
As we mentioned when looking at the SSH post, often we won’t have our Raspberry Pi connected to a monitor and keyboard. Instead, it will be performing tasks like a media center, web server, or home automation and robotics.
In these cases, we need a way to control our device remotely. In the previous post of the Raspberry Pi tutorials, we saw how to connect via SSH. In this post, we will see another common method: a VNC remote desktop connection.
Unlike SSH, which only opens a command console, with VNC we can have a full remote desktop. That is, on the client’s screen we will see the Raspberry Pi’s screen, move the mouse, and use it almost as if we were physically connected.
Despite its simplicity and convenience, a remote desktop also has its disadvantages. The main one is that it needs to transmit a large amount of data, especially due to the need to send the video signal. Although modern systems use video compression, the performance is slower than with a physical connection or an SSH connection.
Other disadvantages of remote desktop, combined with having to send the video connection, are, for example, that we might have some resolution issues, or not be able to view certain elements that are launched directly on the server’s GPU (such as some video players, webcams, or streaming videos).
Finally, VNC is less secure than SSH, so the communication is more susceptible to being intercepted by an attacker. Although it is possible to tunnel the VNC connection over SSH and some clients incorporate encryption in the communication, keep in mind that accessing via SSH is more secure.
What is VNC?
Virtual Network Computing is a remote communication system based on the RFB (Remote FrameBuffer) protocol. VNC transmits the video signal and mouse and keyboard events between several computers.
VNC and RFP were originally developed by the Olivetti & Oracle Research Lab in Cambridge. They were created as a simple way to perform remote desktop between devices with different operating systems. In 2002, the project was discontinued and part of the team continued it independently, forming the company RealVNC.
The VNC system follows a client-server architecture. By default, it works over TCP on port 5900 and onwards, with one port per video session. Therefore, port 5900 is assigned to session :0 (usually the physical display), 5901 to session :1, and so on.
Currently, there are more remote desktop systems, similar or even evolved from VNC. There are also different VNC-compatible software such as RealVNC, TightVNC, UltraVNC, X11vnc, among others, each with its fans and detractors.
In this post, we will focus on RealVNC, as it is one of the most recommended for beginners and, furthermore, because in a way they are the “successors” of those who created VNC, and they deserve that we dedicate this first VNC post to them. In future posts, we will see other clients and alternatives.
Configure VNC on Raspberry Pi
The computer we are going to connect to, in this case our Raspberry Pi, must have the VNC server program installed. In modern Raspbian distributions, VNC comes pre-installed but is not enabled by default.
To activate the VNC server on Raspberry Pi, we need to go into the Raspberry Pi configuration and activate the corresponding option as we saw in the post How to configure Raspberry Pi with GUI or command line.
On the other hand, it is convenient to have a static IP configured, so it doesn’t change every time we restart the Raspberry Pi. We saw how to configure a static IP in the post Configure static IP on Raspberry Pi.
The configured VNC will, in principle, only work on the local network. If you want to connect from outside (through the Internet), you will need to configure port forwarding on your router and ensure the connection is secure.
If we are running an operating system that does not have the VNC server installed, we can install it by running these commands.
sudo apt-get update sudo apt-get install realvnc-vnc-server realvnc-vnc-viewer
Configure the Client
To connect to the Raspberry Pi, we must install the viewer program on the client, which can be a computer, a tablet, a mobile phone (and of course another Raspberry Pi). We have clients available for Windows, Linux, Mac, and Android.
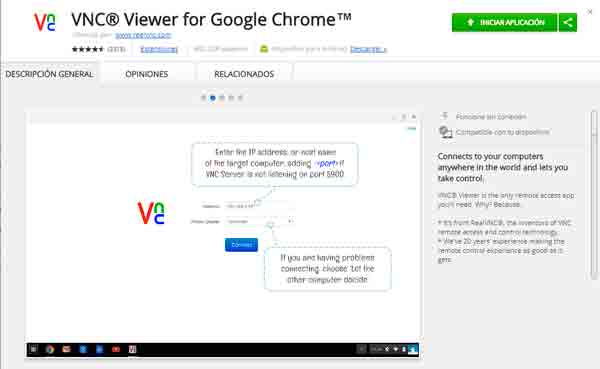
As we said, in this post we will focus on RealVNC. Download and install the RealVNC viewer suitable for your operating system from .

Alternatively, we can also use the Chrome extension, which we can install from the Chrome Web Store. Later, we can access it by entering this link in the browser: chrome://apps/
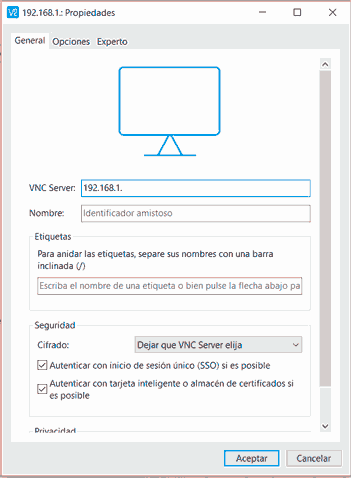
Regardless of whether we use one program or another (each with its own interface), the process to connect is similar. First, we configure a remote computer by indicating the IP of the system we want to connect to. This configuration is saved so it’s convenient to connect to our machines.
When starting the connection, we will be asked for the username and password. Remember that by default it is ‘pi’ as the user and ‘raspberry’ as the password.

It is a serious risk to expose a Raspberry Pi to the Internet with VNC enabled and the default user.
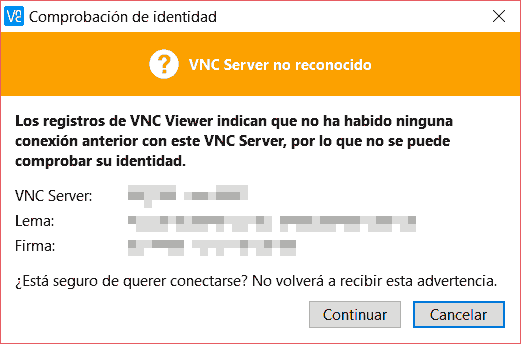
It is possible that the first time we connect with a VNC, a message will appear saying that the device’s signature is not known. It’s okay, it’s a protection measure to prevent spoofing. If it’s the first time we are connecting, we simply accept to continue.
If the connection has been successful, we will see the Raspberry Pi’s video on our computer screen and will be able to interact with it almost as if we had the monitor and keyboard connected directly.
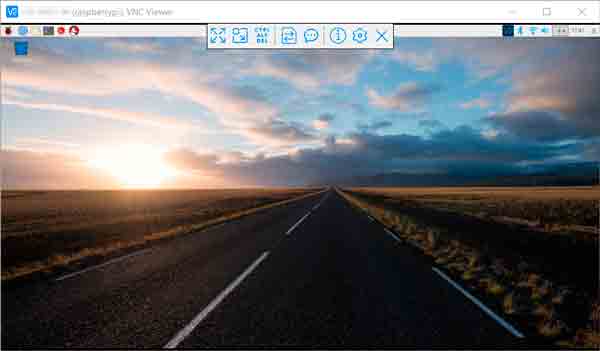
Congratulations! That’s how easy you have correctly configured the remote desktop with RealVNC. In the next post of the Raspberry Pi tutorials, we will see how to perform a completely headless setup (without a monitor or keyboard) from scratch, without ever having connected any peripherals.
