SSH is a secure protocol for accessing a remote command line on another machine.
In many cases, we will not have our Raspberry Pi connected to a monitor and keyboard, but rather we will have it dedicated to other functions such as a web server, an IoT broker, or a small home service. Even if it has a monitor and mouse, we will often want to control it from another computer.
The usual ways to connect remotely are SSH, VNC/RDP, or Raspberry Pi Connect. SSH is the most commonly used for administration, because it is fast, lightweight, and secure. Becoming familiar with it is almost essential if we want to work comfortably with Linux.
SSH stands for Secure Shell (formerly known as Secure Socket Shell) and, basically, it allows us to start a command console on a remote computer easily and securely.
It works similarly to Telnet but adds encryption to the communication, so that packets sent by the client or server cannot be deciphered if intercepted.
SSH follows a client-server model. The client initiates a request to the server, which authenticates the communication and starts the Shell environment. Multiple clients can connect to the same server.
By default, SSH uses TCP port 22, although it can easily be changed. The protocol uses modern cryptography to authenticate the server, protect the session, and encrypt the communication between client and server.
SSH has other very interesting uses. For example, we can securely copy files between two devices, authenticate with keys, or tunnel connections from other applications through a secure channel.
Configure SSH on Raspberry Pi
To be able to connect to our Raspberry Pi, it will act as a server. Before we can connect, we have to enable SSH in the configuration, because for security reasons the SSH server is disabled if we did not enable it during installation.
We can enable SSH from Raspberry Pi Imager, from the graphical settings, with raspi-config, or by creating the ssh file in the boot partition on older installations.
On the other hand, we must know the ‘address’ of the Raspberry Pi we want to connect to. Although, in theory, we can resolve the address with the computer name, name resolution is a process… somewhat unstable.
Therefore, if we want a reliable connection, it is very convenient for the Raspberry Pi to have a static IP assigned, as we saw in this post.
This connection, in principle, will only work on your local network. To be able to access from outside, through the Internet, you will need to configure port forwarding on your router. The complete process depends on your router, so you will have to consult the documentation for your model.
Connect via SSH to Raspberry Pi
If you are using Linux or macOS, using SSH is very simple because the terminal includes native support. On modern Windows, we also have an OpenSSH client built into Terminal or PowerShell, although Putty remains a very well-known alternative.
SSH Connection from Linux
To connect as a client to a Raspberry Pi, we simply open the terminal console and execute the following command:
ssh user@host
Where ‘user’ is the username on the Raspberry Pi server and ‘host’ is the IP address or the computer name we want to connect to.
For example, if our user is called luis and the Raspberry Pi has the IP 192.168.1.10 configured:
The first time we connect, a warning message about the server fingerprint will appear. If we are sure it is our Raspberry Pi, we accept it and the fingerprint will be saved for future connections.
It is a serious risk to expose a Raspberry Pi on the Internet with SSH enabled, a weak password, or a well-known user. It is better to use your own user, a strong password, and, if you are opening SSH to the outside, public-key authentication.
SSH Connection from Windows
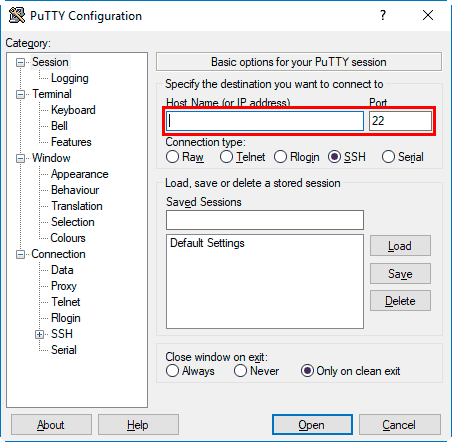
If we use Windows, we can use the SSH client built into Windows Terminal or PowerShell. Putty is still a very commonly used alternative, Open Source, and available at https://www.putty.org/.
Putty is a very useful and easy-to-use program, and it is a tool that has more uses than just making SSH connections. For example, it can also make Serial connections.
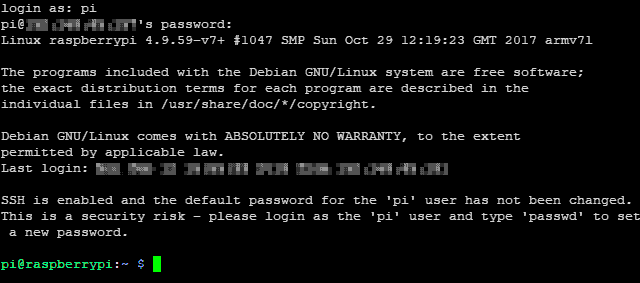
We download and run Putty and a window appears where we can enter the IP address (or name) of the Raspberry Pi. When connecting, we will be asked for the username and password.
After login, we get a command window similar to the one we have in Linux or Mac. Optionally, we can save the connection by giving it a name, so we can store several servers and access them conveniently.
That is how easy it is to make an SSH connection, an almost essential tool for working with Raspberry Pi (and actually with any Linux server).
