
A web form lets us send data to the ESP32 from a page served by the device itself.
The example is oriented to ESP32. In many cases it can also be adapted to ESP8266 by changing libraries and a few pin details.
After a short break to see OTA programming via WiFi (which will be very useful for testing in the following posts) we continue with the ESP8266 acting as a server, which we left in the last post seeing how to set up an asynchronous server with ESPAsyncServer.
As we said, the “preferred” way to serve content on the ESP8266 is from SPIFFS memory. The served content is ‘static’, in the sense that it does not change between server calls. Serving truly dynamic content is usually reserved almost exclusively for endpoints.
However, as we anticipated, the content being ‘static’ does not mean “it does nothing”.
There are multiple ways to exchange information between the frontend and the backend (forms, ajax, websockets). We will see all of them, and we are going to start with the simplest (and oldest), the simple and straightforward forms.
In these times, using forms may seem antiquated. But, you have to start somewhere, and it’s best not to put the cart before the horse. We will see the other more advanced (and complex) methods in the following posts.
Our main program remains unchanged from the ESPAsyncServer example
#include <WiFi.h>
#include <ESPAsyncWebServer.h>
#include <FS.h>

#include "config.h"  // Replace with your network data
#include "Server.hpp"
#include "ESP32_Utils.hpp"

void setup(void)
{
  Serial.begin(115200);
  SPIFFS.begin();

  ConnectWiFi_STA();

  InitServer();
}

void loop(void)
{
}
The changes are in the server behavior definition in the ‘Server.hpp’ file. In addition to the usual function for serving content from SPIFFS, we have added a route for the URL ‘/SetText’ for POST requests, associated with the function ‘handleFormText’. That is, we have defined a ‘mini API’ in the backend with a single Endpoint.
AsyncWebServer server(80);

void handleFormText(AsyncWebServerRequest *request)
{
 String MiText = request->arg("miText");

 Serial.print("MiText:\t");
 Serial.println(MiText);

 //String response = "<a href='/'> Go Back </a>";
 //request->send(200, "text/html", response);

 // direct redirection
 request->redirect("/");
}

void InitServer()
{
  server.serveStatic("/", SPIFFS, "/").setDefaultFile("index.html");

  server.on("/SetText", HTTP_POST, handleFormText);

  server.onNotFound([](AsyncWebServerRequest *request) {
    request->send(400, "text/plain", "Not found");
  });

  server.begin();
    Serial.println("HTTP server started");
}
In this example, in the handleFormText function we are simply going to print the received text via serial port and redirect the client to the form page. (In the same code, you have commented an example that returns an html code with a link to go back)
On the other hand, inside the ‘data’ folder we create a single file called ‘index.html’, with the following content.
<!DOCTYPE html>
<html class="no-js" lang="">
   <head>
      <meta charset="utf-8">
      <meta http-equiv="x-ua-compatible" content="ie=edge">
      <title>ESP8266 Forms</title>
      <meta name="description" content="">
      <meta name="viewport" content="width=device-width, initial-scale=1">
   </head>

   <body>
    <h1>Form example</h1>
        <form action="/SetText" method="post">
      Text:<br>
      <input type="text" name="miText" value="MiText"><br>
      <button type="submit" value="Submit">Send</button>
    </form>
    </body>
</html>
Result
This very simple web page only contains a form whose ‘Submit’ function is associated with the Endpoint ‘/SetText’ under the POST method. We recall that methods (or verbs) in a web API mean things. We are using POST because we are emulating an action we perform on the backend. If we were making a request we would use a GET method.
If you have doubts about the correct use of methods in Web API, consult the post on types of requests and parameters, or how to set up a Rest API in NodeJs.
Once everything is loaded, we access the ESP8266 and we will see our simple (and, let’s admit it, ugly) web page.
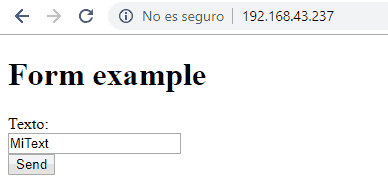
If we write a text and press the ‘submit’ button we can see that, indeed, the ESP8266 correctly receives the text we send and displays it via the serial port. In a real project, it would then be a matter of processing the text and doing whatever is appropriate.

In future posts we will see much more convenient ways to perform this information exchange. This is a simple example, but very useful, which has allowed us to introduce the concepts (and vocabulary) of web methods, backend, frontend, endpoint. We are starting to get into the thick of it!
This is a simple example, but a very useful one for introducing concepts such as web method, backend, frontend, and endpoint. From here we can build more concrete forms, such as turning an LED on or off or sending configuration parameters to the ESP32.
Download the code
All the code from this post is available for download on Github.

Version for ESP8266: https://github.com/luisllamasbinaburo/ESP8266-Examples
Version for ESP32: https://github.com/luisllamasbinaburo/ESP32-Examples
