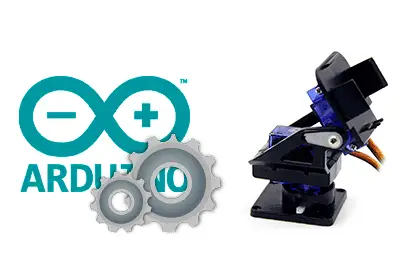
We continue with the third entry dedicated to assembling a two-degree-of-freedom servo turret controlled by Arduino. A small project that, combined with sensors, cameras, lasers, or many other devices, gives rise to a lot of fun projects.
In the first entry we presented the project and saw the budget. In the second entry we saw the assembly process and the wiring diagram. In this one, we will delve into some code examples.
Double Sweep (sweep)
The first example is a simple sweep with both servos, from 45 to 135º. The code is as follows.
#include <Servo.h>

Servo panServo;
Servo tiltServo;

const int speed = 30;
const int panServoPin = 9;
const int tiltServoPin = 10;

void setup()
{
  panServo.attach(panServoPin);
  tiltServo.attach(tiltServoPin);
}

void loop()
{
  for (int pos = 45; pos <= 135; pos += 1)
  {
    panServo.write(pos);
    tiltServo.write(pos);
    delay(speed);
  }
  for (int pos = 135; pos >=45; pos -= 1)
  {
    panServo.write(pos);
    tiltServo.write(pos);
    delay(speed);
  }
}
Simple, and it couldn’t be more boring even if it tried. Let’s see if we can fix it in the next example.
Receive angles through the serial port
We are going to add the EasyComma library to receive the two angles sent by an array separated by commas.
#include <Servo.h>
#include "EasyCommaLib.h"

EasyComma easyComma(2);

Servo panServo;
Servo tiltServo;

const int panServoPin = 9;
const int tiltServoPin = 10;

void setup()
{
  Serial.begin(9600);
  panServo.attach(panServoPin);
  tiltServo.attach(tiltServoPin);
}

void loop()
{
  easyComma.Recieve(OnRecieve);
}

void OnRecieve()
{
  auto panAngle = easyComma[0];
  auto tiltAngle = easyComma[1];

  panServo.write(panAngle);
  tiltServo.write(tiltAngle);
}
Now, if you write two angles in the serial port monitor (for example: 90,90) you will see the turret move immediately to the indicated angles.
Of course, instead of receiving them through the serial port, we could obtain the angles from any controller, such as an analog joystick, the PS2 controller, the wiichuck, a potentiometer, etc.
You can find more Arduino controllers in the Arduino controllers category
Move servos at different speeds
Moving the servos to the indicated position instantaneously is fun, but usually too abrupt. In a real robot, we will want the movement to last a certain amount of milliseconds.
For this, we are going to use the AsyncServo library, which allows us to move multiple servos asynchronously without interfering with the main loop.
#include <Servo.h>
#include "EasyCommaLib.h"
#include "AsyncServoLib.h"

EasyComma easyComma(3);

AsyncServo panServo;
AsyncServo tiltServo;

const int panServoPin = 9;
const int tiltServoPin = 10;

void setup()
{
  Serial.begin(9600);
  panServo.Attach(panServoPin);
  tiltServo.Attach(tiltServoPin);
}

void loop()
{
  easyComma.Recieve(OnRecieve);

  panServo.Update();
  tiltServo.Update();
}

void OnRecieve()
{
  auto panAngle = easyComma[0];
  auto tiltAngle = easyComma[1];
  auto delayTime = easyComma[2];

  panServo.MoveDegrees(panAngle, delayTime);
  tiltServo.MoveDegrees(tiltAngle, delayTime);
}
Now, if you write two angles and a time in milliseconds in the serial port monitor (for example, 45, 90, 2000) you will see the turret move to the indicated angle, reaching it in the indicated time.
Again, the setpoint position values could be obtained by any of the controls that we have seen on the blog, or by any communication system.
In the future, we will occasionally revisit this project, for example, to put a distance sensor on a robot, solve the inverse kinematics to point to coordinates on a laser, or combine a camera and an accelerometer to make a stabilized platform.
Download the code
All the code from this post is available for download on Github. 
