What is a touch switch?
A capacitive touch sensor is a device that behaves like a push button, but can be activated with little or no pressure.
This type of touch sensor operates based on the measurement of the capacitance variation. The sensor plate and the human body act as a capacitor and, therefore, form a system that stores an electric charge.
As the distance decreases, the capacitance increases and the system stores a higher charge. This charge accumulation can be detected on the sensor plate and generate a digital signal when it exceeds a certain value. This trigger signal can in turn be captured with a digital input of Arduino.
The main advantage of this type of sensor is that it does not require physical contact to trigger, just bringing the finger within 1-5mm of the sensor is sufficient. For this reason, they are called touchless devices.
In this way, it is possible to place the touch sensor under vinyl, plastic, cardboard, wood, or glass, as long as the thickness is not excessive. However, they will not work under conductive materials, especially under metals.
Another advantage is that capacitive sensors do not have moving parts, so they, in principle, have a longer durability than a conventional switch.
Touchless sensors are used when making electrical switches, for example, they are common in bathrooms and garages. They can also be useful, for example, to place a touch button under an interactive panel, on vinyl with graphic arts, or integrated under the wood of a piece of furniture.
Price
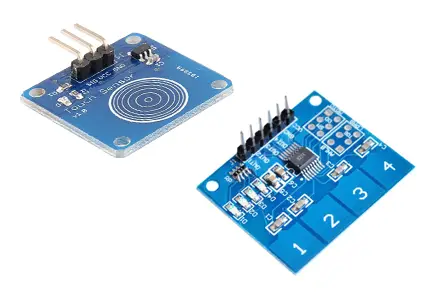
These types of capacitive touch sensors are inexpensive devices. There are ready-made integrated boards ready to connect to Arduino, with different sizes, shapes, and number of contacts.
We can find a 1-button touch sensor for €0.40, a 1x4 touch sensor for €0.65, and a 4x4 touch sensor for €1, from international sellers on eBay and AliExpress.
Assembly diagram
The electrical diagram is simple. We power the module by connecting GND and 5V to the corresponding pins on Arduino.
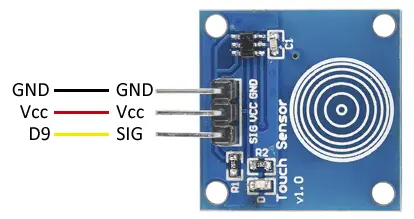
Finally, to perform the digital reading, we connect the SIG output to one of the digital inputs of Arduino.
Code examples
The required code is equally simple. If we are using the digital signal, we use a digital input to read the state. In the example, we show a message on the screen, but in a real case, we would execute the appropriate actions.
const int sensorPin = 9;

void setup()
{
   Serial.begin(9600);
   pinMode(sensorPin, INPUT);
}

void loop()
{
   int state = digitalRead(sensorPin);

   //send message to serial port based on the read value
   if (state == HIGH)
   {
      Serial.println("Contact detected");
      //here the actions would be executed
   }
   delay(1000);
}
We can also read the state using interrupts. For more information, see the entry What are and how to use interrupts in Arduino and Reading a button with interrupts in Arduino
Download the code
All the code from this post is available for download on Github. 
