
We continue with the posts about ESP8266 and ESP32 by seeing how to turn an LED on and off through a Web form on a webpage served from the ESP8266.
We will refer to the ESP8266, but the same code is compatible with the ESP32, adjusting the library names. At the end, you have the code for both ESP8266 and ESP32.
In the previous post we already saw how to receive information with the ESP8266 acting as a server through a Web form. We already mentioned that there are several ways to communicate a web page with the ESP8266 acting as the server. Web forms are one of the simplest but (by no means) the best.
However, these simple examples prepare us for the more advanced tutorials we will see later, and allow us to introduce concepts step by step. Among them, a simple and very typical example is turning an LED on and off through a simple web page.
The code for the main program remains the same as in the previous example, only we have defined the pin associated with the built-in LED on the board as an output.
#include <ESP8266WiFi.h>
#include <ESPAsyncWebServer.h>
#include <FS.h>

#include "config.h"  // Replace with your network data
#include "Server.hpp"
#include "ESP8266_Utils.hpp"

void setup()
{
  pinMode(LED_BUILTIN, OUTPUT);
  Serial.begin(115200);
  SPIFFS.begin();

  ConnectWiFi_STA();

  InitServer();
}

void loop()
{
}
In the ‘Server.hpp’ file, we have defined an Endpoint for /LED under the post method, which calls the handleFormLed(...) function. In this function we get the status parameter, and turn the LED integrated on the board on or off based on the received value.
AsyncWebServer server(80);

void handleFormLed(AsyncWebServerRequest *request)
{
 String ledStatus = request->arg("status");

 Serial.print("Status:\t");
 Serial.println(ledStatus);

 digitalWrite(LED_BUILTIN, ledStatus == "ON" ? LOW : HIGH);

 request->redirect("/");
}

void InitServer()
{
  server.serveStatic("/", SPIFFS, "/").setDefaultFile("index.html");

  server.on("/LED", HTTP_POST, handleFormLed);

  server.onNotFound([](AsyncWebServerRequest *request) {
    request->send(400, "text/plain", "Not found");
  });

  server.begin();
    Serial.println("HTTP server started");
}
Finally, the content of ‘index.html’ that we have in the ‘data’ folder and will upload to the SPIFFS is as follows
In this page we have only added two radio buttons associated with the value ‘ON’ and ‘OFF’
<!DOCTYPE html>
<html class="no-js" lang="">
<head>
<meta charset="utf-8">
<meta http-equiv="x-ua-compatible" content="ie=edge">
<title>ESP8266 Forms</title>
<meta name="description" content="">
<meta name="viewport" content="width=device-width, initial-scale=1">
</head>
<body>
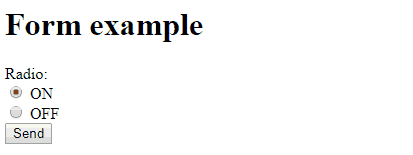
<h1>Form example</h1>
<form action="/LED" method="post">
Radio:<br>
<input type="radio" id="ledOn" name="status" value="ON" checked>
<label for="ledOn">ON</label><br>
<input type="radio" id="ledOff" name="status" value="OFF">
<label for="ledOff">OFF</label><br>
<button type="submit" value="Submit">Send</button>
</form>
</body>
</html>
Result
If we load this on the ESP8266 we will see our (still ugly) web page, with the two radio buttons and the ‘Send’ button that sends the form.
If we change the selection and press the submit button, we verify that we receive the data correctly through the serial port and that, indeed, the LED integrated on the board turns on and off.

That’s how easy it is! A simple example that shows how to process the information received by the ESP8266 to perform actions in the backend.
Of course, we could do any other action, change an output, take a measurement, act on a motor, or any other function. Whatever you need!
In the next entry we will see another typical example, turning on a PWM LED, for which we will add a little bit of JavaScript on the served Web page. See you soon!
Download the code
All the code from this post is available for download on Github.

Version for the ESP8266: https://github.com/luisllamasbinaburo/ESP8266-Examples
Version for the ESP32: https://github.com/luisllamasbinaburo/ESP32-Examples
