If you develop applications for Android, you will have suffered from the fact that the most complicated part is not the development, but the development environment (IDE) itself. The installation is slow and complicated, the emulator is simply lamentable, and it takes much more effort to configure the environment to your liking than to develop the application itself.
The situation improved slightly with the release of Android Studio, which replaced Eclipse as the standard IDE for Android programming. However, the Android SDK emulator remains unbearably slow.
Interestingly, with the release of Visual Studio 2015 (free in its Community Edition), Microsoft has included an Android emulator. This Microsoft Android emulator is, ironically, much faster and more powerful than Google’s own.
In this post, we are going to configure Android Studio to use the Visual Studio 2015 emulator.
Installing
We will start by installing the necessary software, in case we don’t have it installed already. Like this:
- Download and install Android Studio from this link.
- Download and install Visual Studio 2015 Community Edition from this link. Make sure to check the option to install the Android emulator.
Alternatively, we can install only the Visual Studio Android Emulator from this address.
We have a good coffee while everything necessary downloads and installs.
Preparing Visual Studio Emulator
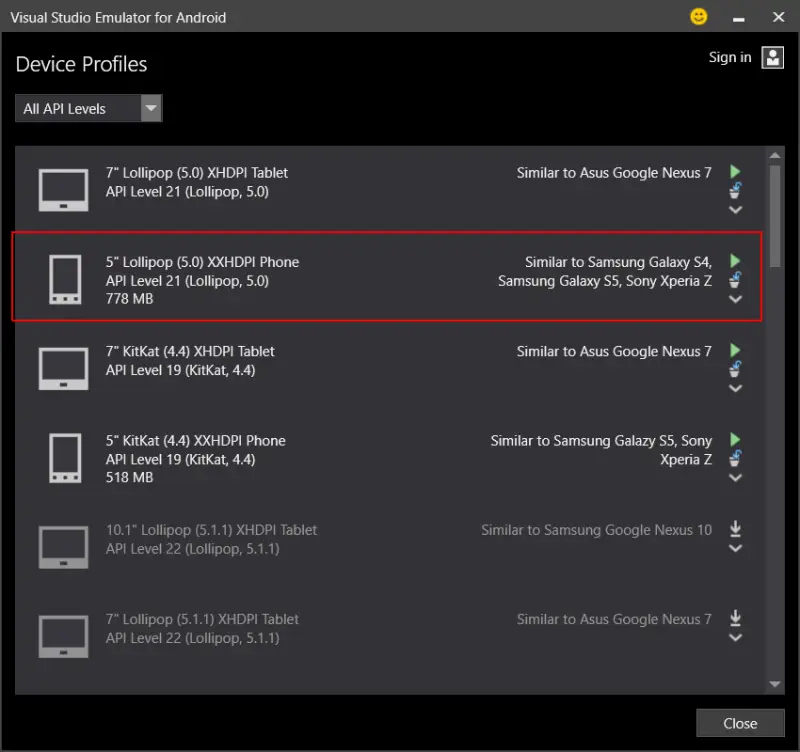
Run Visual Studio Emulator, and launch an instance of a device to make sure everything is configured and working correctly.
Next, we need the ID of one of the machines. To do this, open a command console and type
“c:\Program Files (x86)\Microsoft Emulator Manager\1.0\emulatorcmd.exe” /sku
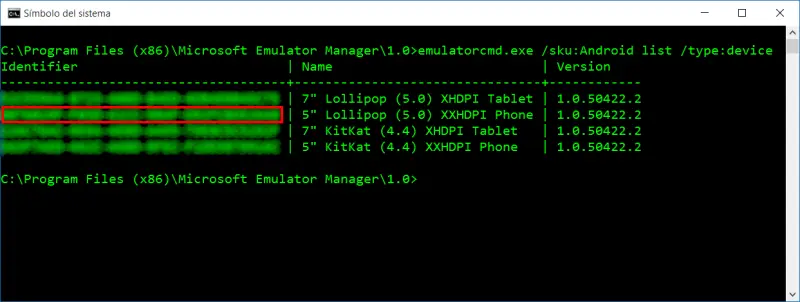
Copy the identifier of the machine you want to use as an emulator.
Configure Android Studio
Next, open Android Studio and apply the following options,
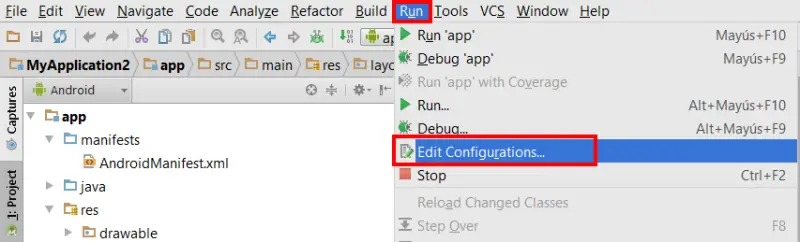
- Go to the “Run” menu, select “Edit/Configurations”.
In “Default/Android Application”, set Target Device to “Show choose dialog” and check “Use the same device for future launches”.
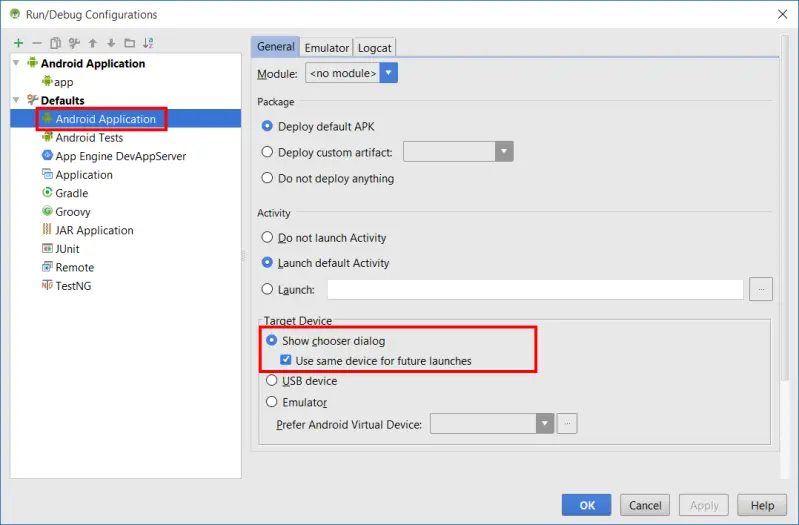
This will make Android Studio ask us for a connected ADB device when we debug the application, and it will remember this device for future sessions.
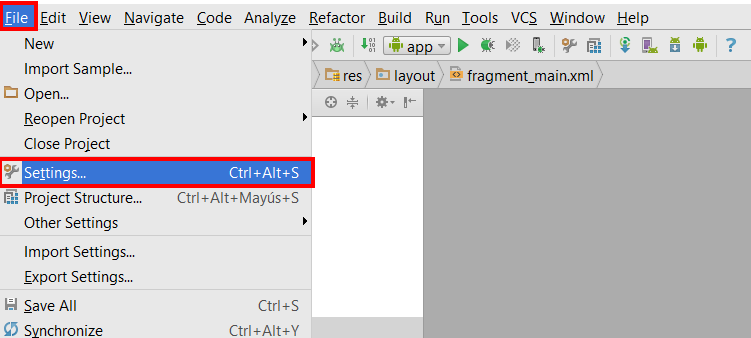
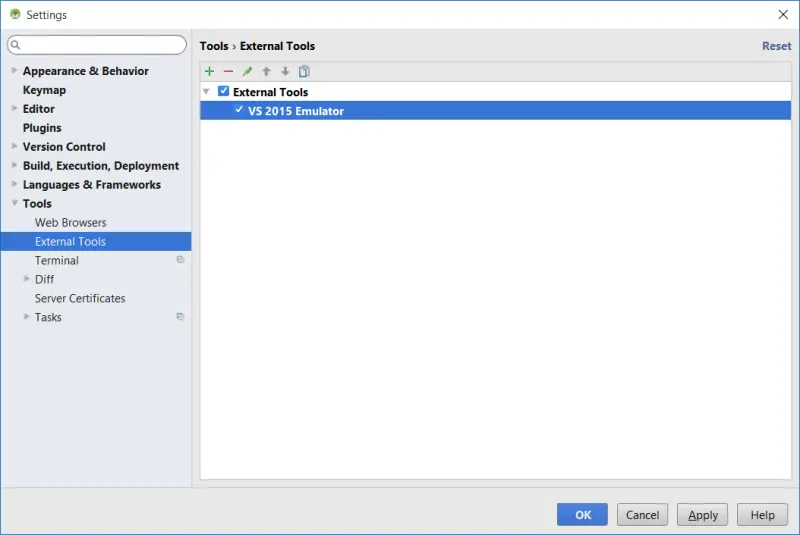
Now we are going to create a button that allows us to directly launch the Visual Studio 2015 emulator. To do this,
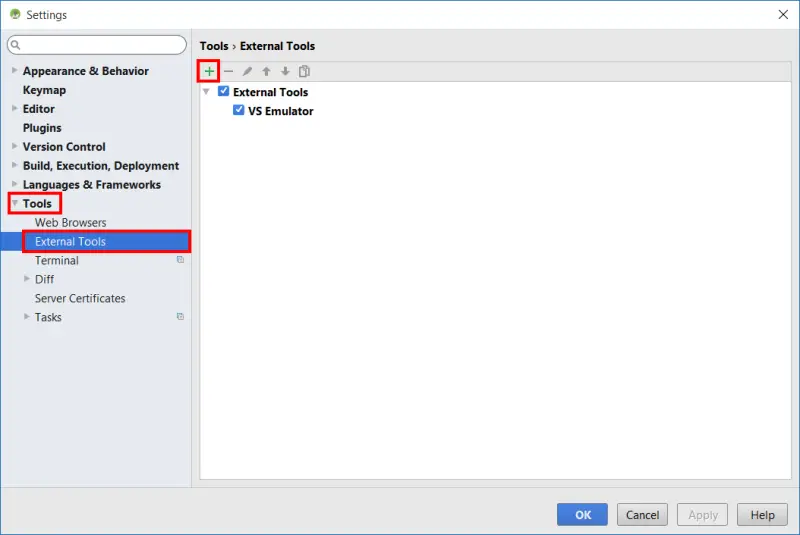
- Go to “File/Settings”.
program: c:\program files (x86)\microsoft emulator manager\1.0\emulatorcmd.exe parameters: /sku
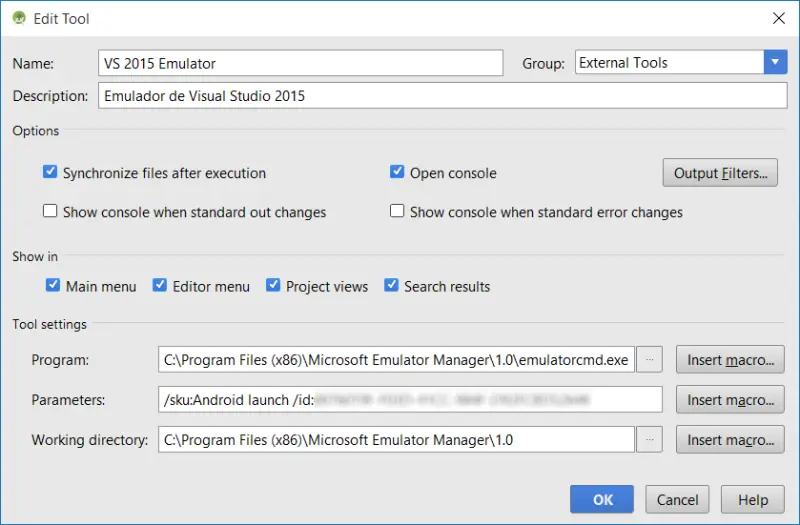 Where you must change 00000000-0000-0000-0000-000000000000 to the ID of your machine, which we obtained previously.
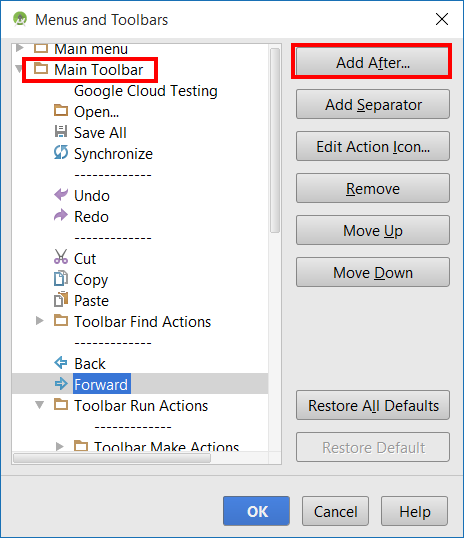
- Right-click on any toolbar.

Inside the “Main toolbar” group, select the icon behind which we can place our new button, and select “Add after” (in the example case, I placed it after the “Forward” button).
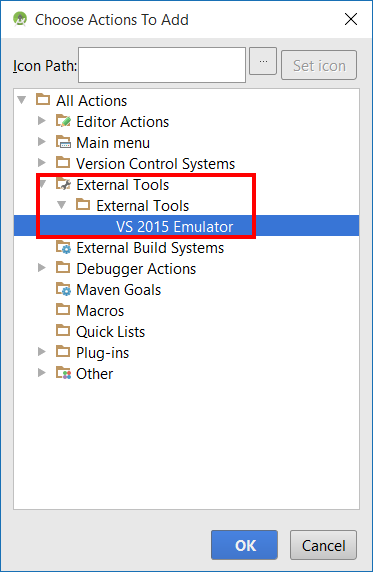
- As the action for the button to perform, select the external tool we created earlier.

We now have Android Studio correctly configured to launch the Visual Studio emulator. We test running an application to verify that we have done the entire process correctly.
Now we can develop software with an efficient Android emulator launched directly from our button in Android Studio.