
Today we are going to see how to connect an LED matrix in a simple way and control it through a processor like Arduino.
The type of matrix we are going to use is a matrix with WS2812b Neopixel pixels, as we saw in this post. We can find these matrices on flexible backing with 16x16 RGB pixels for about 12€ from international sellers like AliExpress or eBay. 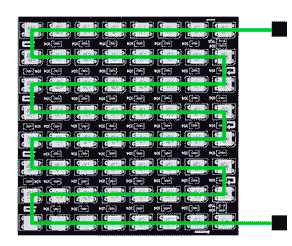
Naturally, we would like to be able to control our LED matrix as simply as possible. Ideally, we would like to have a library that allows us to perform basic graphics functions, such as turning on a pixel, drawing a line, a circle, or even displaying an image.
The good news is that such a library not only exists, but there are several libraries with this function. Furthermore, they are very well-known and popular, and you have probably even used one before.
Specifically, we are referring to any of the libraries we frequently use to connect to a TFT. Most of these libraries have an interface similar to the Adafruit library Adafruit-GFX.
Probably the most well-known is the TFT_eSPI library. Both this library and some of its “competitors” add the concept of a Sprite to the pure hardware management of the screen.
The sprite is a representation of the screen in memory that allows us to accelerate the drawing of graphics. Therefore, it is a buffer of size width * height, where each cell is a pixel with a color and which has the same drawing functions as a TFT. That is, exactly what we were looking for.
Now we only need to make a function that reads the color of a pixel from the sprite and sequentially transmits all the pixels to the WS2812b panel, using the Neopixel or FastLED library.
The function we need is very simple and I’ll give it to you in this code.
#include "./constants.h"
CRGB leds[LED_MATRIX_NUM_LEDS];
void InitLed()
{
auto correction = CRGB(0xFF, 0xE0, 0x1C);
LEDS.addLeds<ws2812b, data_pin,="" grb="">(leds, LED_MATRIX_NUM_LEDS).setCorrection(correction);
LEDS.setBrightness(BRIGHTNESS);
}
void SendToLed(TFT_eSprite& sprite)
{
for (auto y = 0; y < LED_MATRIX_WIDTH; y++)
{
for (auto x = 0; x < LED_MATRIX_WIDTH; x++)
{
uint16_t rgb565 = sprite.readPixel(x, y);
ESP_Color::Color color(rgb565);
auto rgb = CRGB(color.R_Byte(), color.G_Byte(), color.B_Byte());
auto ix = y;
auto iy = x;
leds[(iy % 2 ? LED_MATRIX_WIDTH - ix - 1 : ix) + iy * LED_MATRIX_WIDTH] = rgb;
}
}
}
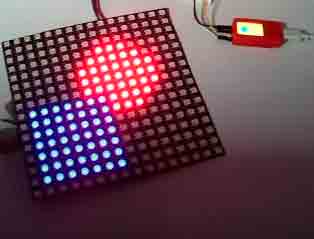
In this way, we have the simplicity of using the TFT screen functions to draw on our LED matrix. These include everything from drawing geometric shapes to importing PNG or JPEG files.
Moreover, we can run any program we find, or that we make ourselves, if it can run on a TFT screen. This includes everything from video games to even streaming video from the computer.
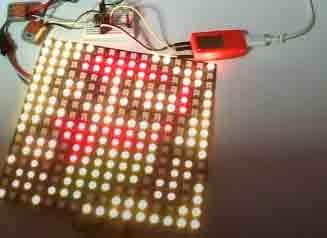
Here are some examples of what we can do, like loading a PNG with a Mario Bross sprite.
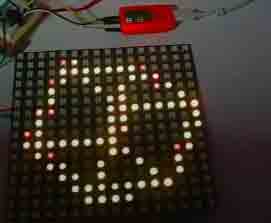
Or drawing a 3D cube.
To run the code you will need the libraries /libreria-esp-color/
Sometimes we will have the problem of having to scale a graphic with higher resolution (an image, or a render) to the resolution of the matrix, which in general will be much lower. Depending on the scale change, we may have aliasing problems.
To avoid the problem of scaling to low resolution, it may be necessary for us to apply image scaling filters as we saw in this post.
And that’s how easy it is to control a WS2812b LED matrix with a processor like Arduino, very simply, as if it were any other LCD or TFT display.
Download the Code
All the code from this post is available for download on Github.  .
.
